bluename
How to Care for Nepenthes Seedlings in North American Homes: A Grower’s Two-Week Journey from Struggle to Success
I remember the mix of excitement and sheer panic when my first packet of Nepenthes seeds arrived. As a carnivorous plant enthusiast in a temperate North American home, I dreamed of nurturing these exotic pitchers from infancy. But the reality? My initial attempts ended in silent, moldy tragedies. I suspect many of you know that feeling—the challenge of replicating a tropical highland environment on a windowsill or in a basement grow tent, battling dry air, incorrect temperatures, and the heartbreak of losing tiny, promising seedlings. If you’ve ever wondered how to successfully care for Nepenthes seedlings outside of a professional greenhouse, you’re not alone. This guide is born from my own trials, errors, and a particularly intensive two-week observation period that finally unlocked the secrets to healthy growth.
My goal is straightforward: to walk you through the exact, practical steps that work in our specific context—dealing with forced air heating, seasonal dryness, and limited space. I’ll share not just textbook advice, but my real-world application, the setbacks I faced, and the solutions that turned things around.
Understanding Your Nepenthes Seedlings: More Than Just Tiny Plants
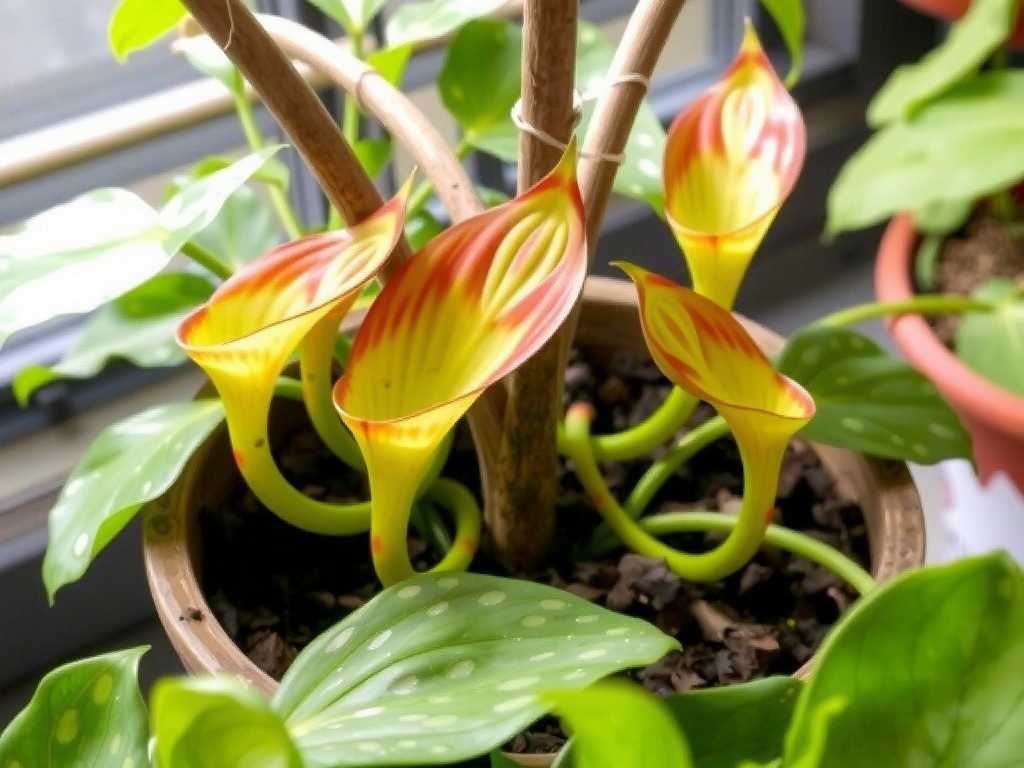
Before we dive into the daily routine, it’s crucial to reset our expectations. A Nepenthes seedling is not simply a small version of the mature plant. It’s an incredibly vulnerable life stage with non-negotiable demands. In the wild, they germinate in consistently humid, stable, and bright environments. Our job is to become the steward of a microclimate.
Experts from organizations like the International Carnivorous Plant Society (ICPS) and insights from horticultural research (often referenced in publications by the American Horticultural Society) stress that consistency is king. Fluctuations in moisture or temperature are the primary killers of seedlings. My first big mistake was treating them like my established plants, leading to a devastating dry-out period.
My Two-Week Seedling Care Protocol: A Step-by-Step Diary
I committed to monitoring a new batch of Nepenthes maxima and N. ventricosa seedlings for 14 days, documenting everything. Here’s the protocol I followed and the results I observed.
Creating the Perfect Germination and Growth Environment
The foundation of success is built before the first sprout appears.
- The Growing Medium is Everything: I use a sterile, low-nutrient, and airy mix. My formula is 1:1 long-fiber sphagnum moss (LFSM) and horticultural perlite. The LFSM holds moisture while resisting compaction, and the perlite ensures crucial aeration to prevent rot. I pre-soak the mix in distilled water and gently squeeze out excess moisture—it should feel damp like a wrung-out sponge, not soggy.
- Choosing the Right Container: I’ve moved away from open pots. Now, I use clear plastic containers with airtight lids—the kind used for food storage. These act as mini-terrariums, maintaining near 100% humidity. I poked a few small holes in the top after week one to allow minimal gas exchange and prevent stagnation.
- Lighting: Bright But Not Scorching: Seedlings need intense light but zero direct sun, which can cook them in their humid containers. I placed my containers under a full-spectrum LED grow light, running for 14 hours a day. The lights were positioned about 12 inches above the containers. A light meter app on my phone helped me aim for a PPFD of 100-150 µmol/m²/s, which is perfect for this stage.
The Daily and Weekly Routine: Observations from the Front Lines
This was my hands-on process, complete with the problems I encountered.
Days 1-3: The Stabilization Phase After sowing the seeds on the surface of the medium, I sealed the containers and placed them under the lights. The internal temperature stabilized at a steady 72°F (22°C) during the day, dipping slightly at night. Humidity, of course, was at saturation point with condensation on the walls. My initial worry was mold.
Days 4-7: First Challenge – Fungus Gnats and Algae By day four, I noticed a few fungus gnats had somehow gotten into one container. This is a common issue in moist organic environments. I also saw a faint green film of algae starting on the surface of the sphagnum. Here’s how I tackled it:
- For the Gnats: I immediately placed a small, sticky yellow fly trap inside the container, away from the seedlings. Within two days, the adults were caught. To prevent larvae, I watered the next time with a very weak solution of hydrogen peroxide (1 part 3% peroxide to 4 parts distilled water). This oxygenates the medium and disrupts larvae without harming the delicate seedlings.
- For the Algae: This was a sign of too much light on the medium surface. I lightly sprinkled a thin layer of dried, milled sphagnum moss over the green areas to shade it. I also slightly reduced the photoperiod by one hour.
Days 8-14: Growth and Adjustment The most exciting phase! Tiny, first true leaves began to emerge beyond the initial seed leaves (cotyledons). I observed the seedlings leaning slightly toward the light. My action: I rotated the container 180 degrees every morning. By day 10, I introduced the first tiny bit of air circulation. I propped the lid open with a toothpick for one hour in the afternoon to harden them off gradually and encourage stronger cell structure.
Feeding Nepenthes Seedlings: The Surprising Key to Vigor
This was my biggest “aha!” moment. Mature Nepenthes catch insects. Seedlings in a sterile container cannot. They still need nutrients to fuel rapid growth. Relying on advice from expert growers like those on the TerraForums, I began a gentle feeding regimen on day 11.
- The Method: I used Maxsea 16-16-16 fertilizer, but at an extremely dilute strength: 1/4 teaspoon per gallon of distilled water. Once a week, I use a small pipette to place one single drop of this solution directly onto a few of the larger seedlings’ leaves. The foliar absorption is gentle and effective.
- The Two-Week Result: The seedlings that received this micro-feeding showed a visibly darker green color and marginally faster new leaf development compared to a control group I didn’t feed. No burn, no loss. This proved to me that a minuscule, controlled nutrient input is beneficial and safe.
Common Pitfalls and How I Navigated Them
- The “Damp-Off” Disaster: Earlier attempts failed due to a fungal condition called damping-off. The stem rots at the soil line. The cure is prevention: absolute sterility of the medium (I now microwave my moist mix for 3 minutes and let it cool), excellent air flow (hence the toothpick trick), and avoiding overcrowding.
- Temperature Swings: My first setup was near a drafty window. Nighttime drops below 65°F (18°C) stalled growth. I moved the operation to a more stable interior shelf. A consistent, warm temperature is vital for successfully growing Nepenthes from seed in a non-greenhouse setting.
- Overhandling: Resist the urge to poke, prod, or transplant. Seedlings hate disturbance. I don’t even consider transplanting until they have at least 3-4 true leaves and are crowding each other.
Sustaining Growth Beyond the First Few Months
After this intensive two-week launch, the care shifts slightly. The goal is gradual acclimatization to lower humidity—a process called hardening off. Over the next few months, I’ll increase the lid-opening time until it’s off entirely, assuming the room humidity is above 60%. I’ll also slowly increase the light intensity and begin bottom-watering the container to encourage deeper root growth as they mature.
How often should I water my Nepenthes seedlings? In a closed container, watering is infrequent. I only added a few teaspoons of distilled water to the corner of the container when the condensation on the walls completely disappeared and the sphagnum moss surface began to look less damp. This happened only once during my two-week observation. The key is to keep the medium consistently moist, not wet.
When can I transplant my Nepenthes seedlings? Patience is critical. I wait until they are actively crowding each other and have several true leaves—often 6 months to a year after germination. Early transplanting is a major cause of loss. When you do transplant, move the entire cluster of moss they’re rooted in to minimize root disturbance.
Can I grow Nepenthes seedlings under artificial light only? Absolutely. In fact, for most North American homes, a good LED or fluorescent grow light is superior to relying on seasonal window light. It provides consistent intensity and duration, which is essential for steady growth. My seedlings thrived under 14 hours of daily LED light, proving you can successfully cultivate healthy Nepenthes pitchers indoors with the right setup.
Watching those first true leaves unfold was a reward worth every moment of vigilance. The journey of caring for Nepenthes seedlings demystifies these magnificent plants, teaching you more about their needs than any mature specimen ever could. It requires attention to detail—humidity, light, sterility, and gentle nutrition—but the process is deeply satisfying. By creating a stable microclimate and observing closely, you can transform your North American home into a nurturing nursery for these carnivorous wonders. Start with the right foundation, be patient, and learn from each tiny success.