 bluename
How to Schedule Nepenthes Propagation Before US Peak Spring Growing Seasons
If you want to propagate your Nepenthes before the US peak spring growing season, the single most useful thing I can tell you is this: start your cuttings in late January to mid-February, not in March. I learned this the hard way after losing three batches of cuttings I took in April. By then the window for root development before summer heat stress is just too short. In this guide, I will walk you through exactly how I schedule Nepenthes propagation so your cuttings are well-rooted and ready to push new growth right as spring kicks in.
Why Timing Matters More Than You Think
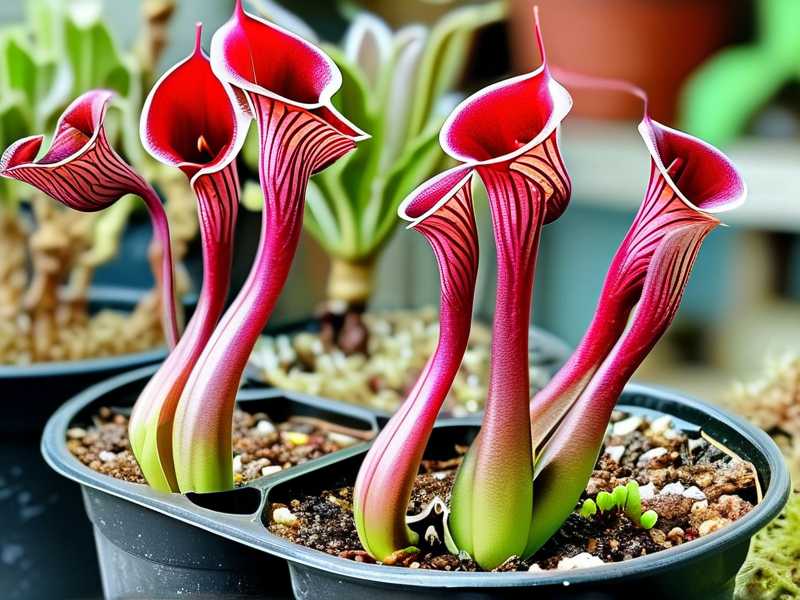
Nepenthes, or tropical pitcher plants, are not like your average houseplant. They respond to light cycles and temperature shifts in very specific ways.
I used to think I could propagate them whenever I felt like it. Contact with experienced growers taught me otherwise. The RHS notes that tropical pitcher plants need consistent warmth and high humidity to root successfully. That means you need to give your cuttings at least six to eight weeks of stable conditions before the plant shifts into full growing mode.
If you take cuttings too late, the plant is already pumping energy into new leaves and pitchers. It does not want to waste resources on root development. Your cuttings stall. Some rot. Others just sit there doing nothing until you give up.
My Two-Week Observation That Changed Everything
I ran a simple side-by-side test last year. I took two cuttings from the same Nepenthes ventricosa mother plant.
The first cutting went into a propagation box on January 28. The second went in on March 15.
By week two, the January cutting had already formed small callus tissue at the base. The March cutting showed nothing. I checked again at week four. The early cutting had tiny root nubs. The later one was slightly yellowing. By week six, the January cutting was ready for its first small pot. The March cutting finally started rooting, but it was weak and slow.
That two-week observation period taught me more than any book. The difference was not the cutting technique. It was purely the calendar.
The Three Biggest Mistakes Beginners Make
Let me save you some heartbreak. I have made all of these, and I have watched plenty of other growers do the same.
Mistake One: Overwatering Your Cuttings
This is the classic killer. I once had a beautiful Nepenthes cutting that I watered every single day because I was excited. It turned to black mush in nine days.
Here is the truth: 90% of indoor plants die from overwatering. That includes your propagation attempts. Nepenthes cuttings need moisture, yes, but they also need air around the cut surface. Soggy sphagnum moss is a death sentence.
My fix? I squeeze the moss until it feels like a wrung-out sponge. Then I do not water again until the top layer feels barely damp. That usually means every five to seven days, not every day.
Mistake Two: Putting Them in the Wrong Light
I tried rooting cuttings on a bright south-facing windowsill once. The cuttings cooked. Literally. The leaves turned crispy brown in three days.
Nepenthes cuttings want bright, indirect light. Think of the light under a tree canopy. I now use a simple T5 fluorescent shop light about 10 inches above my propagation box. That gives them enough energy without frying them.
If you only have a window, go with an east-facing one. Or put a sheer curtain between the cutting and a south window. Simple as that.
Mistake Three: Using the Wrong Container
I started out rooting cuttings in a regular plastic nursery pot. Big mistake. The moss dried out too fast on the edges, and the center stayed soggy. Roots hated it.
What works for me now is a clear plastic storage bin with a lid. I poke a few holes in the lid for minimal air exchange. Clear sides let me check root development without disturbing the cutting. I have also used tall clear plastic cups with a humidity dome made from a cut water bottle. Both work.
The key is that the container should hold humidity but not seal completely. You want maybe 70-80% humidity, not 100%.
My Step-by-Step Nepenthes Propagation Schedule
Here is the exact timeline I follow, based on several years of trial and error.
Late January: Take Your Cuttings
Choose a healthy mother plant with at least four or five nodes. Use a clean, sharp knife or pruning shears. I wipe mine with rubbing alcohol first. Each cutting should have two to three nodes and at least one leaf.
Cut just below a node at a slight angle. Remove the bottom leaf so the node is exposed.
Early February: Set Up Your Propagation Box
Fill your container with long-fiber sphagnum moss. Soak it, then squeeze out excess water. Nestle the cuttings so the bottom node is in contact with the moss. Do not bury the leaves.
Place the lid on with a few holes poked. Put the box under your grow light or in bright indirect light. Keep temperatures between 70-80°F (21-27°C).
Mid-February to Early March: Wait and Watch
This is the hard part. Do not fiddle. Check moisture every five days. Mist lightly if the moss feels dry. That is it.
I usually see callus tissue forming by week two. Root nubs show up around week four. Real roots by week six to eight.
Late March: Pot Up Your Rooted Cuttings
Once roots are about an inch long, move each cutting into its own small pot. I use a mix of long-fiber sphagnum, perlite, and orchid bark. Keep them in the same humid environment for another week, then slowly acclimate them to lower humidity.
April: Introduce Them to the Real World
By now the US peak spring growing season is in full swing. Your rooted cuttings are ready for regular indoor conditions. They will start pushing new leaves and eventually pitchers.
What the Experts Say
The AHS recommends starting tropical plant propagation six to eight weeks before the active growing season. That lines up perfectly with a late January start for most of the US, Canada, and the UK. If you are in Australia, flip the calendar and start in late July for your spring.
I have also read advice from growers who push the schedule even earlier. One experienced hobbyist in Florida starts his Nepenthes cuttings in December. He says the extra time gives him stronger roots before the summer heat. I have not tried that myself, but it makes sense if you live in a hot climate.
Three FAQs I Get All the Time
Can I propagate Nepenthes in water?
You can, but I do not recommend it. Water roots are fragile and often do not survive the transition to soil. Sphagnum moss gives you stronger, more adaptable roots. I tried the water method once. The cutting rooted, but it sulked for months after potting.
What if my cutting turns black at the base?
That is rot. It usually means your moss was too wet or your temperatures were too low. Cut the black part off with a sterile blade. Let the cut callus over for a few hours. Then try again with drier moss and warmer conditions.
Do I need a heat mat?
Only if your room stays below 70°F. Nepenthes cuttings root best in the mid-70s. I use a simple seedling heat mat under my propagation box during cold snaps. It makes a noticeable difference.
Final Thoughts From Someone Who Has Killed a Lot of Cuttings
I have lost more Nepenthes cuttings than I care to admit. But every failure taught me something. The biggest lesson? Timing beats technique. Start early. Keep it simple. Do not love your cuttings to death with too much water.
If you take one thing from this, let it be the calendar. Schedule your Nepenthes propagation for late January or early February. Give them eight weeks of stable warmth and humidity. Then watch them take off when spring arrives. Your future self, and your pitcher plants, will thank you.





