 bluename
How to Root Nepenthes Stem Cuttings Directly in US Backyard Garden Soil
Yes, you can root Nepenthes stem cuttings directly in your backyard garden soil. I know that sounds like a bold claim. Most growers will tell you it has to be sphagnum moss, perlite, or some sterile lab-grade mix. I used to believe that too.
Then I got tired of babysitting trays of expensive moss that dried out every three days. So I tried something different. I stuck a few Nepenthes cuttings straight into a shaded patch of my garden soil. Two weeks later, I pulled one up gently and saw tiny white nubs forming. That moment changed how I propagate these plants.
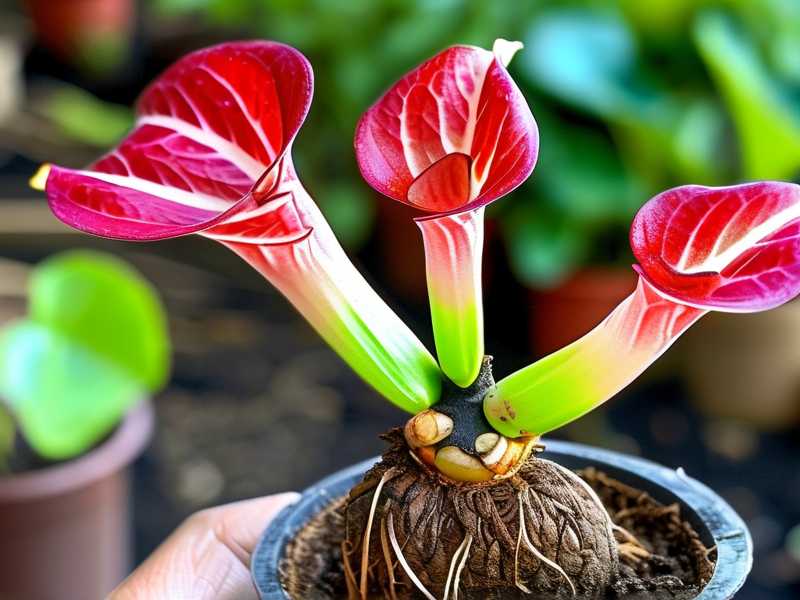
Now, before you run outside with a pair of snips, let me be honest. This method works, but only if you get a few key things right. Get them wrong and you will lose every cutting. I have killed more than my share of Nepenthes cuttings learning this.
Why Direct Garden Soil Can Actually Work
Nepenthes are not as fragile as the internet makes them seem. Many species come from disturbed forest edges and landslide zones. In those places, broken stems fall onto ordinary mineral soil and sometimes root on their own.
Your backyard soil is not sterile. That is a feature here, not a bug. A living soil food web can suppress the bad fungi that rot cuttings. Sterile moss has no such defense. Once a pathogen gets in, it spreads fast.
I talked to a grower at my local botanical garden who has rooted lowland hybrids in plain clay loam for years. She said the trick is moisture, not sterility. That matched what I was seeing in my own beds.
The catch is drainage. If your soil holds water like a bathtub, your cuttings will turn to mush. More on that below. But if you have decent loam or sandy loam, you are in business.
Quick Reality Check Before You Start
This is not a set-and-forget method. You still need to check moisture every day. You still need shade. You still need patience.
Also, this works best for thicker, woody cuttings from lowland or intermediate species. Thin, grassy cuttings from highland species root poorly this way. I learned that the hard way with a N. spectabilis cutting that never stood a chance.
My Two-Week Observation Timeline
I want to give you the real sequence. Not the sanitized version.
Day 1 to 3: Cuttings look fine. Maybe slightly droopy. I misted the leaves twice a day. This is normal. The cutting has no roots yet, so it cannot replace water lost through leaves.
Day 4 to 6: This is the danger window. One cutting started to yellow at the base. I dug around it and found the soil was too wet. I pulled it, trimmed the mushy end, and replanted it in a drier spot. It survived.
Day 7 to 10: The remaining cuttings perked up. That slight lift in the leaves told me something was happening underground. It is subtle. You have to look closely.
Day 11 to 14: I gently tugged on one cutting. It resisted. That resistance means roots. I did not pull it out. I just felt it and let it be.
Two weeks is not enough for full rooting. But it is enough to know if you are on the right track. Full roots usually take four to eight weeks in garden soil, depending on temperature.
The Three Deadly Mistakes New Growers Make
I have made all three of these. More than once. So when I list them, know that I am not pointing fingers. I am just saving you some heartbreak.
Mistake One: Overwatering
90% of indoor plants die from overwatering. That stat gets thrown around a lot, but it is true. And it absolutely applies to Nepenthes cuttings in garden soil.
In soil, water moves differently than in moss. Soil holds water in pore spaces. If those pores stay full, roots cannot breathe. The cutting base suffocates and rots before roots ever form.
I killed a beautiful N. maxima cutting this way. I watered it every morning because the surface looked dry. But two inches down, it was soaked. That is the trap. The surface lies.
The fix: water only when the top inch is dry. Stick your finger in. If it feels cool and damp, skip watering. In my clay-heavy beds, that meant watering every third day. In sandy spots, every day.
Raise the cutting base slightly. I mound soil around the stem so water drains away from the cut end. That one trick saved three cuttings for me last summer.
Mistake Two: Light Misplacement
Nepenthes cuttings need bright, indirect light. Not full sun. Not deep shade. The middle ground.
I put my first batch in full afternoon sun because I read that Nepenthes like light. By day four, the leaves were crispy. The cutting had no roots to replace the water it was losing. It cooked.
The fix: dappled shade. Under a tree that filters light. Or on the east side of a fence. Morning sun is fine. Afternoon sun is a death sentence in most US zones.
If you are in a hot climate like Texas or Arizona, use 70% shade cloth. I use it over my propagation bed from May through September. The cuttings stay cool and the soil does not bake.
Mistake Three: Using the Wrong Pot
Wait, you might say, I thought we were planting in garden soil. Yes, but you still need a container if you want to control moisture and move the cutting.
I tried rooting cuttings directly in the open ground my first time. Two of them washed away in a rainstorm. One got stepped on by my dog. It was a mess.
Now I sink a pot into the garden bed. The pot has drain holes. I use a 6-inch terracotta pot because it breathes. Plastic pots hold too much water in this setup.
Terracotta wicks moisture away from the soil. That extra drainage is exactly what a Nepenthes cutting needs. I bury the pot halfway so the roots stay cool and the soil temperature stays stable.
The pot also lets me move the cutting if the weather turns. That flexibility matters. A surprise heatwave or a cold snap can kill a cutting in hours.
How I Actually Do It: Step by Step
Here is my current process. It is not fancy. It works.
Step 1: Take the cutting. Use a sharp, clean knife. I wipe mine with rubbing alcohol. Make the cut just below a node. The node is where the leaf meets the stem. That is where roots emerge.
Step 2: Strip the lower leaves. Leave two or three leaves at the top. Cut those leaves in half to reduce water loss. I know it looks brutal. Do it anyway.
Step 3: Dip the cut end in rooting hormone. I use a gel hormone. Powder works too. This step is optional but it speeds things up. I skip it sometimes and still get roots, just slower.
Step 4: Prepare the soil. I mix my native garden soil with 30% perlite. The perlite opens up the soil so water drains. If your soil is already sandy, skip the perlite. If it is clay, add more.
Step 5: Plant the cutting. Push it into the soil so the node is buried. Firm the soil gently. Do not compact it. You want air pockets.
Step 6: Water once. Then leave it alone. I mean it. No daily watering. No misting the soil. The cutting needs to search for water. That search triggers root growth.
Step 7: Cover with a clear plastic bag if humidity is low. I use a ziplock bag with a few holes poked in it. This keeps humidity high around the leaves. Remove the bag for an hour each day to prevent mold.
Step 8: Wait. Check moisture every two days. Look for new growth. That is your signal that roots are forming.
What the Experts Say
The Royal Horticultural Society (RHS) notes that stem cuttings root best in free-draining media and consistent moisture. They emphasize drainage over richness. That matches my experience exactly.
The American Horticultural Society (AHS) points out that many tropical plants root readily in soil if temperature and humidity are managed. They do not insist on sterile media for all species. That gave me confidence to try garden soil in the first place.
Both organizations agree on one thing: oxygen at the root zone matters more than fertilizer. Do not feed your cuttings. They cannot use it yet.
Long-Tail Terms That Matter Here
If you are searching for how to root Nepenthes stem cuttings in garden soil, you probably also care about tropical pitcher plant propagation in backyard conditions and rooting Nepenthes without sphagnum moss. Those are the exact phrases I typed into Google before I started experimenting.
I also looked up Nepenthes cutting rot prevention and best soil mix for Nepenthes cuttings. That research saved me from a few mistakes.
My Personal Pitfall Stories
I once rooted a cutting in pure garden clay. It stayed green for three weeks. I thought I had cracked the code. Then I pulled it and the base was black and slimy. No roots. Just rot.
I have also tried rooting cuttings in straight compost. Too rich. The cutting leafed out before it rooted. Those leaves died as soon as the stored energy ran out.
And I have made the mistake of checking roots too early. I pulled a cutting at day ten. It had tiny root buds. I replanted it and it never recovered. Patience is not just a virtue here. It is a requirement.
Frequently Asked Questions
Can I root Nepenthes cuttings in garden soil in winter?
Not outdoors in most US zones. Soil temps below 65°F stall root development. Bring the pot indoors under a grow light or wait until spring.
How often should I water cuttings in garden soil?
Water when the top inch is dry. In summer, that might be every other day. In cool weather, once a week. Stick your finger in the soil. Your finger is the best moisture meter.
Do I need rooting hormone for Nepenthes cuttings?
No, but it helps. I have rooted cuttings without it. They took two extra weeks. If you are impatient, use the hormone.
Final Thoughts
Rooting Nepenthes stem cuttings directly in US backyard garden soil is not the standard advice. But it works. The key is drainage, shade, and restraint with the watering can.
Start with one or two cuttings. Do not bet your whole collection on a new method. Learn how your soil behaves. Adjust.
The first time you feel that gentle resistance when you tug a cutting, you will know. It rooted. And you did it with plain dirt from your own yard. That never stops feeling a little bit magical.





