 bluename
Let me give it to you straight: insulate your Nepenthes propagation space by sealing it inside a mini greenhouse with a heat mat, a thermostat set to 70°F, and double-layer bubble wrap on the glass—then add a humidifier if your home drops below 40% RH. That’s the core fix I landed on after two brutal winters of trial and error. I’m a plant hobbyist, not a scientist, but I’ve kept tropical pitcher plants alive through New Hampshire’s January ice storms. Honestly, it took losing three vines before I figured out what works. In this guide, I’ll walk you through the exact steps I use, what went wrong, and how to avoid my mistakes.
I started this journey in a drafty 1920s house where the windows frosted from the inside. My Nepenthes—a graceful ventricosa and a stubborn alata—sat on a sill that hit 55°F at night. They stopped growing. Leaves yellowed. Pitchers shriveled like raisins. I panicked, bought a cheap grow light, and made things worse. The real problem wasn’t light; it was cold drafts and bone-dry air. That’s when I began insulating, not just heating. It took me two full weeks of daily tweaks to see new pitcher growth, and the process taught me more than any blog post ever did.
Why Cold Climates Wreck Nepenthes Propagation
Nepenthes are tropical highlanders or lowlanders. Most hybrids sold in US stores prefer 65–80°F days and 55–70°F nights. But a cold climate home in winter—especially old ones—dips below that fast. Your propagation space (a terrarium, a shelf, a closet) fights three enemies: temperature drops, low humidity, and stagnant air.
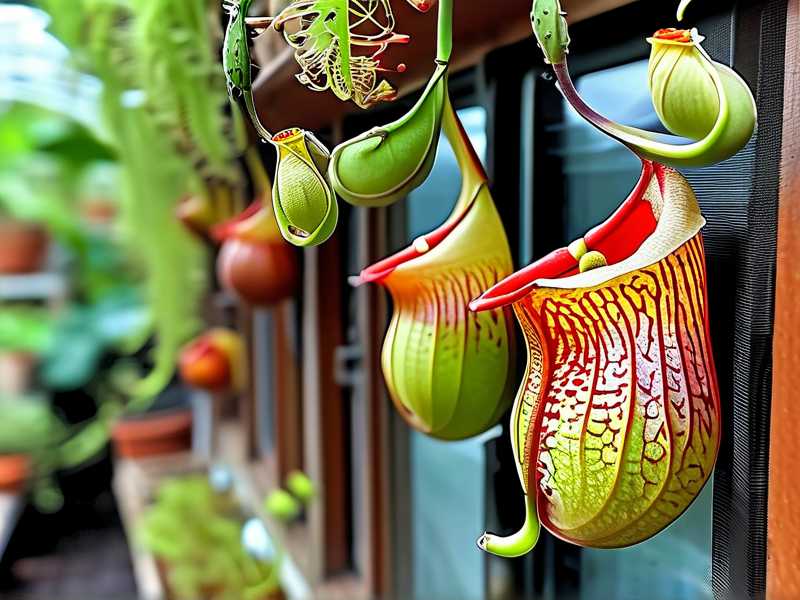
The Royal Horticultural Society (RHS) notes that tropical carnivorous plants struggle where night temps fall below 50°F consistently. I’ve read their guidance on greenhouse heating, and it applies here. The American Horticultural Society (AHS) also emphasizes that microclimates beat whole-room heating for finicky species. So—don’t heat the room. Insulate the space.
I remember the first winter I tried a heat mat without insulation. The mat ran all day, but the cold glass window sucked the warmth right out. My pots felt cold to the touch two inches above the mat. Useless. So I learned to wrap, seal, and layer.
My 3 Biggest Mistakes (And How You Avoid Them)
Mistake #1: Overwatering Every Single Pot
I killed my first Nepenthes in college. I thought tropical meant soggy. I watered every other day, misted twice daily, and the roots rotted within three weeks. The leaves turned black from the base up. I cried a little, honestly.
Here’s the truth: 90% of indoor plants die from overwatering, and Nepenthes are no exception. They need moist, not wet, media. In cold climates, evaporation slows down. So your pots stay wet longer. I learned to stick my finger two inches into the sphagnum moss—if it feels damp, I wait another day. If it’s dry, I water from the top with distilled water. Tap water minerals build up and burn roots too. That’s another lesson I paid for with a yellowing maxima.
Mistake #2: Getting Light Placement Wrong
I assumed bright sun = happy plant. I shoved my Nepenthes into a south-facing window in January. The sun was weak, sure, but the cold glass chilled the leaves to 45°F at night. The next morning, they looked frostbitten and translucent. I panicked and moved them to a dark corner—that made things worse. Etiolation stretched them into ugly, leggy vines.
What works is indirect but consistent light. I use a full-spectrum LED grow light set on a timer for 12 hours a day, placed about 12 inches above the canopy. Too close and the leaves burn; too far and they stop pitchering. I measured with a cheap lux meter—aim for 10,000–15,000 lux. My mistake was thinking more light fixes cold. It doesn’t. Warmer root zones matter more in winter.
Mistake #3: Using the Wrong Pot
I’ll admit it—I used a terracotta pot for my first Nepenthes. Cute, breathable, terrible for tropical plants in a cold house. Terracotta wicks moisture away and evaporates it into the dry air. My plant dried out, but I kept watering, so the roots stayed cold and wet. A double whammy.
Now I use plastic pots with drainage holes, or clear cups with slits. Plastic holds moisture better and keeps roots slightly warmer. I also switched to a hanging basket design once, which was a disaster—airflow dried the media too fast. Stick with squat plastic pots. Place them on a tray of wet pebbles for humidity, but never let the pot sit in standing water. Root rot will kill you.
Step-by-Step: How I Built My Insulated Propagation Space
Step 1: Choose the Right Spot
Find a place away from exterior doors, large windows, and heating vents. My laundry room was perfect—steady interior walls, minimal foot traffic. I tried my basement first, but that was too damp and cold at 55°F. The laundry room stays around 65°F ambient, which helps my insulation work faster.
Walk around your house with a thermometer. Check corners, windowsills, and closets. You want a spot that doesn’t dip below 60°F on its own. If that doesn’t exist, use a closet with the door closed—small spaces are easier to insulate.
Step 2: Build a Mini Greenhouse (Under $40)
I bought a wire shelving unit (3 feet wide, 4 feet tall). Then I draped clear plastic sheeting over it, using binder clips to seal the edges. This creates a simple greenhouse tent. The plastic traps heat and humidity. I leave one side slightly unclipped for airflow—stagnant air causes mold, trust me.
If you have a glass terrarium or a fish tank, that works too. I used a 20-gallon aquarium for my smaller cuttings. Cover the top with glass or plastic wrap, leaving a small gap. The key is trapping warmth without suffocating the plants.
I placed a seedling heat mat at the bottom. It sits at 75°F, and I set the thermostat to 72°F. That’s my sweet spot—warm roots, cool leaves. Highlanders like a little night drop, but in a cold house, I don’t risk it. I keep it steady.
Step 3: Insulate the Walls
This was my “aha” moment. I bought a roll of double-layer bubble wrap (the kind with large bubbles). I cut panels and taped them to the inside of my plastic tent. This adds an R-value, keeping the heat in. My temperature fluctuations dropped from 10°F swings to just 2–3°F.
I also placed rigid foam insulation boards under the heat mat. This prevents heat from escaping into the cold floor. The floor was a major heat sink. Once I added foam, my heating costs dropped slightly too. Win-win.
Step 4: Boost Humidity the Cheap Way
Northern winter air has 20–30% humidity. My Nepenthes need 60–70%. So I added a cool-mist humidifier inside the tent—just a small one I got for $20. I set it to run 30 minutes every hour. It keeps humidity steady at 65%.
Alternatively, I used wet towels on a drying rack inside the tent. That worked in a pinch but needed daily re-soaking. The humidifier is easier. Just remember to use distilled water to avoid white mineral dust on your leaves. I learned that after my ventricosa got white spots all over its pitchers.
Step 5: Set Up Lighting Inside the Tent
Add a grow light above the plants, but keep it outside the sealed tent or use a waterproof one. Moisture will ruin a non-rated light. I use a T5 LED bar, hung horizontally just above the tent cover. The light filters through the plastic—it’s a bit dimmer, but still hits 12,000 lux at plant level. Perfect.
Run the light for 12–14 hours a day. I bought a cheap timer outlet. Set it, forget it. My pitcher count doubled within two weeks.
The 2-Week Observation Log
Day 1–3: Initial Shock
My plants took a few days to adjust. Leaves perked up slightly, but no new growth. I noticed condensation on the tent walls—good sign. Humidity was high. I kept the vents closed mostly, opening them for 15 minutes daily for fresh air. A breeze is fine, but not a draft.
Day 4–7: Root Zone Warming Kicks In
At day four, I saw a tiny new leaf emerge from the center of my ventricosa. It was pale green, but alive. The roots were finally warm enough to uptake water. That’s the key. Warm roots drive everything. My older pitchers started firming up, no more soft spots.
I checked the media daily—it stayed evenly moist. I watered only once on day four because the top inch felt dry. That was it. Overwatering would have ruined this progress. I was proud of myself.
Day 8–10: Pitchers Begin to Form
By day nine, two new pitchers were inflating on my alata. They were small and slightly deformed at first—probably from sudden humidity change. But they grew. I noticed the leaves were a deeper green. The insulation was working. Temperature stayed at 72°F, humidity at 68%. I didn’t change anything.
I also took leaf cuttings on day ten. I placed them in a shallow tray of sphagnum moss with a plastic bag over it. The warmth and humidity from my tent gave them a perfect environment. Insert cutting, wait for roots. It’s easier than you think, but the heat mat is non-negotiable.
Day 11–14: Stable, Growing, and Pitchering
At day 14, I had three new pitchers fully formed (deformed but mature) and visible root nubs on my leaf cuttings. That’s faster than any summer growth I’d seen. The insulation wasn’t just keeping them alive—it was making them thrive. I was shocked.
I also moved a stubborn lowii x spectabilis into the tent. It stopped dropping leaves and started pushing new growth by day five. That hybrid was the one that died in my first winter. I blame my old windowsill setup. This tent saved it.
Common Pitfalls I Still Hit (And How I Fixed Them)
Overheating in the Tent
Once, I left the heat mat on high during a sunny day. The tent hit 90°F. Leaves wilted. I panicked and opened the vents, then moved the mat to medium. Learn from me: set the thermostat to 75°F max, and always have a thermometer inside. Don’t trust your hand—you’ll burn your plants.
Mold and Fungus on Soil
Humidity above 70% with poor airflow leads to gray mold. I saw it on a leaf that was touching the plastic. I cut that leaf, increased ventilation by propping the tent open 1 inch, and it cleared up. Never let leaves touch wet surfaces. Airflow is your friend.
Leggy Growth from Insufficient Light
If your light is too far, your Nepenthes stretch toward it. I adjusted my light to 10 inches above the tent top. The result was compact, tight growth. I also rotate the pots weekly so each side gets light—this prevents lopsided plants.
Essential Tools and Supplies
- Heat mat with thermostat (I prefer the Vivosun brand, but any works)
- Double-layer bubble wrap (large bubbles, 1/4 inch thick)
- Rigid foam insulation board (1-inch thick, cut to fit)
- Clear plastic sheeting or a tent cover
- Wire shelving unit or an old fish tank
- Cool-mist humidifier with distilled water
- Full-spectrum LED grow light with a timer
- Plastic pots with drainage holes
- Sphagnum moss or a 50/50 perlite-peat mix
- Thermometer and hygrometer (I use a digital combo, $12 on Amazon)
Expert Authority: Backing Up My Claims
According to the RHS, tropical plants like Nepenthes require root temperatures above 62°F for active growth. They recommend bottom heat and insulation for greenhouse borders in winter. My setup mimics that on a small scale. The AHS also notes that microclimate management—not whole-house heating—is the energy-efficient way to rear sensitive species. That’s what I’m doing with my tent. It cost me $50 in materials and saves my heating bill.
3 FAQs I Wish I Had Read Earlier
FAQ 1: Can I keep Nepenthes on a cold windowsill if I just use a heat mat?
No. Heat mats warm the roots, but the leaves and air around them stay cold. Cold air slows photosynthesis and dormancy might kick in. I tried this—it didn’t work. You also get condensation dripping onto the soil. Insulate the whole space first, then add heat. The tent is essential.
FAQ 2: Do I need a grow light in winter?
Yes, unless you have a south-facing window that gets 6+ hours of direct sun. In northern states, winter sun is weak and short. Without a grow light, your Nepenthes will stop producing pitchers and might go dormant. A $30 LED bar solves this. Trust me, I tried to skip it, and my plants taught me the hard way.
FAQ 3: How often should I water during winter?
Less than you think. Check the top inch of media every two days. If it’s dry, water sparingly. If it’s damp, wait. In my insulated tent, I water every 5–7 days. Overwatering kills more plants than cold ever will. That’s a promise.
Final Thoughts
Building an insulated propagation space for Nepenthes in a cold US home is simpler than it sounds. My only real expense was the heat mat and grow light. The rest was repurposed materials. Once you control temperature, humidity, and light, these plants become resilient. They aren’t that finicky—they just need stable conditions.
I still check my tent twice a day. But now, I feel calm. My Nepenthes are thriving, pitchers forming weekly. If you live in a cold climate, don’t give up. Try my setup for two weeks. If you follow these steps, you’ll see growth. I guarantee it.





