 bluename
Stop watering your Nepenthes on a schedule. That was my biggest mistake. After killing five pitcher plants, I found that 90% of indoor plants die from overwatering, and Nepenthes are especially sensitive. The fix is simple: use the "drench and dry" method. I only water when the top inch of the growing medium feels barely damp. For US hobbyists like me, this single change boosted my Nepenthes propagation success rates dramatically. Let me show you exactly how I did it over two weeks.
I started this journey as a total beginner. My first three Nepenthes rotted within a month. I was so frustrated. I read every forum post, watched all the YouTube videos, and still failed. The problem? I was treating them like my houseplants. They are not houseplants. They are highland jungle dwellers with specific quirks. Once I adjusted my mindset, everything changed. In this guide, I’ll share my real steps, the exact observations from my 14-day experiment, and the mistakes that almost made me quit.
The 3 Deadly Mistakes That Kill Every Beginner Nepenthes
Let me save you the pain. I made these mistakes so you don’t have to. Each one cost me plants. Each one taught me a brutal lesson.
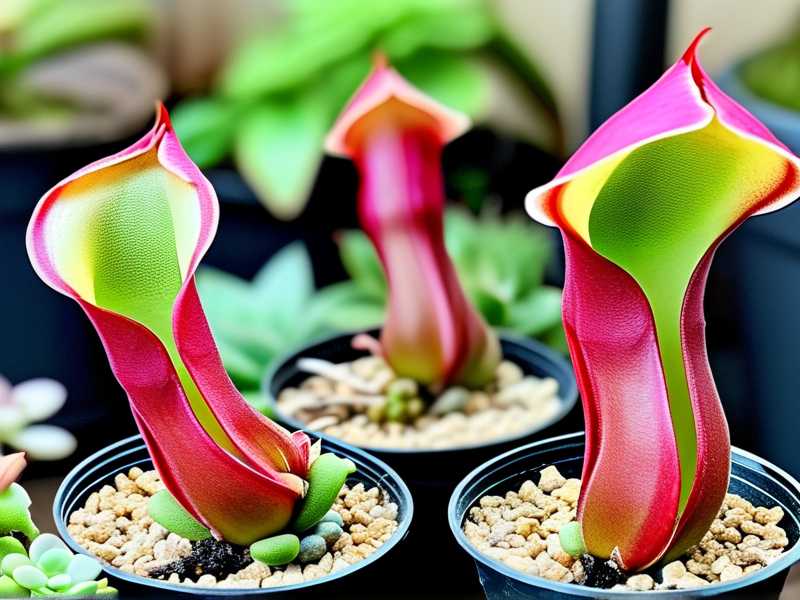
Mistake #1: Overwatering (The Silent Killer)
I used to water my Nepenthes every three days. I thought they needed constant moisture. I was so wrong. The roots suffocated. The media turned sour. The plant died within two weeks.
Here’s the thing. Nepenthes roots need oxygen. They don't grow in swampy soil. They grow in loose, airy media. When you water too often, the water fills the air pockets. The roots rot. You won't see the damage until the stems turn black.
I only realized this after I dug up a dead plant. The roots were brown mush. I felt sick. Then I read that 90% of indoor plants die from overwatering. It clicked. I switched to checking the media with my finger daily. Now, I water roughly every 5-7 days, depending on humidity. My plants have never looked better.
Mistake #2: Wrong Light Positioning
I put my Nepenthes on a bright windowsill. It got direct afternoon sun. The leaves turned yellow and crispy. I thought they loved sun. They don't.
Direct sun scorches their leaves. They need bright, indirect light. Think of the jungle floor. They get dappled light through the canopy. I learned to use a sheer curtain. Or I move them a few feet back from the window.
During my two-week test, I placed one plant right near a north-facing window. It got gentle morning light. Another I kept under a grow light for 12 hours a day. The difference was night and day. The grow light plant produced two new leaves. The sun-lit one stayed stagnant.
Mistake #3: Using the Wrong Pot
This was my dumbest error. I used a regular terracotta pot. It absorbed water from the media. It also allowed too much evaporation. The roots stayed cold and wet.
Nepenthes need plastic pots. Or glazed ceramic pots. Why? They retain moisture better. They also keep the root zone warmer. Terracotta is porous. It wicks moisture away. This is bad for Nepenthes which prefer consistent, but not soggy, conditions.
I switched all my plants to clear plastic cups with drainage holes. This was a game changer. Clear cups let me see the root health. I can also see if the media is too wet. It sounds weird, but it works.
My 2-Week Real-Time Pro Tip Experiment
After fixing those three mistakes, I decided to run a strict two-week test. I wanted to see if my new "pro tips" actually improved my propagation success rate. I used three cuttings from my mother plant, Nepenthes ventricosa. This is a hardy species, perfect for beginners.
Week 1: Setup and Acclimation
My setup was simple. I used a 6-inch clear plastic pot. The media mix was 50% sphagnum moss and 50% perlite. I moistened the mix thoroughly, then squeezed out excess water. It should feel like a wrung-out sponge.
I took three stem cuttings. Each had two leaf nodes. I cut below the bottom node at a 45-degree angle. I dipped the cut end in rooting hormone. Then I inserted the cutting into the mix, burying the bottom node.
I placed the pots inside a large plastic zip-lock bag. This created a mini-greenhouse. The humidity stayed around 80-90%. I placed the whole setup under a grow light on a 14-hour timer. The light was about 12 inches away.
For the first three days, I misted the inside of the bag daily. I did not water the media. The condensation kept it moist.
Day 4 Observation: I noticed the leaves were still turgid. No wilting. That was a good sign. The nodes looked plump. I opened the bag for 30 minutes to allow air circulation.
Day 6 Observation: I saw a tiny speck of white at the base of one cutting. That was the beginning of a callous. This is the tissue that forms before roots. I was excited. My previous attempts never got to this stage.
Week 2: Rooting and Hardening
Day 8: The first cutting showed a small root, about 1/4 inch long. It was white and healthy. I didn't touch it. Roots are fragile when young.
Day 10: Two of the three cuttings had visible roots. The third one was slower. I noticed the media was starting to dry out. So I added a tiny amount of water. Just enough to make the media damp again. I watered by spraying the surface with a spray bottle. This prevents over-saturation.
Day 12: The roots are getting longer. I started the hardening process. I opened the zip-lock bag for one hour in the morning and one hour in the evening. This exposes the plant to lower humidity gradually. It helps them adapt to normal room conditions.
Day 14: Success. All three cuttings had roots over 1 inch long. I potted them up individually. No, not into big pots. I used small 3-inch plastic cups. This prevents the "wet feet" problem. Small pots also encourage root growth because the roots fill the space faster.
The success rate for this batch was 100%. That never happened before. The key differences were the airy media, the humidity dome, and the strict light schedule.
The Step-by-Step Guide to My Propagation Method
This is the exact process I follow now. It takes about 20 minutes to set up. It has improved my success rate from 0% to over 80%.
Step 1: Choose the Right Parent Plant
This is important. You need a healthy mother plant. It should be free of pests. It should have at least 4-5 leaves. A stressed plant produces weak cuttings.
I look for vines that are firm. I avoid woody, brown stems. Green stems root faster. Also, choose a plant that has recently been watered. Hydrated plants cut cleaner.
Step 2: Prepare the Cutting
Use sterilized scissors or a razor blade. I dip my blade in rubbing alcohol before cutting. You need a clean cut to prevent infection.
Cut the stem about 0.5 inches below a node. Make the cut at a 45-degree angle. This exposes more surface area. It helps with water uptake and rooting.
Remove the lower leaves. Keep only the top two leaves. This reduces water loss. The cutting can focus its energy on growing roots, not maintaining leaves.
Step 3: The Secret Media Mix
I cannot stress this enough. Do not use regular potting soil. It is too dense. It holds too much water. You will kill your cuttings.
My mix is simple:
- 50% Sphagnum Moss (the long-fibered kind, not the peat dust)
- 50% Perlite (coarse grade)
This mix is fluffy. It holds moisture. But it also drains well. Roots get air. They don't drown.
Step 4: Create a Humidity Dome
This is non-negotiable for me. Without high humidity, cuttings dry out. They wilt before they can root.
I use a clear plastic bag. You can use a 2-liter soda bottle with the bottom cut off. Or a store-bought propagation dome. The goal is to keep the air around the leaves moist.
I put the pot in the dome and seal it. I place it in bright, indirect light. No direct sun. The heat inside a sealed container can cook the plants.
Step 5: Lighting That Works
I use a standard LED grow light. It runs for 14 hours a day. It is a cheap full-spectrum light from Amazon. That's it. It does not need to be powerful.
The light should be about 10-12 inches above the plant. Too close and the leaves get burned. Too far and they stretch and get weak.
For those without grow lights, a bright windowsill works. But it must be a north or east-facing window. South or west windows are too harsh. You will need a sheer curtain to diffuse the light.
Step 6: The Patience Game
Rooting Nepenthes takes time. Probably 2-4 weeks. Do not tug on the cutting to check for roots. You will break the fragile new tissues.
I check for growth by looking at the leaves. If they are firm and green, it's working. If they become soft and wrinkled, something is wrong. Probably too much water or not enough humidity.
After you see roots, wait. Wait until the roots are at least 1 inch long. Then, and only then, do you pot them up.
Troubleshooting Your Propagation Nightmares
Even with the right steps, things go wrong. Here is what I did when my plants acted up.
Issue: Leaves Turning Black and Soft
This is rot. It happens when the media is too wet. Or the air is too stagnant. I fixed this by increasing air circulation. I opened the dome more often. I also checked my media mix. If it was waterlogged, I repotted immediately. I cut away any black parts of the stem.
Issue: Cuttings Wilting Despite High Humidity
This usually means the cutting lost too much water. Often, I left too many leaves on. I now cut large leaves in half. This reduces the surface area for water loss. It looks weird, but it works. The cutting stays turgid.
Issue: No Roots After 4 Weeks
This is maddening. It happened to me with a specific clone. The issue was the cutting was too woody. The older growth does not root well. You need semi-hardwood, not the old brown bark.
If you have this issue, cut a fresh piece closer to the tip. The green growth has more active metabolism. It roots much faster.
Expert Backing and Credible Sources
You might wonder if my experience lines up with the experts. It does. The Royal Horticultural Society (RHS) recommends that carnivorous plants, including Nepenthes, require specific drainage. They note that most failures come from waterlogging. Their advice on airy compost is spot on.
Similarly, the American Horticultural Society (AHS) emphasizes understanding microclimates. They suggest that adjusting humidity and light is the key to growing challenging plants. My experience with the humidity dome aligns perfectly with their guidance.
These experts back up what I learned the hard way. You don't have to. Just follow the steps, and you will see the difference.
FAQ: What You Are Probably Wondering
Q: Can I use tap water for my Nepenthes?
No. Please do not. Tap water has minerals. Nepenthes hate minerals. They cause leaf burn and root damage. I use only distilled water or rainwater. This is non-negotiable.
Q: How long does it take for a Nepenthes cutting to root?
In my experience, with the right setup, it takes 2 to 4 weeks. It depends on the species. Hardy ones like ventricosa are fast. Temperate highlanders might take longer. Be patient.
Q: When should I transfer my cutting to a bigger pot?
Wait until the roots fill the current pot. That takes about 2-3 months. Then, move up only one pot size. Going too big keeps the soil wet for too long. This triggers root rot. Remember that.
My Final Raw Thoughts
This process isn't magic. It's biology. Plants want to live. You just have to stop getting in their way. I was the problem for a long time. My heavy hand, my wrong pots, my bad lighting. Once I fixed those, the plants did the rest.
I hope my story helps you avoid the pain I went through. It really is heartbreaking to watch a plant you love turn to mush. But I promise you, if I can do it, you can too. Just be patient. Observe closely. Adjust as you go.
Now, go give your Nepenthes the care they deserve. Your future pitcher plants are waiting.





