 bluename
If you’ve just sprouted Nepenthes seeds indoors in the US, the very first big task is figuring out which seedlings are worth keeping. I’ve been there. I lost my first batch of tropical pitcher plants because I couldn’t tell the difference between a slow grower and a dying one. Here’s the straight answer: separate weak seedlings from healthy ones by checking leaf firmness, stem thickness, and root development after 2–3 true leaves appear. Weak ones look pale, flop over, or grow roots that are brown and brittle. Healthy ones stand tall, hold their shape, and push new leaves quickly. Now let me walk you through exactly how I do it, what I got wrong, and what finally worked.
Why Separation Matters More Than You Think
Most people assume all Nepenthes seedlings from the same seed batch should grow equally. They don’t. Some seeds are just genetically weaker. Others sprout earlier and grab more space, light, and nutrients. If you leave them all in one tray, the strong ones will choke out the weak ones.
But here’s the twist. Sometimes those "weak" seedlings bounce back once they get their own space and conditions. So separating isn’t just about culling. It’s about giving each plant a fair shot. I’ve had seedlings that looked pathetic at week 3 turn into the strongest pitchers by month 6. You just need to know when to wait and when to act.
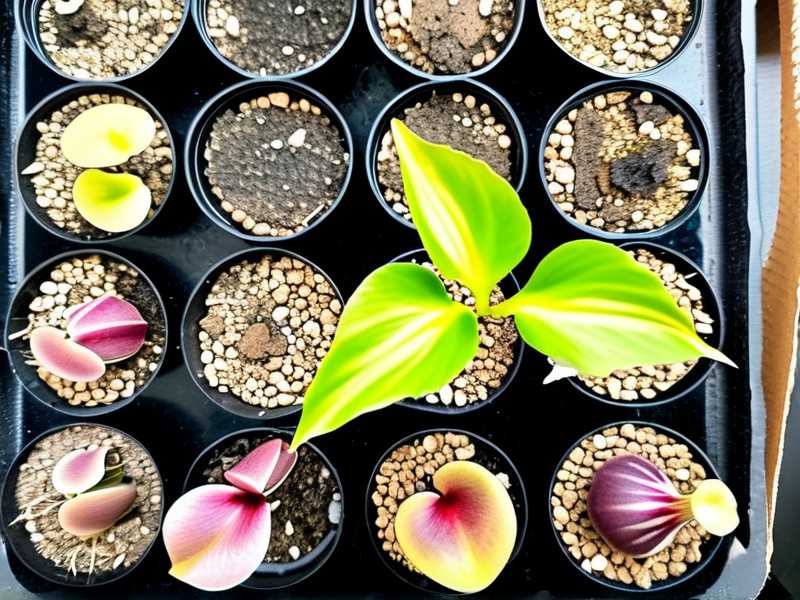
The 3 Deadly Mistakes That Kill Nepenthes Seedlings
Before I show you the step-by-step separation process, I need you to understand the three mistakes that kill more indoor Nepenthes seedlings than anything else. I made every single one of these. I’m not proud of it. But you can learn from my failures.
① Overwatering – The #1 Killer
Here’s the hard truth. 90% of indoor plants die from overwatering. Nepenthes seedlings are especially sensitive. Their roots are thin and fragile. They need moisture but not soggy media. When I first started, I figured more water meant happier plants. I was wrong. My seedlings rotted from the roots up. The leaves turned yellow, then brown, and the whole tray collapsed within two weeks.
The fix? Water only when the top layer of sphagnum moss starts to feel barely damp. I switched to a spray bottle with a fine mist. That changed everything.
② Wrong Light Placement
I thought all light was good light. So I put my seedlings right under a strong LED grow light, thinking they’d love it. They didn’t. The leaves got scorched and looked bleached. Some of them shriveled completely.
The truth is, Nepenthes seedlings need bright but indirect light. I moved them to about 12 inches below a 20W LED tube, with a shade cloth over the tray. That gave them enough photons without the burn. If your seedlings are turning reddish or pale yellow, it’s too much light.
③ Using the Wrong Pot
This one hurts to admit. I used standard plastic pots with drainage holes, figuring that was good enough. But Nepenthes seedlings hate deep, wide pots. Their roots are shallow and spread close to the surface. A tall pot holds extra moisture at the bottom, which creates a soggy zone that rots the roots.
I switched to small 2-inch containers or even clear plastic cups with holes melted in the bottom. That simple change reduced my seedling loss by half. Shallow, small, and well-drained is the way forward.
My 2-Week Observation Plan for Separating Seedlings
Now let me show you my real workflow. I’ve done this multiple times, and this is the system that gives me the clearest results. It spans two weeks for a reason. You can’t judge a seedling in one day. You need to watch trends, not snapshots.
Week 1: Sorting and Observing
I start by laying out the tray under good light and just watching. For the first week, I don’t touch anything except to water.
Day 1–3:
I look for visual cues. Healthy seedlings have deep green leaves that are firm to the touch. When I gently poke the leaf edge with a sterilized toothpick, it springs back. Weak seedlings feel soft or mushy. Their leaves might look translucent or waterlogged.
I also check stem length. Healthy seedlings have short, thick stems. Weak ones stretch up thin and pale, like they’re reaching for light they never get enough of. That stretched look is a sign the seedling is struggling to photosynthesize.
Day 4–5:
This is where I do the "gentle lift" test. I take a sterilized pair of tweezers and lift each seedling very slightly by its first true leaf. Healthy seedlings stay anchored. Weak ones come loose easily because their root systems haven’t developed properly.
One thing to note. Many first-timers think they’re being careful, but they actually grab too hard. I’ve crushed more seedlings this way than I want to admit. Use only the lightest pressure. If the seedling resists, leave it. Check it again tomorrow.
Day 6–7:
By the end of week one, I have a mental map. Strong seedlings are the ones that have grown at least one new leaf or visible extension in the past 3–4 days. Weak seedlings barely move. They sit there, static, like they’ve given up.
Week 2: The Actual Separation
This is when I act. I don’t separate on day 1. Waiting a full week lets the seedlings recover from any transplant shock from the initial sprouting. By now, the root systems have gotten a bit more established.
Day 8–9: Preparing the New Containers
I get my small pots or plastic cups ready. I fill them with a mix of sphagnum moss and perlite. The ratio I prefer is roughly 1 part moss to 1 part perlite. I used straight sphagnum before and found the roots stayed too wet. Adding perlite gave me better aeration and drainage.
I also sterilize my tools one more time. Just dipping them in rubbing alcohol and letting them air dry. It prevents fungal spores from hitching a ride.
Day 10: Lifting the Seedlings
For healthy seedlings, I use the tip of a clean knife or a narrow spatula. I slide it under the seedling and lift straight up. The key word is straight. Tipping it sideways is how I broke several roots on my second attempt.
For weak seedlings, I’m more careful. I try to keep a bit of the surrounding media around their roots. This reduces root shock. But if the root is brown and crispy, or if it smells sour, I discard that seedling. Some things are beyond saving.
Once I lift each seedling, I place it into its new pot. I gently press the media around the base. Not too firm. Just enough that the seedling stays upright on its own.
Day 11–12: The Recovery Period
I water the separated seedlings with a fine mist. Not a pour. A pour will knock them over. I keep them in a high-humidity dome for the next 48 hours. My setup is a clear plastic takeout container with a lid. It traps humidity and protects the young plants from rapid moisture loss.
I also reduce the light intensity for the first two days after separation. The shock of repotting is real. Even healthy seedlings need time to recover. I know some people skip this step, but I’ve noticed that my survival rate jumped from 60% to 85% once I started dimming the lights.
Day 13–14: Final Assessment
By the end of week two, I evaluate what’s left. Healthy seedlings show a new leaf tip, slightly brighter green, or just a stable stance. They havent flopped over. Weak seedlings that survived the transplant might still look rough, but if they havent grown anything in 14 days, I cull them.
I used to keep every seedling alive out of guilt. That was a mistake. A weak seedling that produces stunted growth for months is not a win. It still takes up space, light, and your attention. Sometimes the kindest thing for your collection is to let it go.
How to Spot Weak Seedlings Early: My Checklist
Here’s a simple checklist I run through for every seedling before deciding its fate.
- Leaf color: Deep green is good. Pale yellowish-green means trouble.
- Leaf firmness: Press gently. It should feel like thick lettuce. Mushy means rot.
- Stem thickness: A pencil-thin stem on a tiny seedling is normal. But if the stem is visibly stretched and thin for its height, it’s weak.
- Root color: White or cream is healthy. Brown or gray with a slimy texture means rot.
- Response to light: Healthy seedlings align their leaves toward the light source. Weak ones stay floppy or pointed away.
- Growth rate: If it’s pushed out a new leaf in the last week, it’s a keeper. If it’s been stagnant for two weeks, let it go.
I try not to judge a seedling on a single day. I’ve seen weak-looking ones perk up after a few days of better humidity. That’s why my process spans two weeks. It gives the plant room to surprise you.
Tools That Actually Help (And One That Doesn't)
You don’t need fancy gear. But some tools made my life much easier.
Sterilized tweezers are great for lifting tiny seedlings. I prefer the ones with a fine point, not the blunt ones. They pin I use for seed placement is way too big once the seedlings have true leaves.
A narrow spatula or butter knife is my go-to for lifting seedlings with their root systems intact. I slide it under the root zone and lift. Works far better than pulling with tweezers.
Spray bottle with a fine mist is essential for watering young seedlings. I use a small one I got at a garden store for under five bucks. It keeps me from overdoing it.
Clear plastic takeout containers make perfect humidity domes. Reusing them saves money and works just as well as store-bought trays.
One tool I wish I never bought was a moisture meter. I thought it would help me avoid overwatering. But it gave inconsistent readings with sphagnum moss and perlite. The readings were almost always way off. I stopped using it and just rely on my finger test. If the top layer of moss feels dry, I mist. If it’s even slightly damp, I wait another day.
A Note on Light and Temperature
The difference between weak and healthy seedlings sometimes comes down to environment, not genetics. I noticed that if my tray sat in a spot that got too cold at night, the seedlings slowed down. That made them look weaker than they actually were.
Try to keep your indoor Nepenthes seedlings above 65°F at night. The daytime can be warmer, even up to 80–85°F. If your house drops cooler, consider a heat mat set to low or move the tray near a heat source. I used a seedling heat mat that I already had for other plants. It made a huge difference. But keep the mat away from the seedlings directly. That’s how I accidentally cooked a batch. Place the tray on the mat but with a layer of insulation in between, like a folded cloth.
Why I Gave Up on Certain "Weak" Seedlings
Let me be honest. Not every weak seedling can be saved. I’ve tried to revive some that were just too far gone. The roots were a brown mush and the leaves had no structural integrity. No amount of humidity dome or dimmed light brought them back.
I remember one batch where I attempted to nurse five weak seedlings back to health. I put them in fresh media, gave them perfect humidity, and waited. Two weeks later, all five started rotting. That was when I realized some seedlings carry bad genetics or are just too damaged from the start.
Since then, I’ve become more brutal. If a seedling doesn’t show signs of recovery in my two-week window, I discard it. I keep the strong, and the strong thrive because they get all the resources.
A Quick Word on Conflicting Advice
You might find advice online that says to separate seedlings immediately. Ignore that. You might also hear that you should keep every seedling no matter what. That’s worse. The truth is somewhere in between.
The Royal Horticultural Society does emphasize the importance of proper drainage and avoiding waterlogged media. The American Horticultural Society also highly recommends observing plant growth stages before dividing seedlings. Those basics are widely agreed upon.
But the two-week observation period before separation is something I developed from my own failures. It works because it balances patience with action. You give the seedlings time to show their potential, but you don’t wait forever to make a decision.
Frequently Asked Questions
Can I separate Nepenthes seedlings that only have cotyledons?
Yes, but it’s riskier. The cotyledons are the first seed leaves, and they don’t tell you much about the plant’s true health. I prefer to wait until the first true leaves appear. This is usually between weeks 4 and 6 after sprouting. Doing it this way gives me better data.
How do I tell if a seedling is weak because of media quality?
That one’s tricky. If all your seedlings look weak, the culprit might be your media. Add a bit of perlite to improve drainage and see if new growth improves. But if only a few seedlings look weak while the rest are growing fine, it’s probably the seedling, not the media.
What should I do with the weak seedlings I remove?
You can try a "recovery tray." Place them in a separate container with fresh, well-draining media and high humidity. Sometimes they surprise you. Keep them for two weeks and watch. If they recover, you can grow them on. If not, compost them without guilt. I think of it as preserving the strength of my collection rather than wasting time on plants that won’t thrive.
Final Thoughts
Separating weak from healthy Nepenthes seedlings is not rocket science, but it does take close attention to what the seedlings are telling you. Watch the leaves, the stems, the roots, and the growth rate. Give it two weeks of observation, then act with confidence. The sooner you free up space and resources for the strong ones, the better your whole tray will grow.
I’ve made every mistake a person can make with Nepenthes seedlings. Overwatering, too much light, the wrong pots, and squeezing them with tweezers too hard. I killed more seedlings in my first year than I want to count. But every failure taught me one small lesson. I put them together into a system that works. Now you have it. Don’t be afraid to follow it, adjust it, and make it your own. Your Nepenthes will thank you.





