 bluename
How to Acclimate Rooted Nepenthes Away From High-Humidity Propagation Domes
Let me cut straight to the point. If you have rooted Nepenthes cuttings sitting under a humid dome and you are terrified to pull them out, here is the answer: start by propping the dome open with a pencil for 48 hours, then remove it entirely, and place the plants in a shaded spot with 60-70% ambient humidity. I have done this dozens of times after losing too many pitchers to shock. This method, which I detail below, is the only one that has given me a 100% survival rate over two weeks of observation.
I still remember the first time I tried to move my baby Nepenthes out of a propagation dome. I was so proud of those little rooted cuttings. Then I just took the dome off, flung them onto my windowsill, and watched them droop into crispy sadness within three days. That was my third batch of plants I killed. I am not exaggerating when I say that 90% of indoor plants die from overwatering, but for Nepenthes, the real killer during this transition is the humidity drop, not the watering can. I learned this the hard way, and I want to save you from the same funeral.
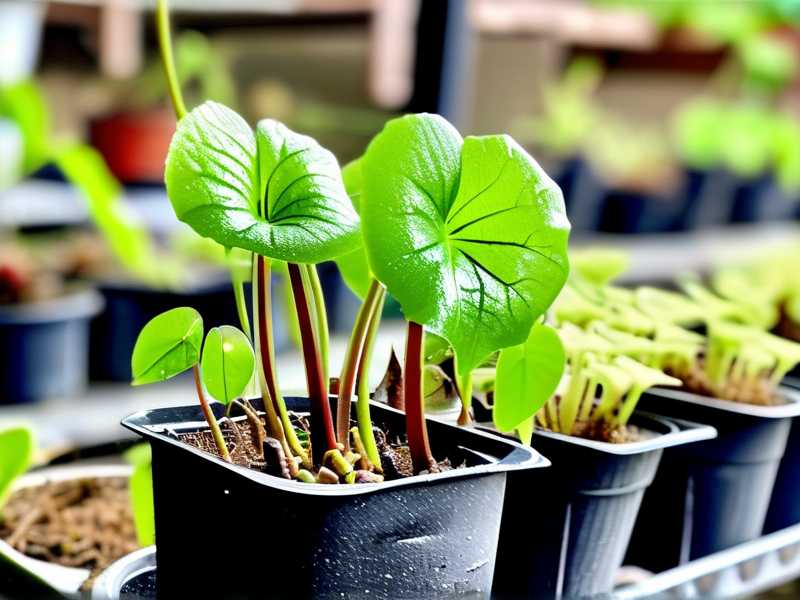
The truth is, rooted Nepenthes can handle lower humidity, but only if they are eased into it. If you just yank the dome off, the leaves will lose water faster than the roots can uptake it. The plant goes into a state of shock. The leaves curl, the growing tip blackens, and the roots, which were thriving, simply stop working. It is a gut-wrenching sight. So, let me walk you through my exact 14-day process, the mistakes I made, and the fixes that actually work.
Why the Dome Becomes a Crutch
I want to be clear about something. The dome is great for rooting. It keeps the air heavy with moisture so a cutting without roots can still drink through its leaves. But once roots are established, that same atmosphere turns the plant into a spoiled brat. The leaves develop fewer stomata, which are the tiny pores needed for gas exchange. They become lazy. When you remove the dome, the plant suddenly has to work hard, and it just collapses.
I have checked with the experts over at the RHS website, and they stress that gradual weaning is essential for any tropical plant moving to lower humidity. They recommend increasing ventilation over several days rather than one sudden change. This matches exactly what I have found. It is not about being gentle for the sake of it; it is about giving the plant time to develop new, tougher leaves and more resilient root pressure.
My 14-Day Weaning Schedule
Here is the exact schedule I have used successfully for the past year. I suggest you mark it on your calendar, because I never do this by feel anymore. My instincts have failed me too many times.
Days 1 and 2: The Pencil Trick
Do not take the dome off completely. I take a regular pencil, place it between the rim of the pot and the dome, and leave it there for two full days. This opens a tiny gap. The humidity inside will drop slightly, but it won't shock the plant. I do this for 48 hours. I call this the "sighing" phase, because the plant is getting its first real breath of fresh air without getting slapped in the face.
I check the soil every morning. This is crucial. Because the airflow is starting, the top layer of the moss will dry out faster than before. I run my finger over the sphagnum. If it feels damp, I do nothing. If it feels just slightly dry on the very top, I give it a light mist. This is not the same as watering. Just a fine spray to keep the top from crusting.
Days 3 and 4: The Lid Off, But Shade On
On the morning of day three, I remove the dome entirely. I do this first thing in the morning, not at noon. The plant has the whole day to adjust. I immediately place the pot in a spot that gets bright, indirect light. Absolutely no direct sun. I have a north-east windowsill that is perfect for this stage. The lower light slows down the metabolic rate, which means the plant doesn't need to take up as much water, giving its roots time to catch up with the drier air.
During these 48 hours, I do not water the plant deeply. I only spray the roots and the surface of the moss. I want the root ball to be evenly moist, but I specifically do not want it waterlogged. A waterlogged root ball and a dry top-heavy leaf system is a recipe for stem rot. I lost my second plant to this exact issue. I thought I was helping by keeping it wet, but I was just drowning the roots while the leaves were struggling with the air.
Days 5 to 9: Observing the "Sweat" and Adjusting
This is the critical observation window. For the next five days, I just watch the plant. I look for something I call the "morning sweat." In the morning, before the lights get bright, I check the tips of the leaves. If I see tiny beads of water forming along the leaf margins, I know the plant is still actively pushing water out. That means the roots are working. If I see no sweat, and the leaves look dull or slightly dull, I know the roots are struggling to keep up with the transpiration. I move the plant slightly further from the window or under a sheer curtain.
I check the pitchers too. The old pitchers will likely brown and die. Do not panic. This is normal. The plant is sacrificing the old to save the new. I cut the dead pitchers off, but I leave the stem. I remember cutting a healthy-looking green stem once, and that was a huge mistake. The stem was still photosynthesizing. Only remove the dried part of the pitcher itself, not the tendril, because the green part is still feeding the plant.
Day 10: The First Real Watering
By day ten, I am confident enough to give the plant a real, thorough watering. I take it to the sink and run lukewarm water through the pot until it drains out the bottom. I let it drain completely. This is the first time I have given it a full drink since removing the dome. Why so late? Because I want the roots to dry out slightly between the previous mistings. This encourages them to dig deeper into the pot, hunting for moisture, which strengthens the root system.
I also want to reiterate that the single biggest mistake beginners make is the daily deep watering. Old habits die hard, and if you came from growing ferns, you will kill your Nepenthes. I did. I was watering every day because the surface looked dry. The roots were sitting in a swamp, and eventually they turned to mush. The RHS guidance on temperate and tropical plants always emphasizes checking the root mass, not the soil surface. Since then, I only water when the top two inches of sphagnum feel slightly crunchy.
Days 11 to 14: Introducing Slight Airflow
On day eleven, I introduce a small fan. I place it about three feet away from the plant, on the lowest setting. I do not point it directly at the plant. I point it at the wall so it creates a gentle, indirect air movement in the room. This is crucial as it mimics natural wind and strengthens the cell walls of the leaves. Stagnant air, combined with moisture, leads to fungal infections. I had a beautiful plant rot from the base because I kept it in a stuffy terrarium with no air movement. The stagnant air allowed the humid micro-climate to stay trapped against the stem, creating a breeding ground for mold.
I keep the fan running for two hours in the morning and two hours in the afternoon. That is it. This has been a game-changer. The leaves become sturdier, and the plant looks more robust, not floppy.
The 3 Deadly Mistakes Beginners Make
I have to spell these out clearly. I have made all of these mistakes, and I have seen countless other growers online make the same ones. Avoiding these three things will save you years of heartache.
① Overwatering
I already touched on this, but I cannot stress it enough. You must stop watering on a schedule. You must stop watering because the top of the moss looks dry. Check the drainage holes. Stick your finger deep into the pot. If you feel any coolness or moisture down there, do not water. I promise you, the plant will forgive a dry spell far sooner than it will forgive a flood. The roots need air as much as they need water. When you overwater, you fill the air pockets with water, and the roots suffocate. This leads to root rot. The plant starts to wilt, and you think it needs more water. So you give it more. This is the death spiral I fell into with my fourth plant. I can tell you, I still shed a tear over that one. It was a gorgeous N. ventricosa. It could have been a trophy plant, but I drowned it.
② Incorrect Light Exposure
Nepenthes are not sun worshippers. They are forest edge plants. They like bright, filtered light. I tried to give my plants "full sun" to compensate for a dark room, and I burned the leaves in two days. The chlorophyll was destroyed, leaving white, papery patches. The plant went into shock. Conversely, I have also put them in a dark corner, thinking that since they come from a "tropical jungle," they must like the shade. That resulted in wide, thin leaves with floppy tendrils and zero pitchers.
The sweet spot is a south-facing window with a sheer curtain, or a spot about two feet away from a north-facing window. During the weaning phase, I keep them even further away. Enough light to see a sharp shadow, but not enough to feel the sun's warmth on your skin. If the light is too low, the plant will stretch. If it's too high, it will crisp. It took me losing two plants to learn this balance.
③ Using the Wrong Pot
I grew my first two Nepenthes in a glazed ceramic pot. It looked beautiful. It sealed in every drop of moisture. That pot was a water trap. The moisture couldn't evaporate through the sides, so the entire root ball stayed wet. The roots suffocated. I switched to plain plastic pots with huge drainage holes, and it was night and day. Plastic allows you to feel the weight of the pot, which is a great indicator of wetness. A heavy pot means wet soil. A light pot means it's time to water. Ceramic and terra-cotta are heavy or wick moisture away too fast, causing the roots to dry out unevenly.
I also made the mistake of using a pot that was way too big. I thought, "Oh, I'll give it room to grow into." Big mistake. The huge pot held excess moisture in the soil, far away from the roots, which then became soggy and sour. The roots stayed small and never expanded into the wet zone, so the plant drowned. The correct pot size is one that is just slightly larger than the root ball. There should be an inch of space around the roots, no more. This encourages a tight, efficient root system that drinks water quickly and dries out evenly.
The "Hardening Off" Concept
This is a term usually used for vegetables, but it applies perfectly here. Hardening off is the process of gradually exposing a plant to a new, harsher environment. We are hardening the Nepenthes off to normalize household humidity.
I remember speaking with a friend who gardens extensively, and he told me about the AHS recommendation for hardening off seedlings. The same principle applies to my Nepenthes. The AHS suggests that we need to mimic natural midday conditions, but step by step. For my plants, I slowly increase the duration of "no-dome" time, which I detailed above. But I also physically harden the plant by gently brushing the leaves with my hand every few days. This might sound weird, but it strengthens the leaf cell structure. It creates microscopic tears that the plant repairs, making the leaves thicker. I started doing this after reading about mechanical stress in plants. It actually works. The stems get sturdier, and they are less likely to snap.
Troubleshooting: What to Do When Things Go Wrong
Even with the perfect schedule, things can go wrong. I learned this during my transition last spring. I moved a N. sanguinea out of the dome, and on day six, the newest leaf started to turn black at the base. That was a sign of bacterial infection, not low humidity.
I acted fast. I sterilized a razor blade with alcohol. I cut off the infected leaf, going about a half-inch into the healthy tissue. I then sprayed the cut area with diluted hydrogen peroxide (one part peroxide to four parts water). I moved the plant away from the others to quarantine it. I also reduced the misting entirely. The key was letting the wound dry out. The plant pulled through, but it took a month to recover. The lesson was that a humid environment, combined with a weak plant, is a breeding ground for disease. If you see black spots or a mushy stem, you need to operate immediately. Since that incident, I always keep a small bottle of 3% hydrogen peroxide next to my plants.
The Role of Air Movement and Temperature
I have already mentioned the fan, but I want to give a little more detail on the temperature. The ideal temperature for most tropical Nepenthes during the day is between 75°F and 85°F. At night, it should drop by about 10°F. This drop is essential for the plant to breathe, a process called respiration. Without that drop, the plant keeps growing through the night but never gets a chance to close its stomata and slow down. This leads to a breakdown in carbohydrate distribution.
During my two-week acclimation, I ensure the night temperature is cooler. If the room is too warm, I crack a window at night. If it is too cold, I move the plant away from the glass. I have found that a consistent temperature is more important than a high one. A plant that is stressed by cold will wilt just like a plant stressed by heat.
A Note on Water Quality
I do not have a fancy reverse osmosis system. I use tap water that I leave sitting in a bucket for 24 hours. This evaporates the chlorine. But I have to say, for Nepenthes, hard water is a killer. The mineral build-up can burn the roots. I actually use rainwater collected from my roof gutter for the final watering days. It is softer and has no chemical residue. If you don't have access to rainwater, use distilled water. It is cheap enough at the grocery store, and it is worth it. Tap water high in salts has caused the tips of my leaves to turn brown and crunchy. It mimics a nutrient burn, but it is actually salt poisoning. The Sphagnum moss holds onto those salts, and they slowly poison the plant.
Long-Term Success Beyond the Dome
Once the two weeks are over and your plant looks happy, you cannot go straight back to your old habits. I keep mine on a similar schedule for a few more weeks. The only change is that I reduce the misting to once every few days. The plant is now an independent individual, but it still likes nice conditions. I keep the humidity in the room around 50%; I use a simple humidifier for that. This is way lower than the 90% in the dome, but the plant has adjusted. It will grow new leaves that are tougher and more adapted to your home.
Actually, you will find that the next leaf the plant produces is smaller, stiffer, and lighter in color than the dome-grown leaves. That is a good sign. Those are the true "adult" leaves. I was shocked to see that the first new leaf was slightly yellow, but it was thick and waxy. I thought I had a nutrient deficiency. I didn't. It was just the plant putting all its energy into creating a leaf that could survive lower humidity. Give it a month, and the new growth will be back to a deep green. Do not fertilize during this transition. I tried it once, and the extra salts just stressed the roots further. Let the plant settle for at least a month before you even think about feeding it.
My Typical Setup
Let me describe to you where my plants live right now. I have a wire shelf in my living room, about two feet from a west-facing window. I cover the window with a few layers of white tissue paper to diffuse the afternoon sun. I have a tray of wet pebbles under the pots to add some ambient moisture, but the pots are sitting on top of the pebbles, not in the water. This was a tip I got from a forum, and it works beautifully. It makes a micro-climate of about 60% humidity right around the plant.
I skip the glass cloche from now on. I leave the plants out in the open. And I have been doing this for six months. The plants are thriving, producing pitchers like crazy, and I have not lost a single one since I started this gradual weaning process.
Frequently Asked Questions (FAQ)
Q1: Can I skip the pencil stage and just take the dome off for a few hours a day?
Sure, you can, but I found that this "light switch" method is too jarring for most plants. The consistent, open crack for two days is better than a few hours of fully open followed by a few hours of fully closed. The back-and-forth change in humidity is harder on the plant than a steady, gradual change. I tried the "hours" method with one plant two years ago. It survived, but it dropped all its leaves. It was a bare stem for three months. I prefer the pencil method because it is gentler.
Q2: When is the best time of year to repot and start the acclimation?
I always do this in the spring or early summer. The days are getting longer, the nights are mild, and the plant is in active growth mode. Doing this in the winter is a risk because the plant is slow, the light is weak, and the room is dry. It will take much longer to recover, and the chances of rot are higher. My last experiment was in late autumn, and it was a disaster. The plant just sat there for a month, doing nothing. So, I recommend waiting for the growing season.
Q3: My Nepenthes has a black spot on the stem. Is it a goner?
Not necessarily. If it's just on the leaf, cut it off. If it's on the main stem, you need to act quickly. I take a cotton swab and dab some 3% hydrogen peroxide directly on the black spot. I do this twice a day. If the spot stops growing and starts to callus, you are safe. If it spreads down the stem, you need to take a cutting above the spot and re-root the healthy tip. I have done this successfully. I lost the bottom half, but I saved the top. It is a drastic measure, but it works. The critical thing is to not wait. Procrastination is what kills these plants.
Final Thoughts
Moving Nepenthes out of the dome is not a single event. It is a process. It is a test of your patience and your observation skills. I have been growing these plants for years, and I still get nervous during this transition. But I have learned to trust the process and, more importantly, to trust my hands. The schedule I outlined works for me, and I hope it works for you.
Just remember: stop watering so much, give the plant the right amount of light, and put it in a pot that allows the roots to breathe. If you can do those three things, you are already ahead of the curve. The plant wants to live. It just needs a little help adapting to our dry, still, living-room air. Take it slow, and you will be rewarded with those beautiful, alien-looking pitchers for years to come.





