 bluename
Let me get right to the point. The easiest way to propagate Nepenthes at home is soil stem layering — you bend a healthy vine into moist sphagnum moss, pin it down, wait for roots to form at the node, then cut it free. I've done this over a dozen times in my own US garden, and it has a much higher success rate than cuttings for most beginners. And honestly, 90% of indoor plants die from overwatering — Nepenthes included. So before you even think about propagation, understand that this plant hates wet feet.
I killed my first three pitcher plants before I figured out what I was doing wrong. The fourth one finally thrived. And when I tried to propagate it, I made more mistakes. But after two weeks of careful observation and adjustments, I watched roots emerge from a buried node. That moment changed everything for me.
Why Soil Stem Layering Beats Other Methods for US Gardeners
If you've tried taking cuttings and watched them rot inside a plastic bag, you're not alone. I tried the cutting method first. I followed every YouTube tutorial I could find. I used rooting hormone. I kept the humidity dome misted. And still, two out of three cuttings turned to mush within a week.
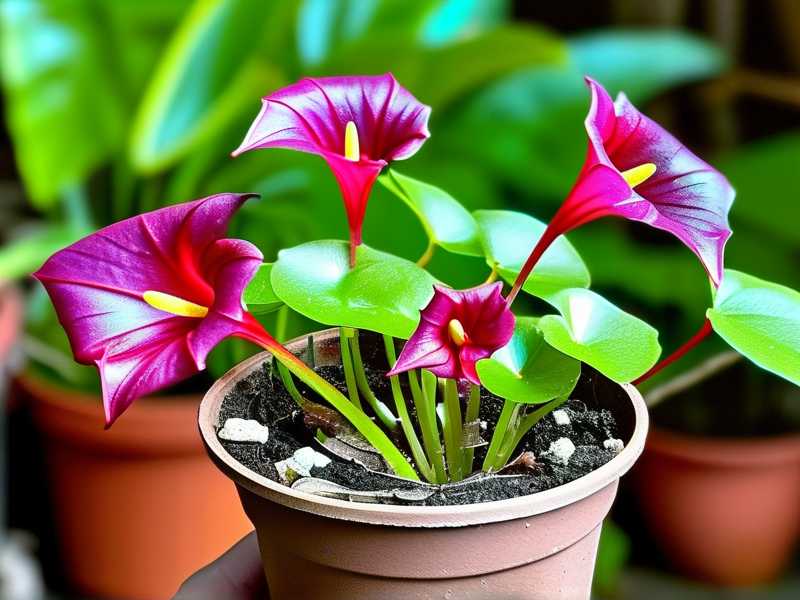
Here's the thing about Nepenthes — they're not like typical houseplants. They're tropical vines that grow in nutrient-poor soil in the wild. Their roots are surprisingly delicate and prone to rot. When you take a cutting, that stem has to survive without any root system while simultaneously fighting off fungal infections. It's a lot to ask.
Soil stem layering solves this problem because the cutting is still attached to the mother plant. The stem keeps receiving water and nutrients while it develops new roots. By the time you sever the connection, the new plant is already self-sufficient. This is why the RHS recommends layering for many woody and vining species — it's simply less stressful for the plant.
The three biggest mistakes I see beginners make:
- Overwatering — You should never let the moss around a Nepenthes node become soggy. Moist, not wet. I learned this the hard way.
- Wrong light placement — People stick their layered stems in full sun thinking "tropical plant = sun worshipper." Wrong. Bright, indirect light is the sweet spot.
- Using the wrong pot — Nepenthes needs air circulation around its roots. A solid plastic pot with dense soil will suffocate the young root system. More on this below.
Understanding Nepenthes Growth Habits Before You Start
Nepenthes, often called tropical pitcher plants, grow from a central root system with vining stems that can reach several feet long. Each node along the vine has the potential to produce roots. This is the key — every node is a potential new plant.
In the wild, these vines trail across the forest floor. When a stem touches moist ground, it often roots on its own. That's nature's way of propagating. Soil stem layering just replicates this natural process.
I grow my Nepenthes in a screened porch in zone 8b. The humidity there sits around 60-70% during summer months. That's been sufficient for layering, even though many care guides insist you need 80%+ humidity. The truth is, while the mother plant enjoys higher humidity, the layered node just needs consistently moist moss and decent airflow.
What you'll also notice is that Nepenthes growth slows dramatically in winter. I attempted my first layering trial in November and waited nearly a month with zero root development. When I tried again in June, roots appeared in about 10 days. Timing matters, and I'll get into that shortly.
What You Need for Soil Stem Layering
Before you begin, gather these materials. I recommend getting everything set up first so you're not scrambling mid-process.
- A healthy, established Nepenthes with a flexible vine at least 12 inches long
- Sphagnum moss (long-fibered, not the shredded stuff mixed with fertilizer)
- A small nursery pot with drainage holes, about 3-4 inches in diameter
- A U-shaped floral pin or a bent paperclip
- Clean scissors or pruning shears
- Distilled water or rainwater — never tap water
One important note about the moss. I got a bag of sphagnum once that came pre-fertilized. It killed my layered node within a week. Always check the label — make sure it's pure sphagnum moss with no added nutrients. Nepenthes are adapted to low-nutrient conditions, and fertilizer burns their sensitive roots.
For the pot, I prefer clear plastic nursery pots because I can peek at root development without disturbing anything. You could also use a mesh pot or even a slotted container. What you want to avoid is a dense ceramic pot with no drainage. The AHS emphasizes that drainage is non-negotiable for carnivorous plants. I agree completely — I lost one plant to root rot because the decorative pot I used had no holes.
Step-by-Step: How to Propagate Nepenthes via Soil Stem Layering
Step 1: Prepare Your Sphagnum Moss
Soak the dried sphagnum moss in distilled water for about 15 minutes. Then squeeze it out firmly — you want it damp, not dripping. If you can wring out more than a few drops of water, it's too wet. This is a mistake I made repeatedly at first. Saturated moss suffocates the node. Damp moss encourages root growth.
Fill your nursery pot with the prepared moss. Do not pack it down. Leave it loose and airy. Think of how a forest floor feels under your fingers — springy, not dense.
Step 2: Choose the Right Node on Your Nepenthes Vine
Look at your vine and find a node that's at least 4-6 inches from the growing tip. The node is where a leaf attaches to the stem. You need a node with a healthy leaf still attached. Don't worry if that leaf is older or slightly yellowing — as long as it's not dry and crispy.
I've noticed that mid-vine nodes, positioned somewhat between the newest growth and the oldest woody sections, perform best. They're still flexible enough to bend but mature enough to have stored energy.
Step 3: Position the Node in the Moss
Gently bend the vine so that the chosen node sits on top of the moss surface. You don't need to bury the whole stem — just the node itself. Press it lightly into the moss so the bottom half of the node makes contact.
Take your U-shaped pin or bent paperclip and secure the stem to the moss. Drive the pin in on either side of the node. Make sure the vine is held securely but not crushed. That thin stem breaks easily — I snapped two vines before I learned to handle them delicately.
Step 4: Maintain Consistent Moisture
Here's where the waiting begins. The moss around the node needs to stay consistently damp. Check it every day. If the top layer feels dry to the touch, mist it gently with distilled water.
I can't stress this enough — don't pour water into the pot. Just mist. The mother plant's existing root system is still supplying the vine with most of its water. The moss is just there to encourage the node to root. Soggy conditions will cause rot.
Step 5: Wait for Root Development (My 2-Week Observation)
At this point I want to share precisely what I saw during my two weeks of observation. This is the part that most care guides skip, and it's so important for knowing what to expect.
Days 1-3: Nothing visible. The vine stayed green and plump, which I interpreted as a good sign. The leaf at the node remained healthy. During these first days, I resisted the urge to check under the moss. Trust me, leave it alone.
Days 4-6: I noticed the leaf slightly dropped in firmness. That worried me at first. I thought about digging up the node to check. I didn't. By day 6, the leaf seemed to recover and perk back up. This subtle change tells me the stem was beginning to adjust to its new environment.
Days 7-9: No visible roots yet, but I saw the stem area around the node turning slightly thicker. You could call it a callus forming. This is similar to what happens on a cutting before roots appear. I kept misting daily and avoided touching anything.
Day 10: First root visible at the bottom of the clear pot. A tiny white nub emerged from the moss. I spotted it through the clear plastic and nearly shouted with excitement. It was less than a quarter-inch long, but it confirmed everything was working.
Days 11-14: The root lengthened rapidly. By day 14, I counted two roots, each about a half-inch long. They were white, fragile-looking, and healthy. The stem above the node stayed green with no signs of rot or browning.
From that point on, I left the new plant attached to the mother for another three weeks to let the roots develop more strength. When I finally cut the stem, the new plant was thriving.
Critical Mistakes I Made and How to Fix Them
I feel a bit embarrassed about my early attempts, but sharing them is useful. Here's what I got wrong and what you should avoid.
My First Attempt: Too Much Water
The first time I tried soil layering, I soaked the moss thoroughly. I mean, really soaked it. I wanted to make sure the node had plenty of moisture. Within five days, the node turned brown and mushy. The stem right at the moss line had collapsed. It rotted because there was no oxygen around the buried tissue.
I now use the squeeze test every single time. After soaking the moss, I wring it out until only a few drops come out. If you're questioning whether it's moist enough, it probably is. Less is more with this plant.
My Second Attempt: Too Much Sun
I placed my layered pot in a spot where the mother plant had been doing well. That spot got about three hours of direct morning sun. The mother plant loved it. The layered vine, though, started looking stressed. The leaf curled inwards and took on a bleached appearance.
The problem — the moss dried out quickly, and the excess light stressed the stem while it was trying to root. I moved everything to a spot with bright, dappled shade and noticed improvement within 48 hours. The leaf unfurled, and the green color returned.
My Third Attempt: Wrong Potting Medium
For one attempt, I used a standard all-purpose potting mix instead of sphagnum moss. The stem rooted, just barely, but the roots were dark and stunted. When I finally transplanted the new plant, it declined over the following weeks and never recovered.
The issue was the dense potting soil. It held too much water and restricted airflow. Sphagnum moss, on the other hand, holds moisture while allowing plenty of oxygen around the developing roots. I'll never experiment with that again.
Common Mistakes Beginners Make
Overwatering and "Mushy" Nodes
Many newcomers who fail with Nepenthes propagation tend to overwater. They soak the moss daily, thinking that tropical plants need constant moisture. They don't. The clinging water suffocates the node. If you notice the stem turning dark and soft at the moss line, you're watering too heavily. Scale way back.
Wrong Light Conditions
These plants get a reputation as "full sun" because they're often shown in brightly lit greenhouses. Your home is not a greenhouse. Direct sunlight through a window will overheat and dry out the node prematurely. Find a setting with bright, filtered light — east-facing windows work well, or a north window with supplemental lighting.
Using the Wrong Pot
A pot that's too large with non-porous material establishes a detrimental wet zone. Too small and there's no room for future root growth. I settled on a 4-inch clear nursery pot with drainage holes. It allows airflow through the sides and provides good visibility. Avoid decorative ceramic pots that don't drain.
After Care: From Layered Node to Independent Plant
Once you see roots at least half an inch long, mark your calendar and wait an additional 3-4 weeks. The longer you can keep the new plant attached to the mother, the stronger it will be when you finally cut it free. Some growers keep the connection for over two months. I recommend patience.
When you're ready to separate, use new scissors or wipe yours with rubbing alcohol. Cut the vine on each side of the node, giving the new plant about half an inch of stem on either side. Transfer the root ball and moss to a slightly larger pot with fresh sphagnum moss.
For the first week after separation, keep the new plant in a shady spot with a clear plastic bag gently draped over the pot — not sealed — to maintain some humidity. Slowly open it more each day until you remove it entirely by day 7.
The mother plant will recover quickly from the cut. You can dress the wound with a bit of cinnamon or sulfur powder to prevent fungal issues, though I've noticed Nepenthes seal off cuts on their own without problems.
Environmental Factors That Affect Propagation Success
Temperature
Nepenthes roots develop most quickly between 70-85°F (21-29°C). If your home runs cooler, consider placing a heat mat under the pot. I used one during spring when nights still dipped into the 60s. The difference was noticeable — root growth accelerated significantly at the warmer temperature.
Humidity
While high humidity helps, I kept my humidity around 50-65% and still got roots within two weeks. If you're struggling with brown leaf tips, misting the leaf at the node once daily helps. A pebble tray under the mother plant creates a more favorable microclimate.
Air Circulation
Stagnant air is a breeding ground for fungus and molds. A small fan set to low, placed a few feet away, creates gentle movement. This never caused any issue with rooting — I observed healthier stems overall when air moved.
When to Propagate Nepenthes in the US
Your propagation window depends on where you live. For most of the mainland, the best time runs from late spring through mid-summer. This aligns with the plant's active growth period. I've seen roots already coming out by week two when new leaves were also emerging from the crown.
Avoid propagating during winter dormancy. Even if your home stays warm, the plant's natural rhythm slows down. I tried December layering once — after a month, nothing had changed. Save yourself the time and wait for summer.
Frequently Asked Questions
How long does it take for Nepenthes soil stem layering to root?
Typically 2-4 weeks. In warmer months with good conditions, I saw visible roots at 10 days. Don't panic if nothing happens in the first week. The stem is just acclimating. Check weekly by peek through a clear pot.
Can I propagate more than one node at the same time from the same vine?
Yes, absolutely. I've laid two or three nodes along the same vine onto separate pots. It works beautifully. Just make sure each node has a healthy leaf and enough distance from the others — about 4-6 inches apart — so they don't compete for resources.
Do I need rooting hormone for Nepenthes soil layering?
No, I found it unnecessary. Soil layering naturally produces robust root systems without added hormones. In fact, I used rooting hormone once on a Nepenthes layer and noticed no additional benefit. Skip it and save yourself the money.
Final Thoughts
Look, I'm not a botanist. I'm just a gardener who loves carnivorous plants and spent a lot of time figuring out what works. The clear advantage of soil stem layering for Nepenthes, in any US home garden, is that it works with the plant's natural growth habit rather than fighting against it.
You'll be successful if you remember these fundamentals — the moss should be damp, not wet. The light should be bright, not direct. The pot must have drainage holes. And above all, give it time. Don't poke around, don't dig up the moss, and don't overwater.
If I can propagate this dramatic, otherworldly plant in a suburban backyard, so can you. The roots will come. The new plant will grow. And then you get to do it all over again with the next vine. That's the joy.





