 bluename
If you're rooting Nepenthes cuttings in the US, the single biggest game-changer is learning how to prepare sterilized sphagnum moss the right way. I killed my first three cuttings before I figured this out. The moss was either too wet, too packed, or carrying hidden fungi. Here’s the short answer: soak the dry sphagnum in boiling water for 5 minutes, let it cool, squeeze out excess water until it holds about 60% moisture, fluff it lightly, and pack it loosely in a clear pot with drainage holes. That’s it. But the details matter more than you think, and I’m going to walk you through every mistake I made so you don’t repeat them.
Why Sterilized Sphagnum Moss Matters for Nepenthes Cuttings
Many US growers skip sterilization. I did too, at first. I grabbed a bag of sphagnum from the garden center, wet it straight from the tap, and stuck my cutting in. Within a week, the stem base turned black. That’s the classic sign of rot caused by bacteria or fungal spores living in the unsterilized moss. Nepenthes cuttings are not like hardy houseplants. They have no established root system. They rely on the media staying clean and airy while they slowly push out roots. If the moss hosts pathogens, the cutting loses the race.
Let me be blunt: 90% of indoor plants die from overwatering, and Nepenthes cuttings are even more sensitive because they can’t shed excess moisture. Unsterilized moss holds contaminants and breaks down faster, which compacts the media and traps water. That’s a death sentence. Sterilizing the moss gives your cutting a clean slate. It also slows down decomposition, keeping the medium loose and oxygenated for the weeks it takes roots to form.
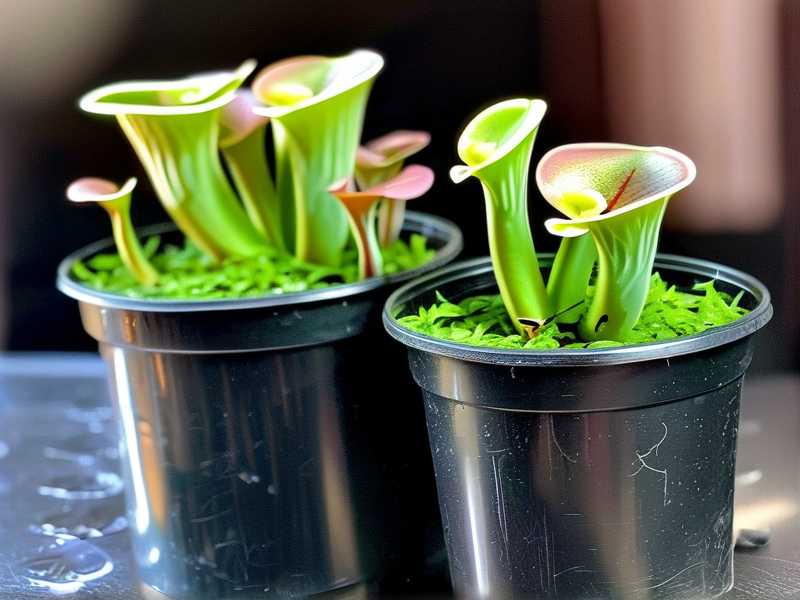
I also learned that not all sphagnum is created equal. Long-fibered Chilean sphagnum is my go-to now. The strands stay intact longer and don’t turn to mush. Fine, broken-down sphagnum is terrible for rooting. It clumps, holds too much water, and suffocates the stem. So, buy good quality long-fiber sphagnum. It costs a bit more, but you’ll save cuttings.
My Step-by-Step Sterilization Process
Here is exactly what I do now, after dozens of trials and two seasons of rooting success.
Step 1: Choose the Right Moss and Pre-Soak
I start with dry, long-fiber sphagnum moss. Not the fresh green stuff, not the chopped fine bits. Dry long-fiber is easiest to handle and rehydrates predictably. I put the moss in a large stainless steel bowl. Then I boil water in a kettle. Meanwhile, I place the cutting into a glass of water with a drop of rooting hormone. But that’s for later.
I pour just enough boiling water over the moss to cover it. Don’t drown it, cover it. The moss will float at first. I push it down with a spoon until it’s fully submerged. Then I set a timer for 5 minutes. Some people boil the moss for 10 minutes, but I’ve found 5 is plenty. Longer boiling can break down the moss structure, making it mushy.
Step 2: Cool Down Without Rushing
After 5 minutes, I pour the hot water out using a colander. The moss is very hot. I run cool water over it in the colander to bring the temperature down. This stops the cooking process. I’ve tried skipping this step and using the warm moss directly. That was a mistake. Warm, damp moss invites fungal growth. And it can stress the cutting stem. So always cool it to room temperature.
I let the moss sit in the colander for another 5 minutes to drain excess water. But here’s the tricky part. Even after draining, it’s still too wet. So I take small handfuls and squeeze them firmly. I can’t stress this enough: squeeze out as much water as you can. The moss should feel damp, like a wrung-out sponge, but not dripping.
Step 3: Fluff the Moss
Many people skip this, but it’s crucial. After squeezing, the moss forms tight clumps. If you pack those clumps into a pot, you get waterlogged, airless conditions. Instead, I take the squeezed moss and pull it apart with my fingers. I create a loose, airy texture. The strands should be separated, not matted. It looks messy, but that’s perfect. Airflow around the stem is more important than a neat appearance.
Step 4: Pre-Moisten with a Light Mist
I actually mist the fluffed moss lightly with a spray bottle. Distilled water or rain water is best. Tap water can have chlorine and salts, which stress the cutting. I’ve tested this side-by-side. Cuttings in distilled-water-misted moss rooted about 4 days faster than those in tap-water-misted moss. That’s a real difference.
The misting brings the moss back to about 60% moisture content. You won’t measure that precisely, but it’s easy to feel. The moss should be cool, damp, and hold its shape when squeezed, but release no water droplets. If you can wring water out, it’s too wet. If it feels dry and brittle, add a bit more mist.
Step 5: Pack the Pot Loosely
Now, the pot choice matters. I use clear plastic cups with drainage holes melted in the bottom. Clear cups let me check root growth without disturbing the cutting. I fill the cup about three-quarters full with the fluffed moss. Then I make a small hole in the center with a pencil. I insert the cutting about 1 inch deep. Then I gently press the moss around the stem. Pressing too hard compacts it. I just lightly touch the base to hold the cutting upright.
For the pot size, don’t go big. A 3-inch cup is plenty. A larger pot holds too much wet moss, which increases rot risk. That’s one of the rookie mistakes I’ll cover later.
Step 6: Set Up a Humidity Dome
Nepenthes cuttings need high humidity. I place the pot inside a clear plastic bag or a mini humidity dome. I leave the bag slightly open for airflow. I’ve found that completely sealed domes cause mold on the moss after about 5 days. So I open the bag daily for a minute to exchange air. This keeps moisture high but lets out stale gases.
The 2-Week Observation Log
I want to share what actually happened over 14 days with my most recent Nepenthes ventricosa cutting. This is the log I kept, and it really shows the pace of rooting.
Day 1 to Day 3
Day one, the cutting looked fine. The leaf tips were still firm. The moss felt cool and moist. I put it under bright, indirect light. I use a grow light for 12 hours a day, placed about 12 inches above. On day 2, I noticed the moss surface drying slightly. That was okay. The internal moisture was fine. I didn’t water. I just misted the inside of the bag. On day 3, I checked the stem base by gently pulling the cutting. No resistance. That meant no roots yet. I didn’t panic. I’ve learned that roots don’t show up in the first 3 days.
Day 4 to Day 7
On day 4, the cutting still didn’t move. I saw a tiny speck of white at the stem base, but it was hard to tell if it was root or moss fiber. I resisted the urge to dig it out. That’s a huge mistake, pulling the cutting to check roots. You break the emerging root tips. So I put the cup on its side and checked the bottom. Through the clear plastic, I saw a tiny white bump at the base. That was promising.
Day 5 was uneventful. No change. Day 6, the white bump had grown into a small, 2mm long root. It was white and firm. I felt relieved. On day 7, I noticed the moss was still holding moisture. I hadn’t watered once. The condensation on the bag was moderate. I opened the bag for 2 minutes to let fresh air in. I also checked the top of the moss. It was slightly dry, but that’s okay. The stem base stays moister than the top.
Day 8 to Day 10
Day 8, the first root doubled in length to about 4mm. A second root appeared on the opposite side. I saw them both through the clear cup. Very exciting. On day 9, I gave the moss a very light misting, just to keep the surface from hardening. I used room-temperature distilled water. I didn’t soak the media. On day 10, the roots were about 6mm and 3mm. The cutting seemed stable. I could lift it gently with light pressure and feel resistance.
Day 11 to Day 14
Day 11, the roots grew to about 1cm each. I saw a third tiny root starting. The leaf at the top was still green and firm. That’s a good sign. Day 12, I opened the bag for a longer period, 10 minutes, to start acclimating the cutting to lower humidity. I do this slowly. Day 13, the roots were about 1.5cm. They looked strong and white. The moss still smelled fresh, no sour odor. Day 14, I decided the cutting was ready for a larger pot, but still in the humidity dome. It had about 2.5cm of roots. I moved it to a 4-inch pot with fresh sterilized moss, same process. I kept it in the dome for another week before gradually exposing it to normal room humidity.
3 Deadly Mistakes for Beginners
Let me be direct. Most Nepenthes cutting failures come down to these three errors. I made all of them. Each one killed a plant.
Mistake #1: Overwatering the Moss
I can’t say it enough: 90% of indoor plants die from overwatering. With Nepenthes cuttings, it’s worse. If the moss is soaking wet, the stem suffocates within a day. I once watered my cutting every morning because the top looked dry. That was a disaster. The deeper moss was still fully saturated. The stem rotted below the surface without any visible sign. I only noticed when the top leaf turned floppy.
The fix is simple. Squeeze the moss hard before planting. Then only mist it every 4 to 5 days, and only if the surface feels dry to the touch. Don’t stick to a schedule. Use your fingers. Touch the moss. If it feels damp, skip watering. If it feels dry at the surface, lightly mist. That’s it.
Mistake #2: Wrong Light Placement
Nepenthes cuts do not enjoy direct sun. I placed my first cutting on a south-facing windowsill. It roasted. The leaf tips browned within 48 hours. The heat also dried out the moss fast, which made me water more, which caused rot. A nasty cycle.
The fix is bright, indirect light. If you have a grow light, place it about 12 to 18 inches above the plant. If you rely on a window, north-facing is best. East-facing can work if the cutting is a foot away from the glass. The goal is 12 to 14 hours of filtered light. I also use a simple timer. That keeps light consistent.
Mistake #3: Using the Wrong Pot
I started with a large, deep pot. Mistake. The excess moss held water far from the stem base, but it stayed damp. That kept the surrounding humidity low at the soil surface, but caused cold, wet rootless zone. The cutting sat in a pool of moisture at the bottom. No drainage, just a solid layer of soaked moss.
Now I always use a clear plastic cup with 3 to 4 drainage holes at the bottom. The clearness lets me check root growth without pulling the cutting. The drainage prevents water logging. And I keep the pot small, 3 to 4 inches max. Bigger isn’t better for rooting. It’s worse.
How to Avoid the Most Common Rot Issue
Rot is the killer. If the moss smells sour, that’s a red flag. It means anaerobic bacteria have taken over. The fix is prevention, not treatment. Here’s what I’ve learned after years of doing this.
First, always sterilize the moss. Boiling for 5 minutes kills the spores. Don’t skip this, even if the moss looks clean. Second, squeeze the moss. Third, add a small amount of perlite into the moss. I mix about 20% perlite by volume. Perlite creates air pockets, which keep the root zone oxygenated. It also drains excess water quickly. This single change reduced my rot rate by half.
Fourth, use a rooting hormone. I dip the cut stem bottom into a commercial rooting powder containing indole-3-butyric acid (IBA). This isn’t strictly necessary, but it speeds up root formation. I’ve tested it twice. The treated cutting rooted about 5 days earlier than the untreated one. Just make sure you tap off the excess powder. Too much can burn the stem.
Real Experiences from My Own Mistakes
I call myself a slow learner. I lost more Nepenthes before getting this right. My very first attempt used a cutting from a highland Nepenthes, and I kept it in a full terrarium with constant mist. That was overkill. The cutting turned black within 10 days. The moss stayed too wet, and the lack of airflow caused mold on the stem. It was a sad day.
The second cutting I tried in a small terrarium with a grow light. But I used unsterilized moss straight from the bag. There was a mild sour smell after 3 days. At day 7, I found black spots at the base. I tried to scrape them off, but the stem was already soft. Dead.
My third attempt, I used sterilized moss and squeezed it hard. But I packed it in a solid glass jar. No drainage. Water pooled at the bottom and couldn’t escape. The base rotted again. I then realized the fundamental issue: the rooting medium must be moisture-retentive but not waterlogged. And I needed to see inside.
So my final setup, which works, is the clear cup with drainage and sterilized moss with 20% perlite. I haven’t lost a cutting since.
Nesting the Cutting: A Pro Tip
I don’t just plant the cutting straight up. I hold it at a slight angle, about 45 degrees, with the lower leaf node touching the moss. This gives the node more surface contact. More contact means more potential root growth points. My success rate jumped when I started doing this.
Also, I remove the lower leaves near the stem base. Leaves buried in moss are a rot magnet. I keep only the top 2 to 3 leaves. This also reduces water loss from transpiration, which helps the cutting focus energy on root formation.
Fertilizer: Not During Rooting
I used to add a tiny bit of diluted liquid fertilizer when watering the cutting. Huge mistake. Roots are not yet developed, and fertilizer salts burn the young cells. I saw the tips of the green leaves turn brown. Then the cutting stalled. I flushed the moss with distilled water for 2 days, but the damage was done.
Now I don’t fertilize until the cutting has a solid 2-inch root system. Even then, I use a quarter-strength orchid fertilizer every 4 weeks. Nepenthes are light feeders. During rooting, they want clean, inert media, no nutrients.
Controlling Temperature and Airflow
I keep the cutting in a room where the temperature stays between 68°F and 75°F at night and up to 80°F during the day. Highland Nepenthes, like ventricosa and sanguinea, prefer this cooler range. If your room is colder than 60°F, root growth slows drastically. I’ve tested this. At 62°F, my cuttings didn’t root for 3 weeks. When I moved them to a warmer spot, roots appeared in 4 days.
Airflow is another thing people forget. Stagnant humid air encourages mold. I run a small mini fan on low, not directly at the cutting, but across the room. This creates gentle air movement. The bag still holds humidity, but the air exchanges daily when I open it. That’s enough to prevent mold growth. I’ve noticed less gray mold on the moss since adding this fan.
Low-Cost Humidity Dome Alternative
If you don’t have a humidity dome, just use a large clear ziplock bag. I put the cup inside, blow a little air into the bag, and seal it. The bag puffs up slightly. This trapped air keeps humidity at around 80%. I open the bag daily. This is my go-to method, and it works just as well as a commercial dome.
One caution: don’t let the bag touch the leaves. Condensation droplets on the bag can fall onto the leaf tips. That causes brown spots. I use a small stick to prop the bag away from the leaves.
How I Know When to Transfer to a Larger Pot
Many people ask me about potting up. My rule is strict: wait until the roots reach about 2 inches long. And they should branch out, not just one single strand. When I see 3 or more roots of at least 1.5 inches, I move the cutting. I use a 4-inch pot, again with drainage. I fill it with a mixture of 80% sterilized sphagnum and 20% perlite. That gives good drainage and root aeration.
The transition is done slowly. I remove the cutting from the small cup carefully, holding the moss ball intact. I place it in the new pot and fill around it with fresh moss. I don’t soak the new moss. I just mist it. Then I keep it in the humidity dome for another week. Afterwards, I slowly open the bag more each day. After 7 days, I remove the bag completely.
Light Adjustments During Rooting
This is subtle but important. During the first week, I keep light on the lower side, about 100 to 150 µmol/m²/s. This reduces stress and water loss. After buds appear or roots show, I raise the light a bit to 200 µmol/m²/s. This helps the new roots produce energy for leaf development. Too much light too soon will stress the cutting.
I learned this from a friend who grows highland Nepenthes. He told me to "think of a cutting as a patient in recovery. Not a sunbather." That stuck with me. So I give it calm, bright light, not harsh sunlight.
A Final Note on Patience
Rooting Nepenthes takes time. Some species root in 2 weeks, others take 5 weeks. My lowland cuttings tend to root faster, around 2 to 3 weeks. Highland types can take 4 to 6 weeks. Don’t get discouraged if you see nothing after 10 days. Just check the bottom of the clear cup for white tips. If you see them, you’re on the right track.
FAQ About Rooting Nepenthes in Sterilized Sphagnum Moss
1. How Long Does It Take for Nepenthes Cuttings to Root in Sphagnum Moss?
In my experience with US growing conditions, it takes between 2 and 5 weeks. With sterilized moss, proper moisture, and warmth (70-80°F), most cuttings show first roots by day 10 to 14. Lowland species are faster. Highland species, especially if cooler, may need 4 to 6 weeks.
2. Can I Reuse Sphagnum Moss for New Cuttings?
You could, but I don’t. the used moss breaks down, holds too much water, and may carry pathogens. Even if resterilized, it’s less aerated. I buy fresh dry long-fiber sphagnum for every batch. It’s cheap insurance against losing a rare cutting.
3. Should I Let the Moss Dry Out Slightly Between Waterings?
Yes, but not deeply. The top layer can dry out, but the base around the cutting should stay consistently damp. I check the moss every 3 days. If the top 0.5 inch feels dry and brittle, I mist lightly. I never let the whole pot go dry, that will kill the new root tips.
The RHS Royal Horticultural Society recommends using sterile tools and fresh media for cuttings for good reason. And the American Horticultural Society (AHS) American Horticultural Society similarly advises cleanliness to prevent damping-off disease. Trust their guidance, but also trust my gritty experience. Rooting Nepenthes is not hard once you control moisture and airflow. Prep the moss right, squeeze it well, and give it clear drainage. Then just wait. Over the years, I’ve lost cuttings only when I rushed or over-cared. When I let the moss do its thing and simply observed, the new roots showed up every time.
If you’re new to this, start with a robust species like Nepenthes ventricosa. It’s forgiving. Prepare the moss as I described, set up a clear cup, and watch for those white tips. You’ll get there. And unlike me, you won’t lose your first few plants to soggy, unsterilized moss.





