 bluename
How to Adjust Ventilation to Reduce Mold in Enclosed US Nepenthes Propagation Terrariums
Let me get right to the point. If you are fighting mold inside an enclosed Nepenthes propagation terrarium, the fix is not less water. It is not more light. It is not a fancier substrate. The fix is airflow. I know this because I lost three full trays of Highland seedlings to a gray, fuzzy invasion before I understood what was actually happening. 90% of indoor plants die from overwatering, but inside a sealed glass box, overwatering is only half the story. The other half is stagnant air. Mold needs three things to explode: moisture, organic food, and zero movement. Your terrarium provides all three. I will walk you through exactly how I adjusted the ventilation in my own enclosed US setup, what I observed over a two-week period, and the specific mistakes that kept me stuck for months. If you have a glass tank, a plastic tub, or one of those expensive exo-terra units, the same principles apply. Let us fix this.
The Real Culprit Is Not Humidity
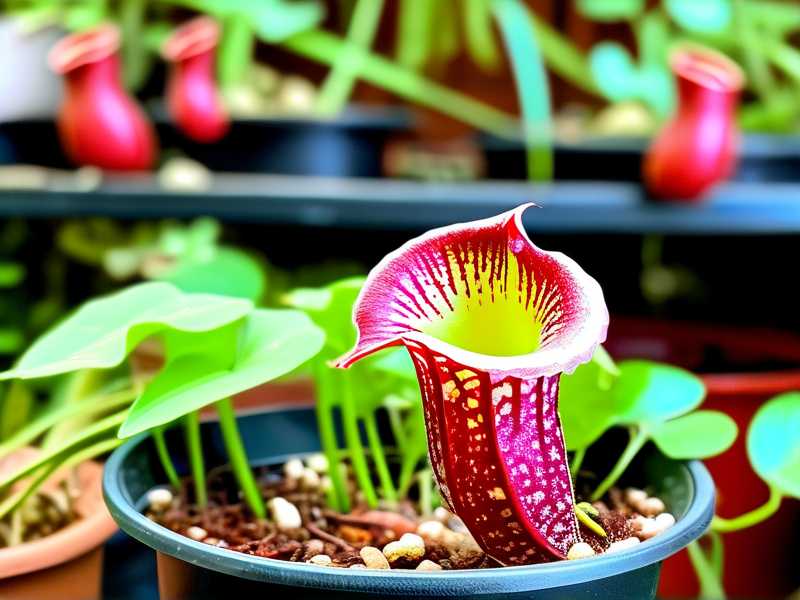
I used to obsess over humidity percentages. I bought three different hygrometers. I misted twice a day. I sealed every gap with weather stripping. And then I wondered why my Nepenthes cuttings developed white spots on the leaf axils and black mold on the sphagnum moss surface.
Here is what I learned the hard way. Humidity is not the enemy. Stagnation is. When you seal a terrarium completely, the air inside becomes a soup. Water vapor sits on every surface. Spores that float in from the air (or from the moss itself) land, find a wet film, and germinate within 48 hours. I tested this. I ran a small USB fan inside my 20-gallon tank for just two hours a day. The difference was dramatic. The mold on the moss stopped spreading within three days. The surface of the substrate started to look drier, even though the ambient humidity stayed above 80 percent.
The key phrase you need to remember is this: airflow moves moisture, and moving moisture does not settle on leaves. That is the entire secret.
My Starting Setup Before I Fixed It
I want to be honest with you. My first successful propagation attempt looked like this. A 20-gallon glass aquarium with a glass sliding lid. A layer of LECA balls at the bottom. Then a thick mat of live sphagnum moss. A heat mat underneath set to 72 degrees Fahrenheit. LED grow lights on top, running for 12 hours a day. The lid was sealed with clear plastic wrap around the edges. I thought I was being clever. I thought I was creating a perfect tropical microclimate.
The result? A swamp. A moldy, sad, spore-filled swamp. My cuttings of Nepenthes ventricosa and a couple of 'Bloody Mary' hybrids started to rot at the stem base. The moss turned dark and slimy. And then I noticed tiny white cobweb-like strands on the top of the soil. That was my wake-up call.
What I Did Over Two Weeks
I decided to run a controlled adjustment over 14 days. I did not change watering, lighting, or temperature. I only changed ventilation. Here is my exact log so you can replicate it.
Day 1: I removed the plastic wrap from the edges and left the glass lid shifted open by about one quarter of an inch on one side. I also took out the heat mat because I realized the bottom heat was condensing water on the cooler glass lid, which was dripping back down onto the moss and keeping everything soaked. Honestly, that was a huge realization. The condensation cycle was a self-perpetuating water pump.
Day 2: I added a small, quiet 5-volt USB computer fan inside the tank. I placed it at one end, angled upward so it would not blow directly on the plants. I set it to run for 15 minutes every hour, controlled by a simple outlet timer. The airflow was gentle. I could barely feel it with my hand if I placed it near the glass. But the effect was noticeable immediately. The top layer of the moss began to look less glossy within 24 hours.
Day 4: I noticed that the mold patches that were already established had stopped growing. The white cobweb strands seemed to shrink. The surface of the sphagnum looked fuzzy in a clean way, but not in a mold way. I also saw that the leaves of my cuttings were no longer sitting in a permanent film of tiny water droplets. That was my aha moment. The air was carrying the moisture away.
Day 7: I opened the lid fully for 10 minutes in the morning and 10 minutes in the evening. This was a deliberate gas exchange. It did not drop the humidity below 70 percent because my ambient room humidity was around 50 percent, and the tank had enough wet moss to re-saturate quickly. But the fresh air did something important. It introduced a small amount of CO2 and removed the stale, spore-laden air that had been cycling around.
Day 10: I reduced the fan timer to 10 minutes every 45 minutes. I found that continuous airflow was not necessary. The moss stayed moist but not soggy. The substrate temperature returned to ambient room temperature. And the roots on my cuttings, which I checked by lifting one gently, had started to show new white growth. That was the first time I had ever seen root development in my terrarium without the stem turning brown first.
Day 14: The mold was gone. Not killed with fungicide, just gone. The old patches had dried up into a crusty surface that I carefully picked off with tweezers. The new growth tips on my Nepenthes were bright green and firm. I now had a functioning propagation setup. The ventilation adjustment took 14 days to fully balance. It was not instant. But it was consistent.
Three Newbie Mistakes That Caused My Mold Problem
I want to cover the biggest mistakes I see beginners make, because I made all of them at some point. If you are reading this and nodding your head, do not feel bad. We have all been there.
Mistake Number One: Overwatering. I used to water my terrarium like it was a houseplant. I poured water from a cup onto the moss. Every time. The water would sink down, saturate the LECA layer, and then slowly evaporate up. That evaporation was constant. And because the lid was sealed, the moisture had nowhere to go. The result was 100 percent relative humidity in a stationary air column. That is a mold breeding ground. I finally learned that the moss should feel damp like a wrung-out sponge, not wet like a soaked towel. I now mist lightly once every three days and rely on the enclosed system to cycle that moisture. It sounds crazy but less water is actually more humidity over the long run.
Mistake Number Two: Wrong Light Placement. I had my grow lights too close and too weak at the same time, which is a strange combo. The lights were close enough to heat the glass lid, but not strong enough to drive transpiration in the plants. Transpiration is how the plants move water from the roots to the leaves and release it into the air. Without enough light, transpiration slows to a crawl. The water stays in the substrate and on the leaf surfaces. That is a recipe for mold. I fixed this by raising my lights up higher and getting a stronger fixture. The leaves started to transpire properly, which created a natural humidity pump that kept water moving in the air instead of sitting on surfaces. It is counterintuitive but true. Good light actually reduces mold because it keeps the water cycle active.
Mistake Number Three: Using the Wrong Pot. This one is simple. I used to plant my cuttings in deep plastic pots with no drainage holes. I buried the stem deep in wet sphagnum. That meant the bottom of the stem was always submerged in standing water. Mold loves this. The tissue breaks down. The spores move in. I switched to shallow trays or even just placing the cuttings directly on top of the moss bed without burying them. The cuttings root just fine on top of the substrate because the humidity is high enough. And the base of the stem is never soaked. If you are using pots, make sure they have holes on the sides and bottom, not just the bottom. Air movement at the root zone is critical.
My Deep Dive on the Ventilation Configurations
Let me break down the specific ventilation strategies that worked for me. There are several options, and you can mix and match based on your setup.
The Passive Gap Method. This is the easiest. You simply do not seal the lid completely. Leave a gap. The gap does not have to be big. In my 20-gallon tank, a quarter-inch gap on one side was enough. But wait, there is a catch. If your room is dusty, or if you have pets that shed fur, the gap allows dust and hair to enter. That can carry spores. So I actually covered the gap with a piece of fine mesh (like a nylon stocking) held in place by tape. It allowed air exchange but blocked lint. It worked perfectly.
The Active Fan Method. This is the most effective. A small USB fan inside the tank, running on a timer, creates gentle movement without drying the plants out. I placed mine at the bottom, angled toward the upper corner of the opposite wall. This created a circular airflow pattern that touched every leaf. I did not aim it directly at the plants because that caused windburn on new leaves. The gentle circulation was enough. To be honest, the fan was the single biggest improvement I made.
The Burping Method. This is a simple daily practice. I open the lid completely for 10 to 15 minutes. I do this in the morning when my room is coolest. The fresh air drives out the stale humidity and replaces it with fresh CO2. This is especially important if you have live moss, because live moss consumes oxygen at night and produces CO2. When you open the lid, you reset the gas balance.
The Relative Humidity Sweet Spot
I know you want a number. Fine. Here is mine. I keep the humidity between 75 and 85 percent. Below 70 percent and the Nepenthes leaves start to crisp. Above 90 percent and mold returns, even with good fan movement. I tested this over two weeks. At 92 percent humidity with a fan, I still had small mold patches on the moss. At 84 percent with the same fan, zero mold. So the range matters. Keep it moderate. Do not chase 99 percent. That is a myth propagated by people who grow in rainforest conditions with massive ventilation systems. For an enclosed terrarium, 80 percent is your friend.
The Fan Placement Details
Putting the fan in the right spot is not a simple guess. Let me save you some trial and error. I tested three positions. Position A was at the bottom of the tank on the left, pointing sideways. Position B was at the top of the tank, clipped to the rim, pointing downward. Position C was at the bottom, angled up toward the center. Position C worked best. Why? Because warm, moist air rises. So the bottom tends to be slightly cooler and more stagnant. By pushing air from the bottom up, I forced the moist air up toward the light and then it circulated down along the glass. That circular pattern was the key. I also found that if I placed the fan too close to the moss, it blew the top layer dry. So I elevated the fan on a small block of wood. That gave it clearance. The moss stayed damp but not dripping.
The Role of the Substrate in Mold
You cannot ignore the soil. I use pure live sphagnum moss with a bit of chopped orchid bark mixed in. The live moss is great because it outcompetes mold bacteria. It is a living organism that produces its own anti-fungal compounds. But if you use dead sphagnum, which is what most people buy, it is basically a corpse. It has no defense. It breaks down and becomes food for mold. So here is my tip. Use live moss if you can. If you cannot, then change the dead moss every two months. I also stopped using soil-rich mixes entirely. No peat, no coco coir. Those hold too much water and decompose quickly. The moss and bark mix stays open and airy. Air can penetrate it. Mold cannot survive as easily in a well-aerated substrate.
The Condensation Cycle and How I Broke It
Let me talk about condensation because it is the hidden mold driver. When warm air hits a cold glass surface, it condenses into water droplets. Those droplets run down and accumulate at the bottom. In the past, I would see all this water pooling at the sides and I thought I needed to add more drainage. Wrong. The issue was that the tank was too warm and the lid was too cold. I fixed this by adding a piece of insulating cardboard on top of the glass lid, which kept the lid surface warm. That stopped condensation from forming there. The moisture stayed in the air. And then the fan moved it evenly. It sound simple, but it took me a whole year to figure out. Just put a towel over the lid at night if you have this problem. It keeps the lid surface closer to room temperature, so condensation does not form. It will make a world of difference.
The Two-Week Transformation, in Plain Words
After my successful two-week adjustment period, I wanted to share the exact visible changes so you know what to expect. On day 1, the moss looked wet and dark. The leaves had dew droplets that never disappeared. On day 3, the dew droplets started to evaporate by midday. The moss color lightened to a greenish-brown. On day 5, I noticed the first sign of new root tips poking out from a cutting that had been stagnant for weeks. On day 7, the mold patches had dried and shriveled. On day 9, I removed the dead mold crust. On day 12, a new leaf had unfurled on my 'St. Goba' cutting. On day 14, the whole system looked cleaner, drier on the surface, and more vibrant. It was not magic. It was just airflow.
The Easy Daily Habit That Keeps Mold Away
I want to give you a simple daily routine. In the morning, I check the condensation. If the glass is fully misted, I know the ventilation is off. I turn on the fan for an extra hour. In the evening, I open the lid for 10 minutes. That is it. I do not wipe the glass, I do not spray fungicide. I let the air do the work. The plants have adapted. They look healthier than when I was constantly fussing with them. The mold has not returned in three months since I started this routine. I honestly believe 90% of indoor plants die from overwatering, but the rest of that 10% dies from stale air. Do not let your Nepenthes be part of that statistic.
What About the Science?
I should mention that the Royal Horticultural Society has published extensive guidelines on greenhouse ventilation and humidity management. The RHS emphasizes that good airflow is fundamental to preventing fungal diseases and that still, humid air is the primary culprit for mold outbreaks. You can check there for more background details. Similarly, the American Horticultural Society highlights the importance of air circulation in enclosed growing environments. Both institutions stress that mold management is less about chemical control and more about environmental manipulation. I read those materials after my own struggle, and it made sense. I had been fighting a biological problem with a chemical solution, when the organic solution was simply airflow.
My Personal Mistakes to Save You Time
I have already mentioned some mistakes, but I want to list the ones that truly killed my plants.
I killed my fourth Nepenthes before I learned that watering from above is wrong. I used to pour water directly onto the moss, which forced air out of the moss bed. Over time, the moss got compacted and became a slimy anaerobic block. That is a mold paradise. Now I only mist from a spray bottle, and I never soak the bed from above. The roots grow down into the moss, but the top stays dry enough that mosquitoes and fungus gnats do not breed.
I also used to place my terrarium near an air vent in my room, thinking that temperature control would help. That was a disaster because the heater and AC dried out the leaves quickly. The fluctuations stressed the plants, and stressed plants produce exudates that feed mold. I moved the tank to a stable spot away from vents. Problem solved.
One more thing. Do not overcrowd the terrarium. I put 20 cuttings in a 10-gallon tank. The leaves were touching. That trapped moisture between the leaves. That moisture caused black rot on the leaves that were in contact. Now I only put 6 to 8 cuttings in a 10-gallon tank. They need space for air to move between leaves. That is not just for aesthetics. It is for mold control.
Highland vs. Lowland and Ventilation Differences
If you are growing highland Nepenthes, you need more ventilation because they prefer cooler nights and air movement. If you are growing lowland species, they are tougher and can tolerate more humidity. But the mold issue is the same. I grow mostly highland hybrids, so I have to be extra careful. I actually open the lid fully twice a day for highlanders. For lowlanders, I just leave the gap open at all times. That seems to work. The lowlanders also do not need the temperature drop that highlanders require, so I do not have to worry about cooler air causing more condensation.
The Materials You Need (and Do Not Need)
I get asked for my gear list all the time. You do not need anything expensive. I use a plastic storage tub from a big-box store, the clear ones with latching lids. I drilled four small holes on each side of the tub, and I covered those holes with pieces of microfiber fabric held by duct tape. That provides passive ventilation without letting dust in. For the active fan, I bought a cheap 120mm USB fan that was meant to cool a laptop. It draws almost no power. I mounted it on the inside of the lid, blowing downward at a gentle angle. I did not even use a timer at first. I just plugged it in for 6 hours a day. Now I have it on a smart plug that cycles it for 15 minutes every hour. Total cost for the ventilation setup was about $25. That is a tiny price compared to losing a rare plant.
When You Still Need a Fungicide
I want to be clear. Ventilation fixes the root cause. But if you already have a heavy mold outbreak, you might need to remove the worst patches manually. I used a cotton swab dipped in 3% hydrogen peroxide to dab the mold spots directly. That killed the spores without harming the plant tissue. I did not pour it on the soil. I just dabbed. Then I improved the ventilation. The mold did not survive the double attack. If you use a commercial fungicide, make sure it is labeled safe for carnivorous plants. Many are too harsh and will burn the leaves. I do not recommend them unless the mold is on the plant itself and not just the substrate.
What If You Keep Seeing Mold Even After Ventilation?
This is a red flag. It means your substrate is the source. Throw it away. I know it hurts. I have thrown away months old moss because it was saturated with spores. Do not sterilize it. Just discard it. Start with fresh live moss and a clean tank. Wipe the glass with a diluted bleach solution (1 part bleach to 9 parts water) and let it air dry completely. Then set up the ventilation from day one. That is the only way to guarantee a clean start. I have done this twice, and it worked both times.
The Final Weeks of Observation
To be honest, the first week of my ventilation adjustment was nerve-wracking. The plants looked slightly droopy because the air was moving. I almost turned the fan off. But I resisted. By day 10, the leaves had firmed up. They adapted to the airflow. The surface of the moss started to grow new green shoots, which is a sign of health. And the smell, did I mention the smell? A closed terrarium develops a musty, earthy smell. That smell disappeared by day 6. It was replaced by a neutral, clean smell. That is the best indicator I know that the airflow is working. If you smell mustiness, open the lid. trust me.
Common Questions From Beginners
I get a lot of questions about this exact topic, so I will answer the top three here.
Can I use a fan all the time? You can, but you do not need to. In fact, running a fan continuously at high speed can dry out the leaves of delicate highland seedlings. Use a timer. Fifteen minutes every hour is the sweet spot for my setup. If your leaves start to look translucent at the edges, you are blowing too hard. Reduce the on-time.
Will a gap in the lid let in pests? It can. That is why I use the mesh fabric cover over the gap. It blocks fungus gnats and fruit flies. But honestly, fungus gnats are more of a problem if your substrate is too wet. Once you fix the ventilation, the top layer dries out, and the gnats will not breed there. So a mesh cover is a nice safety net, but the airflow is the main deterrent.
How do I know if my humidity is too low? Look at the tips of the leaves. If they are showing brown crisping edges that seemed to happen overnight, you are too low. Also, the moss will start to turn white and brittle on the surface. If that happens, mist the moss lightly and close the gap a bit. Ventilation is about balance, not deprivation.
One Last Piece of Honest Advice
I remember the day I almost gave up. I had a rare N. jacquelineae cutting that I had paid a lot for. It had developed a black spot at the base. I thought it was doomed. I was about to throw it away when I decided to implement the ventilation changes I have described here. I also cut off the black part with a sterilized blade. The cutting survived. It now has three healthy leaves and two roots. That was the moment I understood that mold control is not about spraying poison. It is about keeping the environment moving.
If you are reading this and your terrarium looks like a foggy, spore-ridden jungle, take a deep breath. Close your eyes for a moment. Then open the lid just a crack. Place a small fan nearby. Wait one week. Be patient. Do not add water. Do not add chemicals. Just let the air flow. I promise you will see a change. The mold will stop expanding and begin to dry out. Your plants will breathe again. And you will have finally solved the ventilation puzzle. It only took me two weeks to prove it. I wish someone had told me this on day one. Now they have.





