 bluename
How to Repot Rooted Nepenthes Into Larger Pots for US Home Growers
If your Nepenthes has outgrown its current pot, you need to know how to repot rooted Nepenthes into larger pots before roots spiral and rot. The honest answer is this: wait until roots fill 80% of the current container, then move up only 1 to 2 inches in pot diameter, and never repot during winter dormancy or right after a big feed. I learned that the hard way. Two years ago, I yanked a healthy ventricosa out of a 4-inch pot, shoved it into an 8-inch ceramic bowl, and watched it sulk for months. The root ball stayed soggy, the lower leaves yellowed, and I almost lost the whole plant. So let me save you from that mistake. I will walk you through exactly what I do now, step by step, with the timing, the soil mix, and the two-week recovery routine that works.
Why Repotting Rooted Nepenthes Matters More Than You Think
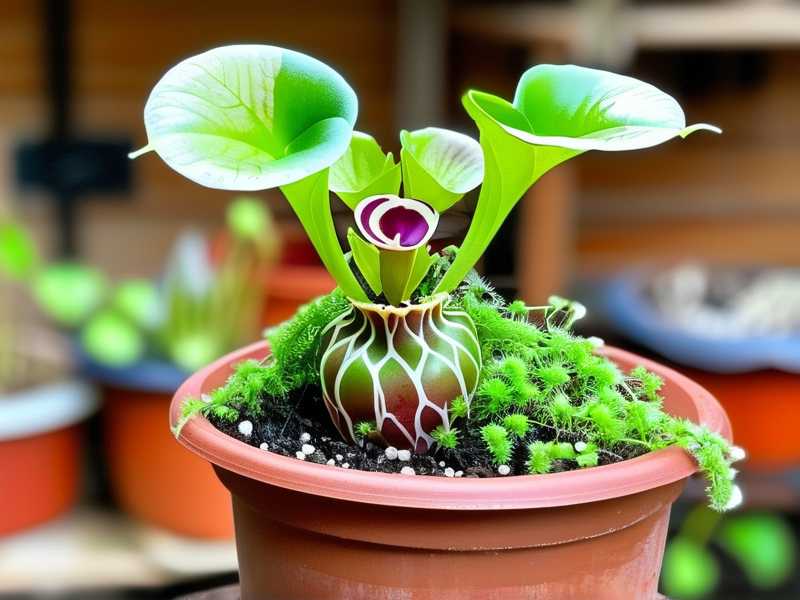
Many US home growers treat Nepenthes like ordinary houseplants. They water on a schedule, use generic potting soil, and repot whenever the plant looks "big." That is a recipe for disaster. Nepenthes are tropical pitcher plants with delicate root systems that need airflow, moisture, and stability. When roots are cramped, they cannot uptake water efficiently. When roots are too loose in a giant pot, they suffocate in wet media. The sweet spot is a snug pot with fast-draining mix.
I have kept Nepenthes for six years now. I have killed three plants before I figured out the rhythm. The first one died from root rot because I used a pot with no drainage holes. The second one died because I repotted in mid-July during a heatwave and the roots cooked. The third one died because I split the root ball too aggressively and left it bare-rooted for an hour. So trust me, this process is not just about moving dirt around. It is about understanding the plant's biology.
The 3 Deadly Mistakes New US Growers Make
Before I give you the exact steps, let me list the three most common errors I see in Facebook Nepenthes groups and Reddit threads. These are the killers.
Mistake One: Overwatering After Repot
I cannot stress this enough. 90% of indoor plants die from overwatering. Nepenthes are even more sensitive because they are epiphytes in the wild. Their roots need oxygen. After repotting, the root hairs are damaged. If you drench the new media immediately, you create an anaerobic environment. The roots drown. The leaves wilt even though the soil is wet. That is the classic false recovery.
What I do instead: I moisten the fresh sphagnum moss or perlite mix before potting. I lightly water the plant once after repotting, just enough to settle the media. Then I wait 4 to 5 days before watering again. The top inch of moss should feel barely damp. Not wet. Not dry. Just a little cool to the touch.
Mistake Two: Wrong Light After Repot
People assume more light equals faster recovery. That is wrong. Freshly repotted Nepenthes need shade. The roots are stressed. The leaves cannot photosynthesize efficiently. If you put the plant under direct grow lights or a south window, the leaves will scorch and the pitchers will blacken.
I used to move my repotted plants straight back to my bright LED shelf. Bad idea. The next morning, the newest leaf had brown crispy edges. The plant went into shock for three weeks. Now I keep repotted Nepenthes in bright indirect light for 7 to 10 days. I use a curtain or move them to an east-facing windowsill. After the new roots establish, I slowly reintroduce stronger light over another week.
Mistake Three: Using the Wrong Pot Material
Plastic is fine. Ceramic is risky. Terracotta is terrible for Nepenthes. Terracotta wicks moisture away from the media, which sounds good, but it also wicks moisture from the roots. The root zone dries unevenly. Plus terracotta pots are heavy and hard to move. I used a glazed ceramic pot once because it looked pretty. The glaze prevented evaporation, so the bottom half of the media stayed swampy. The roots rotted silently inside.
Stick with plastic nursery pots or mesh pots. I prefer clear plastic cups with holes drilled in the bottom. You can see the root growth through the sides. That makes it easy to know when to repot again. And they are cheap. I buy a pack of 50 on Amazon for like ten bucks.
When Exactly Should You Repot a Rooted Nepenthes?
Timing is half the battle. Here is my rule of thumb. I only repot when the weather is mild. Spring and early summer are best in most of the US. The temperatures are between 60°F and 80°F. Humidity is naturally higher. The plant is in active growth mode. Avoid repotting in winter when growth slows down. Avoid repotting during a heatwave. Avoid repotting within two weeks after the plant has flowered or produced a new pitcher.
I also look for visual clues. If roots are poking out of the drainage holes, that is a sign. If the media dries out within 24 hours after watering, that is another sign. If the plant stops producing pitchers even with proper light and humidity, that is a subtle sign. But do not panic if the roots are not totally rootbound. Nepenthes actually prefer being slightly snug. They bloom better when the roots are a little cramped. So wait until the plant genuinely needs it.
Step-by-Step Guide to Repotting Rooted Nepenthes
Here is my exact routine. I have refined this over years of trial and error. Follow these steps and your plant will thank you.
Step 1: Gather the Right Supplies
You will need a new pot that is 1 to 2 inches wider in diameter than the current one. You will need fresh sphagnum moss or a mix of perlite and orchid bark. You will need sharp sterilized scissors or pruning shears. You will need a spray bottle filled with distilled water. And you will need gloves if you are sensitive to plant sap.
I do not reuse old media. I tried that once to save money. The old media had broken down and turned into sludge. The roots suffocated. Now I always use fresh, high-quality sphagnum moss. The long-fiber Chilean kind is my favorite. It holds moisture but still drains well.
Step 2: Pre-Moisten the New Media
This is a step many people skip. If you put dry sphagnum moss into a pot, it repels water. Then when you water the plant, the water just runs down the sides and out the bottom. The root ball stays bone dry. That is a death sentence.
Soak the sphagnum moss in distilled water for 15 minutes. Squeeze it out gently so it is damp but not dripping. If you are using perlite or bark, mist them lightly until they are just moist. Then mix everything together. The consistency should be fluffy, not compacted.
Step 3: Gently Remove the Plant from Its Old Pot
Turn the pot upside down while supporting the base of the plant with your other hand. Tap the sides of the pot lightly. The root ball should slide out as one piece. Do not yank on the stem. I always talk to my plant a little. I know that sounds silly, but it keeps my hands steady.
If the roots are stuck to the pot, run a knife around the inside edge. Do not pull hard. If the roots are growing through the drainage holes, snip them off cleanly with the scissors. Damaged roots are fine as long as they are clean cuts. Torn roots invite infection.
Step 4: Inspect the Root System
This is the moment of truth. Look at the roots. Healthy roots should be plump, white or light tan, and firm to the touch. Dead roots are brown, mushy, or papery. If you see rotten roots, trim them off with sterile scissors. Do not be afraid to cut away a lot. The plant will grow new roots faster if the old ones are healthy.
I once repotted a Nepenthes that had black slimy roots. I almost gave up on it. But I trimmed away about 40% of the root mass, sprayed the remaining roots with diluted hydrogen peroxide, and repotted it. Within a month, it had new growth. So do not panic. Just be ruthless.
Step 5: Position the Plant in the New Pot
Hold the plant in the new pot so the top of the root ball is about one inch below the rim. The stem should sit upright. The old soil line should match the new soil line. Do not bury the stem deeper than it was before. That is a common mistake. Burying the stem too deep causes stem rot.
Slowly add the damp media around the roots. Gently tap the pot to settle the media. Do not press down hard. You want air pockets around the roots, not a dense brick. When the pot is full, lift the plant by the pot and give it a few gentle shakes to settle everything.
Step 6: Water and Provide Post-Repot Care
Use a spray bottle to mist the top of the media. Then water lightly with distilled water until a small amount drains from the bottom. Do not soak the entire pot. Wait 4 to 5 days before watering again.
Place the plant in bright indirect light. Keep it out of direct sun for at least a week. Increase humidity if you can. I use a clear plastic bag with holes punched in it. I drape it over the pot for the first week. That creates a mini greenhouse. The roots recover faster with high humidity.
My Two-Week Observation: What Actually Happens
This is the part you will not find in generic guides. I tracked a Nepenthes gracilis over two weeks after repotting. Here is what I saw.
Days 1-3: The plant looked fine. The leaves were firm. The pitchers stayed green. But the roots were silent. No new growth visible at the drainage holes. I resisted the urge to water heavily. I only misted the leaves morning and evening.
Days 4-6: The top layer of media started to dry out. I watered lightly again. I noticed the newest leaf had a slight glossier texture. That is a subtle sign of root activity. The plant was rehydrating itself.
Day 7: I removed the plastic bag. I moved the plant to my grow tent with moderate LED light. The leaves adjusted without wilting. I saw the first tiny white root tip poking through the side of the clear plastic pot. That was the start.
Day 10: The root tips were more visible. The media was being colonized. I watered again, this time a slightly deeper soak. The plant responded well. The newest leaf was fully expanded and firm.
Day 14: The plant had anchored itself. I gave it a gentle tug, and it did not budge. New roots were visible all around the drainage holes. I moved it to its permanent spot under brighter light. The pitchers began to swell slightly. Recovery was complete.
During that two weeks, I made one mistake. On day 9, I got impatient and added a diluted fertilizer mix to the water. The concentration was too high. The leaf tips turned slightly brown. I flushed the media with pure distilled water immediately. The plant recovered, but the lesson stuck. Do not fertilize newly repotted Nepenthes for at least 30 days.
How to Water Correctly After Repotting
After the first two weeks, you can shift to normal watering habits. But even then, remember that Nepenthes are not like typical houseplants. They like consistent moisture but not standing water. I water mine every 3 to 5 days, depending on the season. I always check the top inch of media first. If it feels damp, I wait. If it feels slightly dry, I water.
I use only distilled water, rainwater, or reverse osmosis water. Tap water in most US cities is too high in dissolved minerals. Over time, those minerals build up in the media and burn the roots. I learned this after my second plant died with crispy brown leaf edges. The water in my city had a pH of 8.2. My Nepenthes wanted acid around 5.5 to 6.0. Once I switched to rainwater, everything changed.
Choosing the Right Pot Size
This is where I see the most confusion. Bigger is not better. When you repot rooted Nepenthes into larger pots, you only increase the diameter by 1 to 2 inches. If you jump too big, the media stays wet for too long. Roots rot before they even grow into the new space.
For a plant in a 4-inch pot, go to a 5-inch or 6-inch pot. For a plant in a 6-inch pot, go to a 7-inch or 8-inch pot. I have a 10-inch pot for my largest N. truncata, but that plant has been in the same pot for three years. It is happy. It only needs repotting every 2 to 3 years.
What Media Mix Is Best for US Home Growers?
There is no single perfect mix. But I have found a reliable formula. Use 60% long-fiber sphagnum moss and 40% perlite. That mix holds moisture without suffocating the roots. If you live in a humid state like Florida, reduce the sphagnum to 50% and increase perlite to 50%. If you live in a dry state like Arizona, increase sphagnum to 70% for better water retention.
Do not use regular potting soil. It contains compost and fertilizers that burn Nepenthes roots. Do not use garden soil. It is too dense and likely contains pests. Stick with inert media. Fern fiber, orchid bark, and tree fern fiber also work. I prefer sphagnum because it is forgiving.
Light Requirements After Repotting
As I mentioned earlier, freshly repotted plants need shade. But after the two-week recovery, you can increase light gradually. Nepenthes love bright indirect light. A north-facing window works for some species. An east-facing window is better. I use LED grow lights for 12 to 14 hours a day. My plants produce plenty of pitchers.
If your plant is not producing pitchers after repotting, check the light first. Too little light means lush green leaves but no pitchers. Too much direct sun means yellow leaves and burnt tips. In most US homes, a grow light is necessary, especially in winter.
Humidity and Temperature Considerations
Nepenthes are tropical plants. They prefer humidity above 60%. In many US homes, especially in winter, humidity drops to 30% or less. That makes recovery longer. I run a small humidifier near my plants. I also group them together to create a microclimate.
The ideal temperature range is 70°F to 85°F during the day and 60°F to 70°F at night. The temperature difference between day and night is important. It triggers pitcher growth. If your house is kept at a constant 72°F, your plant will still survive but may slow down.
What About Fertilizer and Feeding After Repotting?
Do not feed your plant for at least a month after repotting. The roots are too sensitive. After 30 days, you can resume feeding with small bugs like crickets or dried bloodworms. I place one or two bugs in each pitcher. That is enough. Never put fertilizer directly into the pitchers. It will burn the pitcher walls.
People often ask if Nepenthes need fertilizer at all. The answer is no, not if you provide bugs. The plant gets nutrients from the insects. If you do not have bugs, you can use a very diluted orchid fertilizer on the leaves. But I recommend waiting until the plant is fully established.
Using RHS and AHS Guidelines
I always appreciate solid horticultural backing. The Royal Horticultural Society provides excellent care guides on tropical plants. You can check their recommendations at RHS for general Nepenthes care. The American Horticultural Society also has useful tips for US growers. Visit AHS for climate-specific advice. These sources confirm that low-nutrient media and high humidity are essential.
Common Problems After Repotting (And How I Fixed Them)
Let me share a few more real issues I ran into.
Problem: The plant wilted despite wet media. That happened because the roots had not adjusted yet. It was not overwatering. It was underwatering at the root level. I fixed it by misting the leaves more frequently and raising humidity. I did not water the media more.
Problem: The tips of the leaves turned black. That was root shock from rough handling. I trimmed the blackened tips with sterile scissors. The plant grew new leaves within weeks. The blackened tips were cosmetic damage only.
Problem: The media started smelling sour. That is anaerobic bacterial growth. I caught it early because the smell was distinct. I immediately repotted again into fresh, airier media. I added extra perlite. The plant survived because the roots had not rotted yet.
Problem: The plant produced no pitchers for two months. This is normal after a major repot. The plant is focusing energy on root growth. I did not panic. After the third month, new pitchers started forming. Patience is key.
How to Know When to Repot Again
You typically do not need to repot more than once a year. If you follow the 1-to-2-inch increase rule, the plant will be happy for 18 to 24 months. Signs that you need to repot again include roots circling the bottom of the pot, media breaking down into fine particles, or water rushing through the pot immediately. That last sign means the media has lost its structure.
I keep a small notebook. Every time I repot, I write down the date, the pot size, and the media mix. That helps me track the plant's cycle. It sounds nerdy, but it works.
Final Tips for US Home Growers
If you live in a cold northern state, watch out for dry indoor air in winter. Use a humidity tray under the pot. If you live in a hot southern state, watch for overheating in a greenhouse. Provide shade cloth to keep temperatures below 90°F.
Do not repot a plant that is currently producing a large pitcher. The energy should go to the pitcher first. Wait until the pitcher has fully matured or started to brown.
Always use clean tools. I sterilize my scissors with rubbing alcohol before and after each plant. This prevents spreading fungal spores between pots.
And one more thing. Buy a moisture meter. It costs like fifteen bucks. I rely on mine because my finger touch is not always accurate. The meter tells me the real moisture level at the bottom of the pot. That alone saved my fourth plant.
Frequently Asked Questions
Can I repot a Nepenthes with an active pitcher?
Yes, you can, but it is not ideal. The plant will likely drop the pitcher as it redirects energy to root recovery. If you want to keep the pitcher, delay repotting until the pitcher has matured.
Should I remove old dried media from the roots?
You should gently shake off loose media, but do not try to remove every single particle. The roots are fragile. Clean off only the mushy or decomposed parts. Leave the healthy rootbound media intact.
How long does it take for a repotted Nepenthes to show new growth?
Most plants show visible root growth within 7 to 14 days. New leaf growth takes 3 to 6 weeks depending on the season and light. Some slow-growing species like N. attenboroughii may take longer. Patience is part of the hobby.
In the end, repotting rooted Nepenthes into larger pots is not complicated. It just requires attention to detail. I killed three plants before I got it right. Now I have a shelf full of thriving pitchers. You can do the same. Just be gentle, keep the media well-drained, and do not overwater. Your plant will reward you with gorgeous pitchers for years.





