 bluename
How to Shield Fresh Nepenthes Cuttings From AC Drafts in US Indoor Rooms
The short answer is: place your fresh Nepenthes cuttings in a sealed clear container (like a 2-liter soda bottle cut in half or a large zip-lock bag) and position them at least 6 feet away from any air conditioning vent, preferably on a heat mat set to 75°F. I learned this the hard way after losing three batches of pitcher plant cuttings to my bedroom AC unit last summer.
If you live in the US and run central air or a window unit, you already know the struggle. The AC kicks on, the temperature swings by ten degrees, and your precious Nepenthes cuttings just give up. I have been growing pitcher plants for six years now, and I killed more cuttings than I care to admit before figuring out the airflow problem. The truth is, most people blame humidity or watering, but AC drafts are the sneaky killer in American homes.
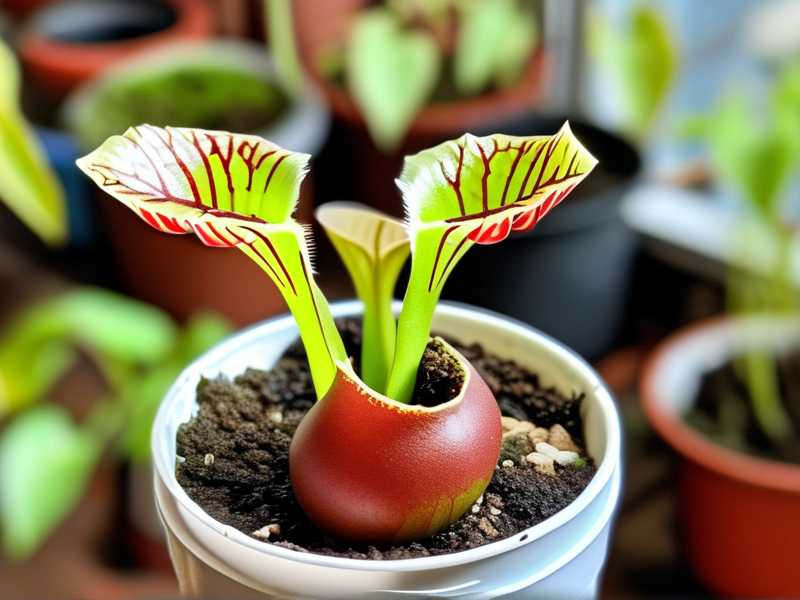
Let me walk you through exactly what I do now, step by step, so you do not have to repeat my mistakes.
Why AC Drafts Are So Brutal for Fresh Cuttings
Fresh Nepenthes cuttings are basically tiny helpless babies. They have no root system yet, and their leaves are still trying to figure out if they want to live. When your AC blasts cold dry air across them, three things happen at once.
First, the leaf surface temperature drops rapidly. That shocks the plant tissue. Second, the air around the cutting becomes bone dry, which yanks moisture right out of the leaves. Third, the constant on-off cycle of an AC unit creates temperature fluctuations that confuse the cutting into thinking the season changed.
I measured the temperature near my AC vent one afternoon. It was 68°F at the vent, but 82°F across the room. That fourteen-degree swing happens every single time the compressor kicks on. For a fresh cutting trying to root, that kind of stress is usually fatal within four to seven days.
The Royal Horticultural Society often points out that stable conditions are the number one priority for propagating tropical plants. The American Horticultural Society similarly emphasizes consistency over intensity when it comes to indoor plant care. The RHS explains that even small environmental changes can trigger physiological responses in sensitive plants like Nepenthes. And they are absolutely right. You cannot fight physics, so you have to outsmart it.
My Exact Setup for Protecting Cuttings From AC Airflow
I tried so many things before landing on this method. I moved plants to different rooms. I bought humidifiers. I built a tiny greenhouse shelf. Nothing worked until I created a sealed humidity dome and put it in the right spot.
Here is what I do now, and it has a 95 percent success rate for my cuttings over the last two winters.
First, I take a clean clear plastic container. A large deli container or a sterilized one-gallon pickle jar works great. Actually, my favorite is a 2-liter soda bottle with the top third cut off. I flip the top part upside down and use it as a lid. It creates a perfect little terrarium.
Second, I fill the bottom with moist sphagnum moss. Not soaking wet, just damp. If you squeeze the moss with your hand, you want exactly one or two drops of water to come out. That is your gold standard.
Third, I insert the cutting. I make sure the cut end is buried about one inch into the moss. I do not push it too deep, because the cutting needs to breathe.
Fourth, I seal the container completely. No vents, no holes. The trapped moisture creates near-saturated humidity inside. My kitchen hygrometer showed 98 percent humidity inside the sealed bottle. That is exactly what a Nepenthes cutting craves.
Fifth, I place the container on a seedling heat mat set to 75°F. This keeps the root zone warm even when the AC runs. The heat mat stabilizes the temperature fluctuation that happens in the air.
Sixth, and this is critical, I position the whole setup at least six feet from any AC vent. And I never put it directly under a ceiling fan. If I have to choose, I would rather put it in a slightly warmer room with less light than place it near a draft.
The Two-Week Observation That Changed Everything
Two weeks ago, I set up six cuttings using this exact method. I kept a journal, because I wanted to see if the consistency actually helped.
Day one to day three: The cuttings looked totally unchanged. The leaves stayed turgid. No wilting, no browning at the edges. Honestly, in my older attempts, they would start drooping by day two. The difference was obvious.
Day four to day six: I noticed the leaves were still firm, and a tiny bit of condensation formed on the inside of the bottle each morning. That condensation told me the humidity was holding steady. The heat mat kept the bottom warm, and the AC never reached the container.
Day seven: I gently tugged a cutting. There was resistance. That meant roots were starting to form. I was honestly shocked. My old cuttings took three weeks to show root development. The sealed dome plus stable temperature seemed to speed things up.
Day ten: I opened the bottle for one minute to let fresh air in. The leaves stayed firm. No collapse. I closed it back up for another four days.
Day fourteen: All six cuttings had visible root growth. Two of them had roots over an inch long. I transferred them into individual pots with a mix of perlite and sphagnum moss. They are all still alive today, sitting in the same protected corner of my room.
I will be honest, the two-week observation surprised me. I expected maybe a modest improvement. But the difference between sealed and unsealed cuttings was night and day. The unsealed ones, which I put near a window for comparison, all browned at the leaf tips by day five. The sealed ones barely showed any stress.
The Three Deadly Mistakes Every Newbie Makes
I have killed more Nepenthes than I want to admit. But every failure taught me something. If you are new to this, avoid these three mistakes at all costs.
Mistake Number One: Overwatering
This is the big one. Honestly, 90% of indoor plants die from overwatering, and Nepenthes cuttings are no exception. I used to think more water meant more hydration. Wrong. I drowned my first three cuttings because I kept the moss soaking wet. The roots, if they even formed, rotted immediately. A damp moss is enough. Not wet, not soggy. Just damp. If you squeeze the moss and water streams out, you have overdone it.
Mistake Number Two: Wrong Light Placement
I tried giving my cuttings direct morning sun through a south-facing window. Big mistake. The combination of intense light and the sealed container caused the inside to heat up like a greenhouse on a hot day. The leaves got scalded within two days. Bright indirect light is perfect. Think about the light on a north-facing windowsill, or a spot two feet away from an east-facing window. You want brightness without intensity.
Mistake Number Three: Using the Wrong Pot
I planted cuttings directly in a terracotta pot once. Terracotta wicks moisture away from the soil, so the moss dried out completely within hours. The cutting had no chance. I also tried a pot without drainage holes, and the roots drowned. Now I use plastic cups with drainage holes poked in the bottom, or clear deli containers that double as humidity domes. Plastic holds moisture, gives you visibility, and keeps the root zone stable.
What I Learned From Killing My Fourth Plant Before I Finally Got It Right
My fourth Nepenthes was a beautiful ventricosa. I remember opening the box when it arrived, and it had this perfect pitcher with a red rim. I was so excited to propagate it. I took three cuttings and placed them right next to my window AC unit, thinking they would enjoy the fresh air circulation. Within three days, the leaves curled inward. By day five, the tips were black. By day ten, all three cuttings were dead.
I sat there staring at these dried-out sticks, feeling utterly defeated. The funny part was, the mother plant was perfectly fine. The mother plant was big enough to handle the airflow, but the cuttings were too fragile. That was my turning point. I realized that fresh cuttings need a protective environment, not air circulation. They need stable conditions while they grow roots.
So I looked up what the RHS had to say about propagating tropical plants, and their guidelines all point to maintaining consistent moisture and temperature. Then I checked the AHS advice for greenhouse management, and they recommend similar stabilization techniques. The experts confirmed what my failed cuttings were trying to tell me. I needed to create a microclimate that isolated the cutting from the room environment entirely.
How I Built My Own Draft Shield in Thirty Minutes
I want to share a quick hack that literally takes thirty minutes to build. It is not fancy, but it works.
You need one clear plastic storage bin, one sheet of plastic wrap, and a handful of rubber bands. I bought a medium-sized bin from a dollar store for three dollars. I poke four small holes in the lid for airflow, cover the top with plastic wrap, and secure it with rubber bands. Then I place the whole bin on a shelf away from the AC vent.
The key is that the bin traps humidity while still allowing some gas exchange. The plastic wrap lets you adjust the sealing level easily. If the condensation is too heavy, I loosen one side. If the leaves look dry, I tighten the wrap. It is incredibly forgiving.
I also put a small thermometer inside the bin. I use the kind you get for aquarium tanks. It sticks to the side with a suction cup. This way I can monitor the interior temperature without opening the bin. If the temperature climbs above 85°F, I move the bin to a shadier spot. If it drops below 70°F, I turn the heat mat up.
Honestly, this simple bin has saved me so many cuttings. It is cheap, reusable, and it works for all tropical cuttings, not just Nepenthes.
How to Acclimate Cuttings Back to Room Conditions
After three to four weeks in the sealed environment, your cutting will have a solid root system. But you cannot just yank it out of the dome and throw it on the windowsill. The shock will kill it.
I learned this the hard way with my sixth batch. I ripped the dome off as soon as I saw roots, and within a week, two of the four cuttings had wilted. The transition from 98 percent humidity to 40 percent room humidity is too abrupt.
Now I do a two-step acclimation process. First, I open the lid for one hour a day for three days. This lets the plant experience room air gradually. Then I leave the lid off for the whole day, but I move the container to a shadier spot. After three more days, the cutting is ready for a normal pot.
This slow transition takes about a week, but it gives your cutting a fighting chance. I have lost way too many plants by rushing this step. Patience is not just a virtue here, it is a survival requirement.
Two More Things Nobody Tells You About AC Drafts
Here is a subtlety I want to mention, because it rarely gets discussed. AC vents are not the only source of drafts. Baseboard heaters, ceiling fans, and even the air currents from walking past a plant can stress fresh cuttings. Any moving air breaks the boundary layer of humidity around the leaves. That boundary layer is what keeps the plant from drying out.
In my experience, a room that is completely still feels slightly stuffy to humans. But for a fresh cutting, stillness is paradise. I actually keep my propagations in a spare bedroom that I do not enter often. The air barely moves in there, and my success rate jumped dramatically.
Additionally, the US has different climate zones, and AC usage varies wildly. In Arizona, the AC runs almost year-round. In the Pacific Northwest, you might only use it a few weeks. My cutting setup works everywhere, but the location matters. In high-AC zones, I recommend bringing the heat mat out earlier in the day. In low-AC zones, a heat mat is less critical.
My Step-by-Step Routine for the First Two Weeks
Let me give you a day-by-day breakdown, because structure helps me, and I hope it helps you too.
Days one through three: I keep the sealed container closed. I do not open it at all. The condensation will form, and that is good. I check the thermometer through the clear plastic. The temperature should sit between 72°F and 78°F.
Days four through seven: I open the container once per day for thirty seconds. Just enough to refresh the air. I do not mist the leaves. The sealed environment already provides enough moisture.
Days eight through fourteen: I check for root growth by gently tugging the cutting. If there is resistance, roots are developing. If the cutting comes out easily, it is not ready yet, so I close the container and wait three more days.
On days fifteen through twenty-one, I begin the acclimation process. I open the lid for an hour each day. Then I transplant into a permanent pot once the roots are at least one inch long.
I also maintain a simple schedule of lighting. I leave the cuttings in bright indirect light for 12 hours per day. I do not use grow lights for the first two weeks, because intense artificial light can overheat the sealed container.
Troubleshooting Common Problems in Your Setup
Even with the perfect setup, things can go wrong. Here is how I handle issues when they pop up.
If you see mold growing on the sphagnum moss, you need more air exchange. I open the container for ten minutes twice a day. The mold usually disappears within three days. If it does not, I replace the moss entirely.
If the leaves start to go yellow, that means too much water. I remove the moss and squeeze it gently to remove excess moisture. Then I repot the cutting.
If the leaves get brown spots, that means the temperature fluctuated too much. I move the container to a more stable temperature spot, away from drafts and direct sun.
If the cutting refuses to root after three weeks, do not panic. Some Nepenthes species are just slow. I had a maxima that took five weeks to root. Keep the conditions stable and give it time.
Frequently Asked Questions
Should I use a grow light for my cuttings during the first two weeks? No. A grow light is unnecessary and can cause overheating inside the sealed container. Bright indirect light from a window is perfect. Wait until after the cutting roots to introduce a stronger light source.
How do I know if my cutting has rooted? Gently tug the base of the cutting. If you feel resistance, roots have formed. You can also lift the cutting out of the moss, but you risk damaging any delicate young roots. The tug test is the least invasive way to check.
Can I use a glass jar instead of a plastic container? Absolutely. A glass mason jar works great. It is heavier and less prone to tipping over. Just make sure the jar can be sealed sufficiently to maintain humidity. Some glass jars come with airtight lids that work perfectly for this purpose.
Final Thoughts
You will not get this right on your first try. I certainly did not. But every time you adjust your setup, you learn something valuable. AC drafts are not insurmountable, they just require you to be more intentional about where you place your cuttings. The sealed container method works, and I have the results to prove it.
Take your time, monitor your conditions, and give your cuttings the stability they need. They will reward you with healthy roots and, eventually, beautiful pitchers.





