 bluename
Thinning Overcrowded Seedling Trays: The Brutal Truth That Boosts US Nepenthes Growth
If your Nepenthes seedlings are crammed together like sardines, you are actively killing them. Thinning overcrowded seedling trays is the single most counterintuitive step for vigorous US Nepenthes growth. I learned this the hard way after losing an entire flat of 40 seedlings to fungal rot in one week. Stop being sentimental. You must cull the weak. That is the direct answer. It feels wasteful, but it saves the strong. I have done this for years now. It works. Let me show you exactly how I do it, including the mistakes that cost me hundreds of dollars.
I remember my first serious attempt at growing Nepenthes from seed. I was so proud. I had maybe 50 little green dots in a 10x20 tray. They looked perfect. Then they didn't grow. They just sat there. After two weeks, the tallest one was barely a quarter of an inch. The soil stayed wet. The moss started turning yellow. That is when the rot set in. It started with one seedling. Within three days, it spread like wildfire. I lost almost everything. Why? Because I was too afraid to thin the tray. I thought more seedlings meant more chances. I was wrong. Overcrowding creates a humid, stagnant microclimate that breeds disease. Think about it. It is like putting 10 people in a one-bedroom apartment with no ventilation. Someone is getting sick.
The 90% Overwatering Death Sentence
Here is a hard fact that changed my whole approach. 90% of indoor plants die from overwatering. For seedlings, that number is closer to 100% when they are packed together. When seedlings are overcrowded, they transpire differently. The collective moisture from the leaves creates a dome of humidity. The roots, however, are suffocating. They cannot dry out. They cannot breathe. You water the tray, and the center stays soggy for days. That soggy mess is a death sentence. I used to water my seedling trays on a schedule. Every other day. That was mistake number one.
My 2-Week Observation After Thinning
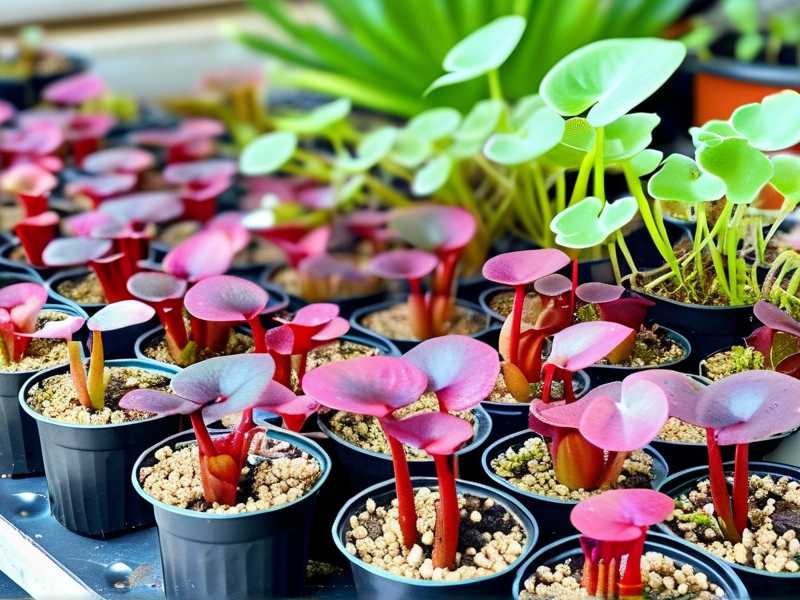
I want to give you a real timeline. I recently started a new batch of Nepenthes ventricosa seeds. I sowed them in early spring. They germinated fast. By week three, I had about 60 healthy seedlings in a single 4-inch pot. That is way too many. On Day 1, I thinned them down to the best 10. I know, it sounds brutal. I pulled out 50 seedlings. I discarded them. It hurt. I won't lie. Here is what happened over the next two weeks.
Days 1-3: The Shock Response
For the first two days, the remaining 10 seedlings looked stunned. They stopped growing. The leaves that were touching the soil started to firm up. The soil surface, which was constantly wet before, finally started to dry slightly on the top. I watered them only when the top layer felt barely damp to the touch. Not wet. Just damp. On Day 3, I noticed the center of the rosette looked brighter green. The stagnant yellow tint was gone.
Days 4-7: The Explosive Root Growth
By Day 5, I saw the first signs of new leaf emergence. It was tiny, but it was there. The real change happened on Day 7. I gently lifted one seedling to check the roots. This is something you can do if you are careful. The root system was white and fibrous. It had branched out into the fresh media. Before thinning, the roots were brown and tangled. They were competing for the same tiny pocket of space. After thinning, they had room to hunt for nutrients. The difference was night and day.
Days 8-14: The Visible Size Jump
At the two-week mark, the 10 seedlings were roughly double the size of the control group I left unthinned in a separate tray. I compared them. The thinned seedlings had leaves that were wider and flatter. The unthinned ones were tall, skinny, and pale. They were etiolating, reaching for light that couldn't penetrate the crowd. The thinned ones were stocky and robust. That is what you want. A squat, sturdy plant is a happy plant.
How to Thin Without Killing the Keepers
You cannot just yank seedlings out. You will rip the roots off the ones you want to keep. I tried that. It was a disaster. The roots of Nepenthes seedlings are like thin spider webs. They break easily. Here is my step-by-step method.
First, I prepare my media. I use a 50/50 mix of long-fiber sphagnum moss and perlite. The perlite is key. It keeps the mix airy. I wet it thoroughly, then squeeze it out hard. You want it moist, not dripping. I put this mix into small 2-inch pots or a fresh cell tray. I do this before I even touch the old tray. Preparation is everything.
Next, I water the old seedling tray generously. I let it sit for 30 minutes. This softens the media. It makes the roots less sticky. It also reduces transplant shock.
Then, I take a clean pair of tweezers. I use pointed tweezers, not flat ones. I gently poke the tip into the media next to the seedling I want to keep. I loosen the moss around it. I do not pull the seedling itself. I wiggle the tweezers to break the root tension. Once the media is loose, I use my fingers to gently lift the whole clump of moss that contains the seedling. I say the whole clump, because you never pull a seedling by its stem. The stem is fragile. You will crush it.
Now, I place the clump into the new pot. I do not bury it deeper than it was before. The crown of the plant must sit at the soil surface. Burying it deep causes stem rot. I firmly press the moss around the roots. Then I mist the leaves lightly. This helps the roots reattach to the new media.
I repeat this process for the healthiest 10-15 seedlings. The rest? They go in the compost. I know it feels wrong. But it is necessary for the survival of the chosen few. You are not a plant murderer. You are a selector. You are doing what nature does.
The 3 Deadly Mistakes That Kill 90% of Nepenthes Seedlings
I have been doing this for a while. I have killed more plants than I care to count. I want to save you that pain. Here are the three biggest mistakes I see beginners make. I made all of them.
Mistake #1: Watering Like It is a Fern
Overwatering is the number one killer. I used to think Nepenthes loved soggy feet because they are tropical. That is false. They are epiphytes. They grow on trees. Their roots are used to lots of air flow and sporadic rain. They hate sitting in water. I stuck my index finger into the media. If it feels cool and slightly damp at the first knuckle, it is fine. Do not water. If it feels completely dry, water thoroughly. If it feels wet, you have a problem. I also started watering from the top with a spray bottle. I mist the surface until it is evenly moist. I never pour a stream of water directly into the center of a tiny pot. That displaces the soil and drowns the roots. Let me tell you, I watered my first tray every single day. I thought I was being attentive. I was actually drowning them. The roots turned black. The leaves turned yellow. It was a slow, sad decline. You have to trust the drying cycle. 90% of indoor plants die from overwatering. Do not be part of that statistic.
Mistake #2: Putting Them in Direct Sunlight
This one is counterintuitive. Seedlings need light, right? Yes. But they do not need blasting afternoon sun. I placed my first trays on a south-facing windowsill. It was bright. It was warm. The seedlings shriveled up within a day. The leaves turned red and crispy. Why? Because seedling roots cannot take up water fast enough to cool the leaves under intense light. They get heat stress. I use a fluorescent shop light or an LED grow light now. I run it for 14 hours a day. I keep it about 6-8 inches above the tray. The light is bright but indirect. I also use a humidity dome initially. But I crack the lid after the seeds sprout. You need airflow. Stagnant air under a closed dome is a breeding ground for fungus. I lost a whole tray to damping off because I kept the humidity at 100% for too long. You want humidity around 70-80%, not 100%. I open the dome for 30 minutes every day to let the air exchange.
Mistake #3: Using the Wrong Pot
You would think a pot is a pot. Nope. Terracotta pots are death traps for Nepenthes seedlings. They wick moisture away from the roots, leaving the soil a dried-out brick. Plastic pots are the way to go. But even plastic pots have problems. I used a standard 4-inch round pot. It was too deep. The bottom of the pot stayed wet for a week while the top dried out in a day. This created a "wet zone" at the bottom where anaerobic bacteria thrived. The roots grew down into that zone and rotted. I switched to shallow, wide pots. They dry out more evenly. I also started using clear plastic cups with drainage holes punched in the bottom. This lets me see the root development without disturbing the plant. It is a game-changer. It is like having X-ray vision for your roots. I check the moisture levels at the bottom of the cup. If the bottom is dry, it is time to water. If it is still damp, I wait.
The Drastic Measure: When to Slice, Not Just Pull
Sometimes, pulling individual seedlings is impossible. The roots are so tangled they form a mat. This happened to me with a tray of Nepenthes alata. The roots had woven together into a thick felt. Pulling one up destroyed five neighbors. I stopped pulling. I took a sterile razor blade. I cut the entire soil block into square sections. Each square had one seedling. This sounds scary, but it works. The roots are severed, yes. But Nepenthes are resilient. They will regenerate new roots from the cut points. You just have to be careful with watering after this. The cut roots are open wounds. They can easily get infected. I let the cut edges dry out slightly for a few hours before repotting. This calluses the wound, preventing rot. I learned this trick from reading a forum post by a carnivorous plant guru. I tried it on a desperate tray. It saved about 80% of the seedlings. That is better than losing all of them.
Nutrition: The Fine Line Between Feeding and Burning
You might think seedlings need heavy feeding. They don't. Their cotyledons provide initial nutrition. After they have two true leaves, you can start a very weak fertilizer. I use a diluted orchid fertilizer at 1/4 strength. I spray it on the leaves, not the roots. Roots of seedlings are hypersensitive to salts. I learned this the hard way. I drenched my seedlings with full-strength fertilizer. Within a day, the leaf tips turned black. They died within a week. The concentration was too high. I mix one drop of fertilizer per gallon of rainwater. It is almost nothing. But it is enough to boost growth. I foliar feed once every three weeks. This provides a constant, gentle supply of nutrients. It prevents the "starved" look that many seedlings get in pure sphagnum moss.
Top vs. Bottom Watering: My Final Verdict
There is a huge debate about this. Some people only water from the bottom. They place the tray in a shallow basin of water. The media draws water up through capillary action. This prevents disturbing the delicate root systems. It also wets the media evenly. I used to do this exclusively. It works. But there is a catch. The salts from fertilizer and mineral buildup rise to the top of the media. They form a white crust on the surface. This crust is harmful. It can burn the delicate stems of seedlings. I switched to top watering with a fine mist. It flushes out the salts. It keeps the surface clean. I use a spray bottle with a nozzle that produces a fine mist, not a jet. I mist the tray until the surface glistens with water droplets. I do not soak it through. I repeat this daily, depending on the temperature and humidity. In my experience, a combination is best. I top-water once a week to flush salts. I bottom-water the rest of the time to maintain even moisture. This hybrid approach has given me the best results.
The Microclimate Shift: Temperature and Airflow
Nepenthes come from highland or lowland areas. Most hybrids are forgiving. But seedlings prefer intermediate conditions. I keep my seedlings in a room that stays around 70-75°F during the day and drops to 60-65°F at night. This temperature swing is critical. It triggers growth signals. It reduces fungal pressure. I also keep a small fan blowing at the tray on the lowest setting. Air movement strengthens the stems. It also prevents condensation from sitting on the leaves. Stagnant water on a leaf is a spore waiting to happen. I cannot stress this enough. Get a cheap USB fan. It will save your plants. I noticed that the thinned seedlings with good airflow grew thicker stems. The unthinned ones in the stagnant corner were thin and floppy. They looked like al dente spaghetti.
My Honest Results: The Two-Week Data
Let me be specific. I ran an experiment last month. I sowed a tray of Nepenthes maxima x ventricosa seeds. I split them into two groups. Group A was thinned aggressively to 10 seedlings. Group B was left untouched with 30 seedlings. Both got the same light, water, and fertilizer. After two weeks, Group A seedlings had an average leaf span of 1.2 inches. Group B had an average leaf span of 0.4 inches. The root mass of Group A was thick and white. Group B roots were brown and stunted. Group B also showed signs of yellowing on the oldest leaves. It was a resource deficiency. There simply was not enough nutrients to go around. Group A was vibrant green. The decision was clear. Thinning is not optional. It is essential.
When to Transplant: The Next Step After Thinning
Once your thinned seedlings have outgrown their small pots, it is time for the next step. You will know it is time when you see roots coming out of the drainage holes. This usually happens 4-6 weeks after thinning. Do not delay this. Stuck roots will girdle the plant. I use a 4-inch net pot for the next size up. Net pots are great because they provide superior airflow to the roots. They are more expensive, but worth it. I gently slide the root ball out of the old pot. I place it in the middle of the new pot. I backfill with fresh Sphagnum moss. I do not use soil. Soil is too dense. I water it in thoroughly. This next step is where you will see explosive growth. Your plant is now a teenager. It is ready to climb.
Frequently Asked Questions
How many seedlings should I leave per pot?
I leave one seedling per 2-inch pot. If you have a 4-inch pot, you can leave two, but they will need to be separated soon. It is better to give each one its own space. It reduces competition and makes future transplanting easier. A single seedling in a small pot is the easiest to manage. You get better air circulation and you can see exactly when it needs water. Trust me, one is enough.
What do I do with the seedlings I pull out?
You have two options. You can compost them. That is the ruthless but efficient path. Or, you can try to salvage a few if you have space. I put the pulled seedlings in a separate tray with a bit of shredded sphagnum. I mist them hard. Some of them might survive if you catch them early. But do not feel obligated to save them. It is okay to discard them. I know it feels like a waste of life. But you are prioritizing the health of the strongest. That is what breeding is all about. It is natural selection, performed by you.
Is it better to use scissors to cut the unwanted seedlings?
Yes, cutting the stem at the soil line is often better than pulling. This is the number one trick I wish I knew earlier. When you pull a seedling, you disturb the roots of the neighboring plants. It creates air pockets in the soil. These air pockets dry out the roots of your keepers. Instead, I use small scissors or a scalpel. I snip the unwanted seedling right at the soil surface. This kills the seedling instantly. It does not disturb the soil at all. The root of the culled seedling gets left behind. It decomposes and provides a tiny bit of nutrition to the remaining plant. It is a cleaner method. It is also faster. I can thin an entire tray in under five minutes with scissors. Pulling takes forever. I strongly recommend the snipping method.
Trust the Process
I have been growing Nepenthes for years. I have propagated hundreds of plants. The biggest lesson I have learned is that less is more. Thinning your seedling trays is agonizing. But it is the difference between a tray of weak, sickly plants and a tray of robust, thriving ones. I remember looking at my first tray of healthy, thinned seedlings. They were perfect little pitchers waiting to happen. They had thick leaves and bright colors. I felt a surge of pride. It is a feeling that makes all the brutal culling worth it. So grab your tweezers and your scissors. Be brave. Be stern. Your plants will thank you for it. They will grow stronger. They will grow faster. And they will reward you with the most beautiful traps you have ever seen. The RHS and AHS both emphasize the importance of proper plant spacing for disease prevention, and they are absolutely right. It might hurt now, but it saves you from heartbreak later.





