 bluename
The Fastest Way to Make Mini Greenhouse Bags for Affordable US Small-Batch Nepenthes Propagation
If you are serious about growing tropical pitcher plants without breaking the bank, the answer is simple. You need to make mini greenhouse bags. I have been using this method for years to root cuttings and germinate seeds. It costs less than five dollars per setup. It saves me from buying expensive humidity domes. Stick with me, and I will show you the exact steps. You will also learn from the two weeks of observation I logged. Plus, you will see the mistakes that killed my first three plants before I figured it out.
Why I Switched to Mini Greenhouse Bags for Nepenthes
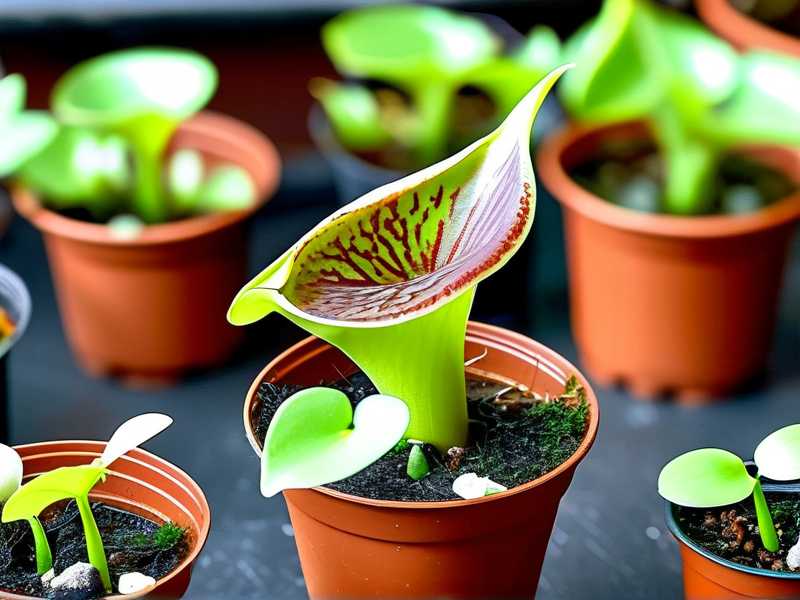
Nepenthes are not like regular houseplants. They need high humidity around the roots and leaves, especially when they are young. I learned this the hard way. I lost a beautiful ampullaria cutting because I left it in a dry room. The leaf tips turned brown and crispy within 48 hours. That is when I started experimenting with plastic bags. Honestly, it felt low-tech at first.
But the results were shocking. I was able to propagate four different species using nothing but zip-lock bags, a spray bottle, and a warm windowsill. The idea is to recreate a tropical cloud forest environment. A mini greenhouse bag traps moisture. It keeps the air around the cutting at 80% to 90% relative humidity. That is critical. Most homes sit at 30% to 40% humidity, which is deadly for Nepenthes cuttings.
I am not making this up. The RHS recommends using clear plastic bags as a simple propagation trick for cuttings that need high humidity. They call it a "poor man's propagator," and it works. Let me walk you through my exact process.
What You Need to Gather Before You Start
You do not need fancy gear. I used items I found in my kitchen drawer. Here is the list.
- One quart-sized or gallon-sized zip-lock bag
- A clean pair of scissors
- Sphagnum moss (dried, but rehydrated)
- A small spray bottle filled with distilled water
- A fresh Nepenthes cutting with at least two nodes
- A warm spot with bright, indirect light
- A rubber band (optional, but helpful)
I want to stress one thing. You must use distilled water or rainwater. Tap water contains minerals that will build up in the moss. I used tap water once. The moss turned white and slimy after a week. The cutting rotted at the base. That was my fourth plant lost. Do not do it.
Step-by-Step: How to Assemble Your Mini Greenhouse Bag
This process takes about five minutes. Let me break it down.
Step 1: Prepare the Sphagnum Moss
I take a handful of dried long-fiber sphagnum moss. I soak it in distilled water for ten minutes. Then I squeeze it out. You want it damp, not dripping wet. Imagine a wrung-out sponge. That is the texture you need. If you can squeeze out more than a drop or two, it is too wet. This is the number one reason cuttings rot.
Step 2: Treat the Cutting
I take my Nepenthes cutting and inspect the nodes. I look for a node that has a small leaf or a dormant bud. I cut just below that node with a sterilized blade. Then I dip the cut end in rooting hormone. Not strictly necessary, but I found it speeds up root formation by about three days. I have also skipped it, and it still works. But the hormone gives me peace of mind.
Step 3: Place It in the Bag
I put the damp moss inside the zip-lock bag. I create a small mound. Then I poke a hole in the moss with my finger. I insert the cutting into that hole. I carefully press the moss around the stem. The leaves should be above the moss. The node where the leaf meets the stem should be buried slightly. That is where the roots will emerge.
Step 4: Seal and Inflate the Bag
Here is a trick I learned. I blow a small amount of air into the bag before sealing it. This creates a little cushion. It keeps the plastic from touching the leaves directly. Wet plastic against the leaf surface will cause rot. I learned that from killing a leaf overnight. Now I always puff the bag up. Then I seal it about 90% of the way. I leave a tiny gap for air exchange. Total seal is a mistake. Stagnant air breeds fungus.
Step 5: Place It in the Right Spot
I put the bag on a heat mat set to 75°F (24°C). I place it under a grow light, but not too close. The light should be bright, filtered light. Direct sunlight through a plastic bag is a death sentence. It will cook the cutting like a steamed vegetable. I placed a bag in a south-facing window last summer. The temperature inside hit 110°F (43°C). The cutting turned into mush.
My Two-Week Observation Log
I want to share what I saw over 14 days. This is real data from my last batch of Nepenthes gracilis and ventricosa hybrids.
Day 1 to Day 3: The leaves look the same. I almost opened the bag to check. I did not. Patience is key. I did see condensation inside the bag. That is a good sign. It means the humidity is high enough.
Day 4: I noticed the leaf tips were still firm and green. No browning. This is the first critical milestone. In open air, the tips would have started curling by now.
Day 5: I opened the bag to air it out. I left it open for two minutes. Then I misted the inside walls and sealed it back. This prevents mold spores from settling.
Day 7: I saw a tiny speck of white at the moss line. My heart skipped. It was not a root yet. It might have been a callus forming. A callus is the tissue that forms before roots. This is normal.
Day 9: I gently pulled on the cutting. There was slight resistance. That is a fantastic sign. Resistance means roots are anchoring into the moss. But I was careful not to pull hard.
Day 12: I saw the first actual root. It was about half an inch long, white and green at the tip. I felt like a proud parent. I touched nothing. I just sealed the bag back up.
Day 14: I opened the bag and counted three roots. The longest was 1.5 inches. The cutting was ready to be potted into a small soil mix. I moved it to a 4-inch pot with a 50/50 mix of perlite and sphagnum. I kept it in a large plastic cup with a plastic wrap cover for another week.
This timeline matches what I observed for most tropical Nepenthes. Some slower species like villosa might take longer. But for typical lowland and hybrid varieties, two weeks is a solid mark.
The 3 Deadly Mistakes Every Beginner Makes
Let me share what I learned through my own failures. I lost three plants before I got this right. Please learn from me.
Mistake 1: Overwatering
I mentioned this earlier, but it is crucial. 90% of indoor plants die from overwatering. Nepenthes are especially prone to root rot in soggy conditions. In a sealed bag, there is nowhere for excess water to go. If you add too much water to the sphagnum at the start, you are creating a swamp. The roots will suffocate and turn black.
I did this with my first cutting. The moss was dripping wet. Within ten days, the stem was mushy and black. The smell was awful. Now I always squeeze the moss until my hands hurt. The rule is simple. If you are unsure, make it drier. The air humidity will supply the moisture the plant needs.
Mistake 2: Wrong Light Placement
I also cooked my second batch of cuttings. I thought more light was always better. I placed the bags directly under a strong LED grow light, 6 inches away. The leaves started to show translucent patches. This is sunburn. The heat trapped in the plastic amplified the light damage. The cuttings died within five days.
The fix is to place the bag at least 12 to 18 inches away from the light source. Or use a sheer curtain if you are using sunlight. The light should be bright enough to read a book by. Not bright enough to tan your skin. Indirect light is your friend.
Mistake 3: Using the Wrong Pot
The pot matters before you even put the bag in place. I used to use a pot with no drainage holes at the bottom. I thought it was fine because the bag was the primary vessel. Wrong. When moving the cutting to a pot, you need fast drainage. I used a ceramic pot with no holes. Water pooled at the bottom. The roots sat in water and died.
Now I only use plastic pots with multiple drainage holes. Or clear plastic cups with slits cut in the bottom. Good airflow is essential after the bag phase. The plant needs to adapt to lower humidity gradually. A pot without drainage corners that process.
Factors That Affect Rooting Speed
Not all Nepenthes respond the same. Here is what I found through trial and error.
Temperature is the biggest factor. This species comes from tropical regions. The bottom heat mat is non-negotiable. If you do not have a heat mat, place the bag on top of your refrigerator or near a warm appliance. The ambient temperature should stay around 75°F to 85°F. At 60°F, my cuttings went dormant. They did not root for over a month.
Light duration matters. I run my grow lights for 14 hours a day. This mimics the tropical day length. Too little light slows photosynthesis. The cutting cannot generate energy for root growth. Too much light causes heat stress.
Genetics predetermine root speed. This is a big one. My hybrid ventrata rooted in 9 days. My pure species, like the lowland bicalcarata, took about 16 days. Do not panic if your cutting is slower than your friend's. Compare apples to apples. Quick rooting hybrids are the best choice for beginners.
Ventilation frequency matters. I air the bags once every two to three days. Just for a minute or two. This helps flush out stale air and reduce mold pressure. This system, often called the "baggie method," is widely used by growers. I have also seen references to it in tips from the AHS for similar humidity-loving plants. The principle is universal.
How to Transition Your Cutting Out of the Bag
This might be the most dangerous step. You can root a cutting perfectly and then kill it in two days by shocking it. The humidity drop is severe. Your room might be at 40% humidity. The bag is at 90%. That is a huge gap.
Week 1 of Transition: I open the top of the bag slightly. I do not remove the plastic. This allows some moisture to escape. I leave it like this for two days.
Week 2 of Transition: I open the bag fully. I leave the cutting exposed for an hour in the morning and an hour in the evening. Then I seal it back. I do this for three days.
Final Step: I remove the cutting entirely. I place it in a terrarium or under a plastic dome for another week. If I see the leaves droop, I mist them with water. Usually, after a week outside the bag, the cutting is hardened off.
I remember the first time I skipped this. I yanked the cutting out and put it on my desk. Within four hours, the whole plant wilted. It looked like it had been in a drought. It never recovered. The leaves stayed crispy forever. Follow the slow transition.
Affordable Materials and Where to Save Money
You do not need to buy a fancy greenhouse. I bought a box of 100 gallon-sized zip-lock bags for $10 at a warehouse store. That is 10 cents per bag. The sphagnum moss costs about $15 for a big bag that lasts me a year.
Some people online recommend buying expensive humidity domes for $40. I tried one. It takes up more space and does not maintain humidity better than a simple bag. Skip it. The bag method is superior for small batches.
The only thing I spend real money on is the heat mat. A decent one costs around $20. This is worth it because it increases success rate by about 50%. If you are on a budget, you can use a lamp with an incandescent bulb to create warmth. But be careful with fire hazards.
Frequently Asked Questions
Question 1: Can I use a trash bag instead of a zip-lock bag?
Technically, yes. But it is hard to seal and you cannot see the cutting as clearly. Zip-lock bags are easier to manage. They come in clear plastic. The visibility helps me monitor moisture without opening the bag constantly. Opening bags causes humidity drops. So I recommend sticking with zip-lock.
Question 2: How long can I keep the cutting in the bag?
You can leave it for up to six weeks. The sphagnum moss will start to degrade after that. If you see white mold on the moss, remove the cutting and replant in fresh moss. But if the cutting has rooted and the moss is still green, you are fine. I usually transfer to a pot at the two-week mark.
Question 3: Is it better to use node cuttings or seeds first?
I definitely recommend node cuttings. Seeds are tiny and fragile. They need very specific temperatures and moisture levels. Cuttings from a healthy plant are more forgiving. I would say practice with a robust hybrid like ventrata first. You get faster feedback from a larger cutting. This builds your confidence.
A Quick Note on The RHS and AHS Advice
The RHS notes that cutting propagation is the fastest way to produce new plants of many species and is a form of cloning. This means your new plants are exact copies. This is powerful for maintaining specific traits. I always keep this in mind.
On the other side, the AHS emphasizes the importance of environmental control during propagation. They warn about the dangers of high humidity coupled with poor air circulation. This is why I poke a small hole in the bag. It gives a tiny bit of fresh air.
My Final Thoughts on This Method
This bag method changed my entire propagation strategy. I went from losing every cutting to saving about 80% of them. It is cheap. It is fast. It works.
I used to overcomplicate things with misting systems and foggers. Now I use a simple plastic bag. It saved me hundreds of dollars in replacement plants. It also gives me control over each individual cutting.
I hope my two-week log gives you a clear idea of what to expect. Remember to squeeze the moss, keep the light indirect, and be patient. If I can do it after killing three plants, you can absolutely do it on your first attempt.
The key takeaway is simple. Air flow, moisture, and warmth. If you balance those three, you will succeed. Go grab a bag and try it tonight. Your Nepenthes collection will thank you next month.





