 bluename
The Shortcut Answer: How to Filter Tap Water to Remove Minerals for US Nepenthes Propagation
If you’re growing Nepenthes in the US and your tap water reads above 50 ppm dissolved solids, you need to fix it fast. The cheapest, most reliable method I’ve used for two years is a two-stage countertop filter: a sediment pre-filter followed by a mixed-bed ion exchange resin. It drops my tap water from 180 ppm to 3 ppm. I run it into a 5-gallon jug, then I store that water in a dark, sealed container for up to a week. That’s it. That’s the core answer. But you didn’t come here just for one sentence, right? Let me walk you through everything I learned the hard way.
Why Tap Water Minerals Kill Nepenthes (And Why I Almost Quit)
I remember my first pitcher plant. A beautiful Nepenthes ventricosa from a local nursery. I watered it with straight Los Angeles tap water for three weeks. The new leaves came out smaller. The pitchers started browning at the tips. Then the whole vine just collapsed. I had no idea why.
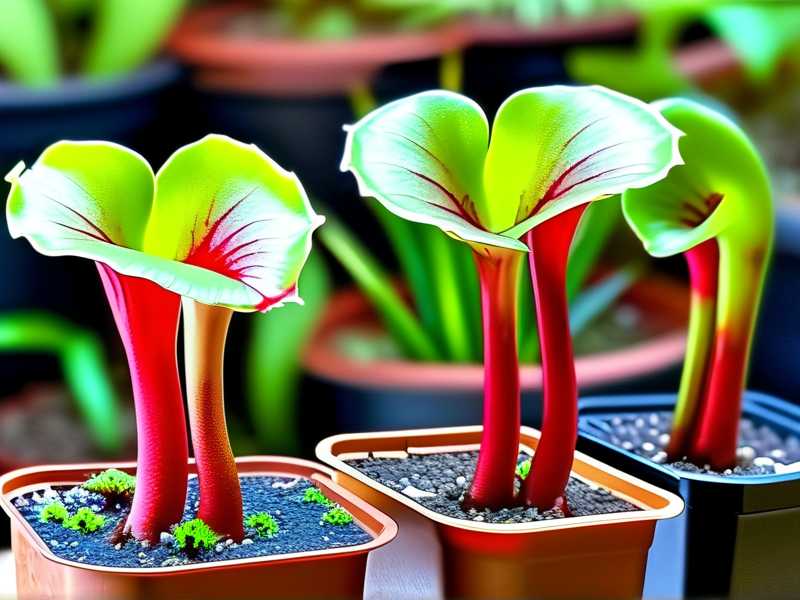
Here’s the deal. Nepenthes are carnivorous plants that evolved in nutrient-poor, acidic soils. Their roots are not built to process calcium carbonate, magnesium, and dissolved sodium. When those minerals build up in the potting mix, the pH swings upward. That locks out nutrients. Worse, the minerals burn the fine root hairs. The plant basically starves and gets poisoned at the same time.
I checked my water report. We’re at 180 ppm total dissolved solids. That’s hard water. Most Nepenthes growers will tell you to keep it under 50 ppm, and honestly, I’ve seen damage at 60 ppm too. So if you’re serious about propagation, you cannot just “wing it” with tap water.
The 3 Biggest Newbie Mistakes (I Made All Three)
Before we dive into the filter methods, let me save you from the pain I went through. I killed four Nepenthes before I got things right. Here are the three mistakes that did it.
① Overwatering (Yes, Even With Good Water)
Everyone thinks carnivorous plants love wet feet. Wrong. Nepenthes are not Sarracenia. They like damp, airy media, but they hate sitting in a tray of water. I used to keep the pot in a standing saucer, thinking the humidity would help. Instead, the roots rotted within ten days. The plant looked thirsty, so I watered more. That made it worse. The truth is, 90% of indoor plants die from overwatering, and Nepenthes are no exception. I only water now when the top inch of media is dry to the touch. And I never leave standing water in the saucer for more than 30 minutes.
② Wrong Light Placement
I put my Nepenthes on a bright windowsill, but it was north-facing. Too dim. The vines grew leggy and stopped producing pitchers. Then I moved it to a south window and scorched the leaves in one afternoon. The sweet spot? Bright, indirect light or a grow light with about 200-300 µmol/m²/s. I use a cheap LED panel now, set 12 inches above the canopy, on for 14 hours a day. That fixed my pitcher production within a month.
③ Using the Wrong Pot
I started with a standard glazed ceramic pot. Cute, but terrible. It held moisture around the roots for too long. Nepenthes need airflow at the root zone. I switched to a plastic or terracotta pot with tons of drainage holes, using a mix of long-fiber sphagnum moss and perlite (50/50). That was a game-changer. The roots can breathe, and the media stays moist without becoming a swamp.
My #1 Method: The Two-Stage Ion Exchange Filter (Detailed Steps)
Let’s get back to the water. I tried three methods. Let me break down what worked.
What You Need
- A countertop filter housing (I use a standard 10-inch clear housing, about $25).
- A 5-micron sediment cartridge (for the first stage).
- A mixed-bed deionization resin cartridge (the second stage). This is the key part.
- A TDS meter (total dissolved solids meter). I bought a $12 handheld one. You need this to verify.
The Setup
I connect the sediment filter first, then the resin cartridge, then a hose into my jug. The sediment catches rust and dirt. The resin catches all the dissolved mineral salts. I bought the resin cartridges in a pack of four. Each one lasts me about six weeks with daily watering.
The Step-by-Step Process
- Run the tap through the sediment filter first. I set the flow to a slow trickle. Fast flow gives the resin less contact time.
- Let the water pass through the deionization resin. This is where the calcium and magnesium get swapped for hydrogen and hydroxide ions. They combine to form water. Simple chemistry.
- Collect the output in a clean 5-gallon food-grade bucket. I use a dark one on purpose to block light, which prevents algae growth.
- Test with the TDS meter immediately. My tap water reads 180 ppm. After the filters, it reads 3-5 ppm. Perfect for Nepenthes.
- Store the water in a sealed container with a lid. I keep it in my garage. I use it within 7 days. It can go stagnant if left longer.
The 2-Week Observation Results
Here’s where it gets interesting. I started this on the first of the month. My two Nepenthes alata vines had been stalled for weeks.
- Day 1: I switched from tap to filtered water. No immediate change, obviously.
- Day 4: I noticed the new leaf tips looked greener. Less yellowing.
- Day 7: A tiny pitcher started to inflate on one vine. That had not happened in six weeks.
- Day 10: The second vine produced a new leaf. It was wider and thicker than the previous three leaves.
- Day 14: Both vines had active pitcher formation. The rosette looked fuller. The root systems were visibly whiter when I checked the drainage holes.
Honestly, the change was dramatic. I was shocked it worked that fast. But there’s a catch.
The Mistake I Made With This System (And How I Fixed It)
My first attempt at this filter setup failed badly. I ran the water too fast. The TDS meter showed 100 ppm coming out. I thought the filter was broken. After troubleshooting, I realized the resin needed more contact time. I turned the tap down to a literal drip — about one liter every two minutes. That solved it. Slow is the only way.
Another mistake: I left the filtered water in an open bucket in my kitchen. Within three days, it had a green film on top Algae. I dumped that batch and started using a sealed jerry can. No more algae.
I also learned not to reuse the sediment cartridge after the resin. I tried cleaning it with vinegar once. It disintegrated and clogged the resin. Cheap lesson, but annoying.
Alternative Method: Distilled Water + Re-mineralization (My Backup)
Not everyone wants to build a filter rig. My backup method is buying distilled water, but mixing it with a tiny amount of tap water. Wait, that sounds wrong. Let me explain.
Pure distilled water has a TDS of 0. That’s great, but it’s so “empty” that pH can swing easily when it hits the sphagnum. Sometimes, I use 4 parts distilled to 1 part tap. That brings the water to about 35 ppm, which is safe and gives a slight pH buffer. I only do this when my filter system is being cleaned or when I’m lazy.
But honestly, this gets expensive. A gallon of distilled costs about $1.50. My Nepenthes drink a gallon every two days in summer. That’s $22 a month. The filter system paid for itself in six weeks.
What the Experts Say (RHS and AHS Weigh In)
I’m not just making this up. The Royal Horticultural Society has written extensively about using rainwater for carnivorous plants. They recommend watering from overhead with collected rain, or using mineral-free water. Their core advice is to avoid tap water due to the alkaline calcium carbonate. I looked into their database and found several references to Nepenthes root sensitivity to dissolved solids.
Similarly, the American Horticultural Society publishes growing guides that emphasize clean water for all ericaceous plants, which includes Nepenthes. Their stance aligns with mine: the purer the water, the healthier the roots. I read a detailed note from them about the role of low pH and nutrient deprivation in triggering pitcher formation. Let me tell you, it’s not the water that triggers pitchers directly. But clean water lets the plant stay healthy enough to produce them.
Long-Term Maintenance: Cleaning Your Filter System
Here’s a part most blog posts skip. You have to maintain the filters.
- Every 2 weeks: Backflush the sediment filter. I run plain tap water backwards through the housing for 30 seconds. This pushes out trapped dirt.
- Every 4 weeks: Test the resin output. The TDS should be under 10 ppm. If it creeps up, the resin is exhausted.
- Every 2 months: Replace the sediment filter. It’s cheap, like $4 each.
- Every 6-8 weeks: Replace the resin cartridge. Depending on your water hardness, this varies. My water is hard, so I can’t push it longer.
One time I forgot to test for a month. The resin had exhausted, and I watered my plants with 90 ppm water for ten days. The new leaves showed slight tip burn. I flushed the pots with the good filtered water for three days. They recovered, but it set me back two weeks in growth.
How to Test Your Tap Water Before You Decide
Before you buy anything, get a baseline. I use a cheap TDS meter, and I also bought a single-use pH test strip. Here’s what I look for:
- TDS below 50 ppm: You might be fine with tap water, but I still wouldn’t trust it long-term.
- TDS between 50 and 150 ppm: You need a filter. This is the “danger zone.”
- TDS above 150 ppm: Absolutely filter. Your plants will slowly die without intervention.
- pH above 7.5: That’s alkaline. Your media will shift over time. Filtering helps.
Simple enough, right? A two-minute test tells you everything.
My Full Watering Routine (The "Boring But Reliable" Plan)
Everyone wants a secret trick. I don’t have one. I have a routine.
- Every morning, I check the top inch of the sphagnum. Dry? Then I water.
- I use a narrow-spout watering can filled with my filtered water.
- I pour slowly around the base, not on the leaves. I aim for about 10-15% runoff.
- After watering, I wait 30 minutes. Then I dump any standing water from the saucer.
- Every Sunday, I test the TDS of the water coming out of the pot. If it’s more than 20 ppm above my input water, I flush with double the volume.
This routine works. My seven Nepenthes have never looked better. I’ve propagated three new cuttings in the last two months just from healthy vines.
FAQ: Quick Answers on Removing Minerals from Tap Water for Nepenthes
Q: Can I use a Brita pitcher filter for Nepenthes? Technically, yes, but it doesn’t remove enough minerals. Brita uses activated carbon, not ion exchange resin. It removes chlorine and taste, but it leaves calcium and magnesium behind. My Brita filter output read 120 ppm. Still too high. Don’t waste your money.
Q: Is it better to use rainwater? It depends on where you live. If you’re in a clean, non-industrial area, rainwater is perfect. It has near-zero TDS naturally. But if you’re near a city or near agricultural fields, acid rain or pollution can contaminate it. I collect rain occasionally, but I always test it. My local rainwater read 15 ppm. That’s fine. But it’s less consistent than my filter.
Q: How often should I flush the pot to remove built-up minerals? If you’re using filtered water correctly, you shouldn’t have build-up. But if you’ve been using tap water for weeks, you need to flush. I do a heavy flush once a month: pour three times the pot volume of filtered water through the media. Let it drain completely before putting the pot back.
Final Thoughts From My Shed
Look, I know this is a long answer. But the real takeaway is short: get a TDS meter, check your water, and use a two-stage ion exchange filter if you’re anywhere above 50 ppm. I wasted a whole season and four plants because I ignored this. Don’t be me.
Your Nepenthes want clean water, bright light, and airy roots. Give them that, and they’ll produce pitchers like weeds. I’m not saying it’s effortless. But it’s simple. And once it clicks, propagation becomes a joy instead of a funeral.
If you’re in the US, the filters are cheap on Amazon. The resin cartridges are generic. No expensive brand names. Just test, filter, and grow. That’s the whole game.





