 bluename
Selecting Healthy Mother Plants for High-Quality US Nepenthes Cuttings
If you want vigorous US Nepenthes cuttings, you must start with a stellar mother plant. I learned this the hard way after killing my first three pitcher plants. The secret isn't complicated. Look for firm stems, vibrant leaves, and a robust root system. Skip anything with yellowing or mushy tissue. That simple filter would have saved me months of frustration.
I have spent years growing these exotic beauties in my Florida greenhouse. The difference between a cutting that roots in three weeks and one that rots in three days almost always comes down to the mother plant's health. Many folks grab the biggest, showiest pitcher they see at a nursery. That's a rookie mistake. The pitcher itself tells you little. You need to examine the growth point, the stem, and the roots.
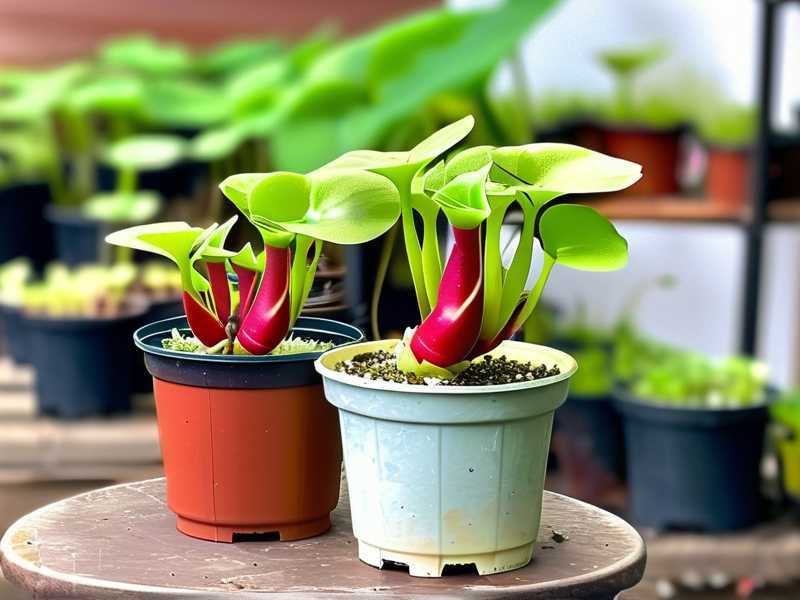
Let me walk you through everything I check before I take a single cutting. This process took me years to refine, and it will save you from the heartbreak of watching expensive cuttings turn to black mush.
Why the Mother Plant Matters More Than Anything
Think of your cutting as a clone. It carries the exact genetics and health status of its parent. A stressed mother plant produces stressed cuttings. Those cuttings struggle to root and often succumb to fungal infections. A thriving mother plant gives you cuttings packed with energy and natural resistance.
The Royal Horticultural Society (RHS) emphasizes that stock plant health directly influences propagation success rates. They recommend selecting only disease-free specimens with strong structural integrity. The American Horticultural Society (AHS) echoes this, noting that clean stock material is the foundation of any successful propagation program. I follow both organizations' guidelines closely, and my success rates have skyrocketed.
My Three Biggest Early Mistakes with Nepenthes
Before I give you the selection checklist, let me share the painful lessons. These three errors taught me more than any book ever did.
Mistake One: Overwatering the Mother Plant
I used to think pitcher plants loved soggy soil. They come from tropical jungles, right? So I watered mine every single day. The soil stayed wet, and within two weeks, the roots started rotting. The stems turned soft and brown near the base. I lost an entire collection of rare hybrids.
The truth is, 90% of indoor plants die from overwatering, and Nepenthes are especially sensitive. These plants need moist but well-aerated roots. They grow on mountainsides and in tree canopies where water drains quickly. Constant moisture around the roots suffocates them.
I now check the soil with my finger before watering. If the top inch feels dry, I water thoroughly. If it still feels damp, I wait another day. This simple adjustment saved my remaining plants and made future cuttings survive.
Mistake Two: Wrong Light Placement
My second disaster came from putting my Nepenthes in direct afternoon sun. I figured tropical plants wanted maximum light. Wrong. The intense UV rays scorched the leaves within days. The leaf edges turned crispy brown, and the plant went into shock. Cuttings I took from that stressed plant all failed to root.
Nepenthes do need bright light, but they prefer indirect or filtered light. I learned that morning sun works best, with shade during the hottest afternoon hours. A spot near an east-facing window or under a shade cloth outdoors replicates their natural habitat perfectly.
Mistake Three: Using the Wrong Pot
For my third attempt, I used a standard ceramic pot with no drainage holes. I added an inner plastic pot but left it sitting in collected water. The roots stayed waterlogged, and algae grew across the soil surface. The plant slowly declined, and I lost another precious specimen.
Nepenthes need pots that breathe. I now use plastic nursery pots with plenty of drainage holes. I also add perlite to my mix for extra aeration. The roots stay healthy, and the plant thrives. This simple change made an enormous difference in growth rate.
The Exact Checklist I Use for Selecting Mother Plants
After all those failures, I developed a systematic approach. Here is exactly what I examine before taking cuttings. Use this checklist every single time.
1. Examine the Growing Point
The growing point, or meristem, is where new leaves emerge. This tiny area tells you the plant's current health status. A healthy growing point looks firm and slightly glossy. It should show signs of active growth, like tiny new leaves or tendrils forming.
Avoid plants where the growing point looks brown, black, or shriveled. This indicates stress, disease, or pest damage. Even if the rest of the plant looks fine, a damaged growing point means production will slow or stop.
I look for plants with multiple growth points when possible. This gives me more cutting options and indicates an older, more established plant. Single growth points work fine, but they limit how many cuttings I can take.
2. Check Leaf Turgidity and Color
Healthy Nepenthes leaves feel firm and leathery. They should spring back when gently pressed. Yellowing, wilting, or brittle leaves signal problems. The color should be green, though some species and hybrids have red or purple tints.
I also check for uniform leaf spacing along the stem. Tight spacing suggests the plant got consistent light and nutrition. Sparse spacing with long bare stems indicates the plant once struggled or lacked light.
3. Inspect the Pitchers and Tendrils
Look beyond the pretty pitchers. Examine how new pitchers form. Healthy plants continuously produce new tendrils that develop into pitchers. Missing or brittle tendrils mean the plant is under stress.
The pitchers themselves should be firm and hold moisture inside. Dry, crispy pitchers with brown spots may indicate fungal issues or pest infestations. Avoid plants with more dead pitchers than live ones.
4. Examine the Stem Structure
The stem must feel solid when gently squeezed. Soft, mushy, or wrinkled stems indicate rot or dehydration. A healthy stem remains rigid and slightly green underneath the outer layer.
Check for multiple branching points. Branched plants recover better from cutting removal and continue growing. Single-stemmed plants will stop growing at the cut point, though they usually produce new growth below.
5. Inspect the Root System
This requires sliding the plant from its pot. Gently tip the container and support the base of the plant. Healthy roots appear pale yellow or white and fill the pot evenly. Brown, black, or slimy roots indicate rot.
The roots should hold the soil together when you lift the plant. If soil falls away and roots look sparse, the plant is likely stressed. Dense, healthy roots promote quick recovery after you take cuttings.
6. Look for Pests and Diseases
Inspect the undersides of leaves carefully. Check for tiny moving specks, webbing, or sticky residues. These signs point to spider mites, thrips, or aphids. Any pest infestation disqualifies a mother plant.
Fungal diseases show as black spots, powdery coatings, or soft, water-soaked areas. Even plants that look mostly healthy can harbor hidden problems. I quarantine new plants for two weeks before using them as mothers.
7. Verify the Species or Hybrid Identity
Buy from reputable sources with proper labeling. Many plants sold as rare species are actually common hybrids. Check for authentic documentation or distinctive characteristics. This matters if you plan to sell cuttings later.
I once bought a plant labeled as a rare highland species. It turned out to be a common hybrid. All my cuttings had the wrong genetics. Always verify identity before investing months of growing time.
My Two-Week Observation Protocol
Once I select a potential mother plant, I never take cuttings immediately. I observe for two full weeks. This period reveals hidden problems that might not show initially.
During week one, I monitor new growth. The plant should produce visible new leaves or tendril extensions. I also check how quickly the soil dries after watering. Slow drying may indicate root issues.
During week two, I examine new pitcher development. The plant should create healthy, fully formed pitchers. I also look for consistent color and turgidity across all leaves. Any decline during this period eliminates the plant from consideration.
I follow fertilization routines during this period too. I use a mild foliar spray with diluted orchid fertilizer. This strengthens the plant and improves cutting viability. The American Horticultural Society suggests this preconditioning approach for propagation stock.
How I Take the Actual Cuttings
Once my mother plant passes the two-week test, I take my cuttings. I use sterilized pruning shears for every cut. I wipe the blades with isopropyl alcohol between each snip. This prevents transmitting diseases.
I cut below a node, leaving two to three leaves on each cutting. The lower leaves I remove completely. I make the cut at a 45-degree angle to maximize water absorption surface area.
For the best rooting, I take cuttings from the upper portions of the plant. These have more active growth hormones. After cutting, I immediately place them in water to prevent air bubbles from blocking uptake.
I use a rooting hormone powder for most Nepenthes. The Royal Horticultural Society recommends IBA-based products for carnivorous plants. I dip the cut end, shake off excess, and plant in a damp sphagnum moss mix.
The Propagation Setup That Works
Clean stock plants need clean setups. I use clear plastic cups with drainage holes for individual cuttings. The clear walls let me see root development without disturbing the cutting.
I fill the cups with live sphagnum moss that I have soaked in distilled water. I never use tap water because the minerals harm Nepenthes. I place the cuttings in bright, indirect light with high humidity.
A simple clear plastic bag works as a humidity dome. I secure it over the cup with a rubber band. Two weeks later, I open the bag gradually to acclimate the new growth.
I keep the moss damp but not soggy. Excess moisture causes rot faster than anything else. If I see condensation inside the bag, I open it temporarily to let things dry slightly.
Common Problems After Taking Cuttings
Even healthy mother plants can produce stubborn cuttings. Here are solutions to problems I have encountered.
Cutting Turns Black Within Days
This indicates either a bacterial infection or excess moisture. Remove the cutting, sterilize your tools, and start fresh. Use a drier medium and consider adding a fungicide dip.
Leaves Wilt Despite Humidity
The cutting may have too many leaves for the minimal root system. Remove the largest leaves to reduce water loss. Let the cutting focus energy on root production instead of supporting foliage.
No Root Growth After Six Weeks
Some Nepenthes take months to root, especially highland species. Keep the cutting in stable conditions and avoid disturbance. Check for rot every two weeks but resist pulling the cutting from the moss.
The Need for Patience
I know you want fast results. We all do. But rushing the process kills more cuttings than anything else. The plant needs time to adjust, grow roots, and establish itself.
I have waited three full months for stubborn highland species to root. They eventually grew substantial root systems and took off quickly after transplanting. The patient approach always yields the strongest plants.
Common Questions About Mother Plant Selection
Q: Can I take cuttings from a young Nepenthes? Yes, but younger plants tolerate fewer cuttings. Take only one or two at a time. Give the mother plant plenty of time to recover between rounds. Mature plants handle more aggressive cutting schedules.
Q: How many cuttings can I take from one mother plant? That depends on plant size and available growth points. A large, established plant with multiple branches can supply five to ten cuttings. Smaller plants should give only one to three. Always leave the mother with enough foliage to stay healthy.
Q: Should I use fertilizer on my mother plant? A balanced orchid fertilizer diluted to quarter strength works well. Apply every two weeks during active growth. Stop fertilizing fourteen days before taking cuttings. This ensures clean tissue without excess salt buildup.
My Final Thoughts on Mother Plant Selection
Selecting healthy mother plants separates successful propagation from continuous failure. The time spent observing and inspecting always pays off. I have converted many dying collections into thriving nurseries using these methods.
Your Nepenthes will reward you with strong growth, abundant pitchers, and reliable cuttings. Pay attention to subtle changes in leaf color, stem firmness, and root health. These signals tell you everything about plant vigor.
Start with one excellent mother plant. Care for it properly. Take cuttings conservatively. You will produce high-quality US Nepenthes cuttings that flourish. Your collection will grow stronger each season.





