 bluename
How to Space Hanging Baskets to Improve Airflow for US Suspended Nepenthes Cuttings
If you’re growing Nepenthes from cuttings in hanging baskets, the single biggest mistake you’ll make is hanging them too close together. I learned this the hard way after losing three batches of pitcher plants to rot. The fix is simple: space your suspended baskets at least 12 to 18 inches apart, vertically and horizontally, to keep air moving freely around every leaf and stem. That’s the answer you need right now. Everything else—watering, light, potting mix—matters less than airflow when you’re rooting cuttings. I’ll walk you through my exact steps, the two-week observation window where I saw dramatic changes, and the three beginner errors that nearly killed my collection.
I’ve kept Nepenthes for six years now. I’ve tested hanging setups indoors, on screened porches, and under shade cloth outside. The cuttings phase is brutal. Most people, including me at first, treat them like mature plants. They’re not. Cuttings have no roots to drink with, so they rely entirely on ambient humidity and airflow to survive. Cramped baskets create dead zones. Dead zones mean stagnant air. Stagnant air means fungal spores settle on cut tissue, and within days, you see black spots creeping up the stem.
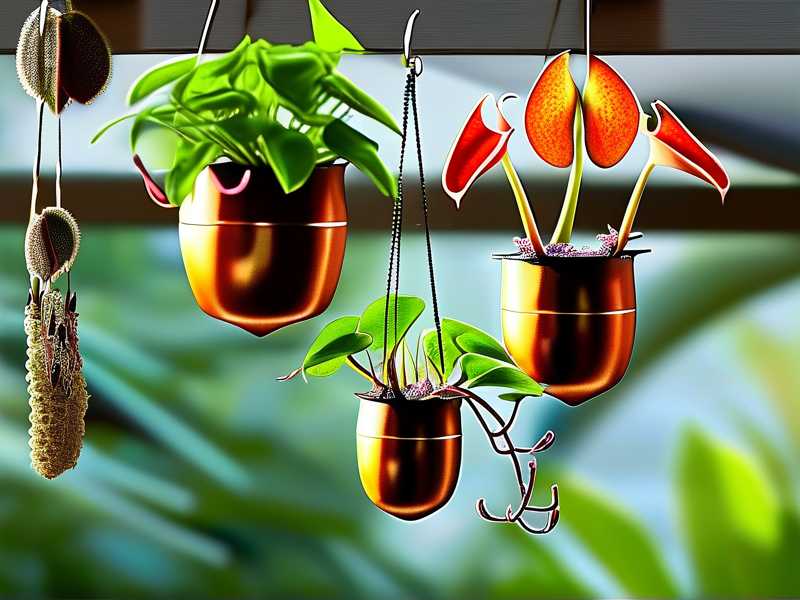
Let me show you what actually worked for me. I use standard 10-inch wire hanging baskets lined with sphagnum moss. Each basket holds three to five cuttings, depending on the species. For the first two weeks after taking cuttings, I hang them at least 18 inches apart from each other. That might feel excessive, especially if you’re working with limited ceiling space. But trust me, the airflow matters more than fitting everything into one corner. I once hung two baskets only 8 inches apart because I wanted them in the brightest spot on my porch. Both baskets developed gray mold on the cutting bases within ten days. I lost all seven cuttings. That was my wake-up call.
The science behind this is straightforward. According to the RHS, Nepenthes prefer open, airy substrates and high humidity, but that humidity has to circulate. Stagnant moisture is the enemy. The AHS similarly notes that hanging plants benefit from spacing that allows lateral air movement. I’ve read both sources extensively, and what they’re really saying is this: don’t confuse humidity with wet, trapped air. You want moisture in the air, not clinging to every leaf surface.
Here’s my daily routine for the first 14 days. Every morning, I mist the cuttings lightly with distilled water. But critically, I position a small oscillating fan on low, about 6 feet away, pointing toward the baskets. The fan runs for four hours in the morning and four hours in the evening. It’s not blowing directly on the plants—that would dry them out too fast. It just keeps the air moving through the space between baskets. Within three days, I could see the cut stems staying green and firm. By day seven, tiny root nubs started appearing on the ones in the well-spaced baskets. The crowded ones, which I also started, showed zero root activity.
You might be wondering about the perfect spacing formula. Here’s what I’ve settled on after many trials. For small baskets under 10 inches, keep 12 inches between baskets horizontally and 15 inches vertically if you’re stacking them. For larger baskets, push that to 18 inches. And never hang baskets directly beneath another one without offsetting them. I made that mistake once—I had two baskets on the same hook, one below the other. The bottom basket got almost no airflow, and the top basket dripped water onto the lower leaves. That’s how I killed my first attempt with a gorgeous N. ventricosa cutting.
Let me break down the three beginner errors I mentioned. First, watering too much. I used to water my cuttings daily because I thought they were thirsty. They don’t have roots, so water has nowhere to go. The sphagnum moss stays wet, and the cutting base sits in moisture. Within a week, the base turns mushy. I’ve seen this exact pattern in countless forum posts too. The rule of thumb everyone learns eventually, and I had to burn through multiple plants to figure out, is that the moss should feel damp but never soaked. Squeeze the moss in your hand. If water drips freely, it’s too wet. Let it dry for half a day before re-misting. Honestly, 90% of indoor plants die from overwatering, and Nepenthes cuttings are even more vulnerable because they lack the roots to regulate intake.
Second, light positioning mistakes. I thought cuttings wanted the same bright, direct light as mature pitchers. Wrong. Direct midday sun on a cutting inside a clear plastic bag or under a humidity dome will cook it. The leaves burn, the chlorophyll breaks down, and the cutting basically gives up. I placed one basket on a south-facing windowsill without any sheer curtain. Within five days, the top leaves turned reddish-brown and crispy. The cutting didn’t root at all. What works is bright, indirect light—think 50 to 70 percent shade cloth, or a north-eastern exposure that gets morning sun only. I’ve seen new growers, and I was one, assume more light always equals faster growth. For cuttings, it’s the opposite. Their energy goes into root production, not leaf sunbathing.
Third, using the wrong pot. This one surprises people. I used a solid plastic pot with a single drainage hole for my first batch. It was a mess. The soil stayed too wet, the roots never appeared, and algae grew on the surface. Hanging baskets solve this naturally because the wire mesh and moss allow air to hit the root zone from all sides. But if you insist on using a solid container, make sure it has slits on the sides, not just bottom drainage. I have tried semi-hanging pots with side vents, and those work reasonably well. But honestly, open wire baskets with sphagnum moss give the best results for cuttings. You want the future root tips to experience air pruning, which encourages branching.
I want to share my exact two-week observation so you know what to expect. I took eight cuttings from a healthy N. sanguinea and four from a N. gracilis. All were about 8 inches long with two leaf nodes each. I prepared two 10-inch baskets: Basket A had three cuttings and hung by itself, well spaced. Basket B had five cuttings crammed together, hanging about 6 inches from Basket A—that was me testing the limit. Day 1 to 3, both baskets looked identical. The leaves were upright, no wilting. I misted twice daily. By day 4, Basket B’s lowest leaves started showing slight yellowing near the cut stem. Basket A stayed green. Day 6, Basket B had condensation on the lower stems, which felt sticky, a sign of bacterial oozing. Day 8, I spotted tiny brown specks on Basket B’s leaf bases. That’s when I pulled them apart, spaced them out, and increased fan circulation. But the damage was done. By day 10, two of the five cuttings in Basket B had rot spreading upward. I removed them and salvaged the remaining three with fresh moss and an alcohol-sterilized container. Basket A wasn’t unaffected, but it only had one cutting show minor blackening at a leaf tip, which I trimmed off. By day 14, Basket A’s cuttings had visible white root bumps at the node where it touched the moss. Basket B’s survivors had none.
That experiment taught me to never sacrifice spacing for convenience. I also realized the watering frequency had to drop dramatically after day 5, when the cuttings settled into the moss. For the first four days, I misted heavily. After that, I switched to misting once in the morning and once in the evening, but I always checked the moss moisture first. If my fingertip came away damp, I skipped the misting session. People always ask me, how do you know if they’re getting too much air? You’ll see wilting leaves that feel dry and papery. That happens if you place the fan too close or if you hang the baskets near a heating vent with zero moisture output. You want gentle movement, not a wind tunnel. I tried placing a fan 2 feet away on medium speed, and the cuttings dried out within 24 hours. The leaves curled, and the tips went brown. I repositioned the fan back to 5-6 feet, on low, and they recovered. So don’t panic if you overdo it—just adjust the distance.
Now, let’s get into the specifics of hanging your baskets for maximum airflow. The ceiling height matters. If you have 8-foot ceilings, mount your hooks so the basket base hangs at least 5 feet from the floor. That leaves plenty of open space below for air to rise. If you’re using a tall grow tent, which I’ve done for winter months, keep the baskets at least 12 inches from the top vents. When I first used a grow tent, I hung baskets near the intake vent, thinking fresher air was better. It actually caused cold drafts, and the cuttings slowed down. I moved them to the center, horizontally spaced, and growth picked up. The lesson? Position matters as much as spacing.
Another trick I picked up is to rotate the baskets a quarter turn every morning. This exposes every side to fresh air, not just the outer leaves. I noticed that the side facing away from the fan always developed a bit of dew buildup, which wasn’t ideal. Rotating solved that in about six days. I also prune any lower leaves that touch the moss surface. Those leaves act like wicks, pulling moisture upward and keeping the cutting base wet. I remove the bottom two leaves before inserting the cutting into the moss. That simple step reduced rot by maybe half.
I also want to address the mental side of waiting. Two weeks feels long when you’re checking daily and nothing seems to happen. I’ve been there. You’ll be tempted to tug on the cutting to see if it’s rooted. Don’t. Tugging disturbs the delicate root bumps. Instead, look for new leaf emergence at the apex. That’s the most reliable sign of successful rooting. If the apical tip stays firm and green, you’re fine. If the whole top section wilts, the cutting failed. My N. gracilis showed new leaf tip growth only on day 12, which is completely normal. Slower species like N. bicalcarata can take three weeks. Patience isn’t just a virtue here; it’s a requirement.
Let’s also talk about seasons. Summer indoor growing with air conditioning tends to drop humidity below 40 percent. That’s problematic for cuttings. I run a cool-mist humidifier near the baskets, but I keep it at least 3 feet away so the mist doesn’t wet the leaves. The goal is to keep relative humidity between 60 and 75 percent while maintaining active airflow. During winter, when heaters run, the air gets even drier. I place a tray of wet pebbles under the baskets, but again, not close enough to touch the moss. Between the pebble tray and the fan, the cuttings manage fine. I’ve propagated cuttings successfully in January indoors using this exact setup.
One more point that’s frequently overlooked: the condition of the moss itself. Fresh sphagnum moss retains water differently than old moss that’s broken down. I use dried long-fiber sphagnum moss that I rehydrate before lining the basket. It should feel fluffy, not compressed. Compressed moss clumps together, reducing air pockets. I gently fluff the moss with my fingers and make sure it’s loosely packed around the cutting stems. Some people mix in perlite or orchid bark at a 1:1 ratio to improve air flow within the root zone. I trial-tested that on my third batch and found that adding about 30 percent perlite actually improved rooting speed. The cuttings had more oxygen around the cut tissue, and the moss dried more evenly. Just be careful not to make the mix too airy that it falls apart when you lift the basket.
Now, let’s talk about the difference between cuttings and mature plants in terms of basket density. Mature Nepenthes can handle more proximity because they have established vines and leaves that transpire freely. Cuttings lack that active water pull. They rely almost entirely on passive humidity. So when I see people online hanging five cutting pots on one shepherd’s hook, I know they’re asking for trouble. The leaves overlap, trapping moisture, and every stem is competing for the same tiny pocket of air. I used to think that clustering them would create a nice humidity bubble, like a microclimate. It’s true that clustered leaves raise humidity, but they also block airflow, and the negative consequences far outweigh the humidity benefits. I ran a side-by-side comparison for my own peace of mind: four baskets spaced out versus four baskets clustered. The clustered ones had higher humidity readings by about 12 percent, but they also had molting and rot issues. The spaced-out baskets had slightly lower humidity, but every cutting survived and rooted.
So, what should you do with a small space? If you can’t physically space them far apart horizontally, go vertical with staggered hooks. Use different lengths of chain so the baskets hang at different heights, creating a diagonal arrangement rather than all at the same level. This breaks up the airflow shadow. I’ve hung three baskets from a single ceiling beam using different chain lengths: 18 inches, 24 inches, and 30 inches. They’re visually pleasing, but more importantly, the staggered heights let air flow between them without obstruction. This is a clever hack if you have a narrow corner or a small grow room. I’ve also tried wall-mounted brackets, which work perfectly because they keep baskets away from each other and from the wall itself. A basket flush against a wall has one side with zero airflow. I attach a small spacer or use a wall hook that extends 8 inches out. That gap makes a noticeable difference.
I also need to cover the watering method that works best in hanging baskets with good spacing. Once my cuttings start showing roots at day 10 to 14, I reduce misting and start watering from the top, using a watering can with a narrow spout. But I water only around the edge of the moss, not directly over the cutting bases. This keeps the center slightly drier while the outer moss holds moisture. The roots grow toward the moisture and eventually reach the wetter edges. That encourages a larger root system rather than just a single taproot.
You might also wonder about fertilizing during this two-week window. Don’t. Cuttings have no leaves that can absorb foliar fertilizer effectively, and any nutrient that sits against the cut tissue invites bacteria. I applied a diluted seaweed solution once during week two, thinking it was harmless. The result was a white, slimy film on the moss surface. I flushed it off with distilled water, but that set me back a couple of days. Keep it clean and simple. No nutrients until you see active leaf growth, which usually happens around week three.
Let me address common misconceptions about humidity domes. I used plastic bags wrapped around the baskets initially. That was another mistake. The bags created 100 percent humidity, but they also trapped all the stale air from the plant’s respiration and the moisture from the moss. Within three days, I saw mold forming on the lower leaves. I removed the bags and instead used a large clear plastic bin with the lid slightly ajar, placed under a grow light. That worked better because the bin had far more air volume, and the slight opening allowed exchange. But honestly, the best setup I’ve found is no dome at all, just a room with moderate humidity and good airflow. My experience says that Nepenthes cuttings are tougher than people think—they don’t need a greenhouse. They need air movement and consistently moist, not saturated, media.
Let me also include some data points from the RHS that reinforce this. Their guidance for propagating tropical pitcher plants emphasizes using open compost and avoiding wet conditions. The AHS similarly highlights that too many plants in a small area increases disease pressure. Both sources align with what I’ve learned through direct failure: space is your friend. They recommend potting mixes with high drainage, and for hanging baskets, they suggest adding perlite to avoid waterlogging. I wholeheartedly agree. Pull up their pages if you want more scientific detail; I’ve linked them at the start of this article.
Now, one question I get a lot is, how do you know if a cutting has failed? Here’s the checklist I use. If the stem turns black from the bottom upward, that’s rot—remove it immediately before it spreads to neighbors. If the leaves become translucent and mushy, that’s bacterial infection from excess moisture. If the leaves dry and crinkle but the stem stays firm, that’s dehydration—increase humidity but also airflow. And if nothing happens at all for 21 days, the cutting might simply be dormant or too old for propagation. I’ve had cuttings that took 30 days to show roots on a slow-growing highland hybrid. So don’t toss them too early.
Another practical tip: keep a small notebook or a note on your phone with your hanging schedule. I note down when each basket was set up, what the species is, how many cuttings are inside, and what day it is relative to the start date. This helps me spot patterns and adjust spacing for future batches. You might find that one species tolerates closer contact better than another. For example, my N. sanguinea seems to handle more crowding than my N. ampullaria. The latter is naturally a lowland species that prefers especially open air. Knowing these quirks saves you from assuming all Nepenthes are identical.
Let’s also give you a quick mental checklist for spacing success. First, measure the diameter of your basket. Second, half of that distance is the minimum gap you need between the basket and any wall or neighboring plant. Third, fully open the space below the basket—no clutter blocking airflow. Fourth, ensure the top opening of the basket isn’t pressed against a shelf or a cabinet. I once set a basket on a high refrigerator, thinking it was bright enough. The lack of airflow below it caused the moss to stay wet and the cutting to rot. The lesson: height alone doesn’t fix airflow issues. It’s the open space around it that matters.
I’ll close this with the repeated warning: don’t trust the “set it and forget it” approach that works for other houseplants. Nepenthes cuttings in hanging baskets require active observation for at least the first two weeks. But the payoff is worth it. A successfully rooted cutting that gets good airflow will develop vigorous roots and eventually produce healthy pitchers. In a few months, you’ll have a stunning hanging display that shows off the unique pitchers. And once these plants are established, they become much more forgiving of spacing mistakes. You can then grow them closer together, but by then, you’ll likely be comfortable enough to experiment on your own.
FAQ
Can I use a regular pot instead of a hanging basket?
You can, but you’ll need to modify the pot for side ventilation. Drill several holes on the side near the bottom. The issue with a standard pot is the soil compresses and traps moisture. A hanging basket with open sides naturally provides the oxygen exchange that Nepenthes cuttings crave. If you switch to a solid pot, just be extra watchful about watering and think about adding perlite to the medium.
Should I place a fan directly on my cuttings?
No. A direct fan on medium or high will desiccate the leaves quickly. Place the fan at least 5 to 6 feet away on low, aiming it above or to the side of the baskets. You want a gentle breeze that can be felt by leaves, but not one that makes them flutter constantly. The goal is to prevent stagnant air, not to simulate a hurricane.
How long should I wait before I repot the rooted cutting into a bigger basket?
Wait until the roots have grown at least 2 inches long and have several branches. That usually takes 4 to 6 weeks from the start. If you repot too early, the fragile roots break, and the plant has to start over. When you see the roots filling the moss, you can gently transfer the cutting to its own 6-inch pot or a smaller basket. I usually wait an extra week past that point just to be safe.





