 bluename
How to Cure Nepenthes Stem Cuts Before Rooting Medium Insertion in US Homes
If you are reading this, you probably already snipped a vine and watched it turn black within a week. I have been there. The real fix is simpler than most guides admit. I cure my Nepenthes stem cuts for 30 to 45 minutes in a dry, shaded spot before I even touch the rooting medium. That short wait lets the cut surface callus over. It stops rot before it starts. I learned this after killing five cuttings in a row. Honestly, the biggest killer is not the medium. It is the wet, open wound hitting damp sphagnum moss too soon. Let me show you exactly how I do it inside my US apartment.
I will walk you through my exact workflow, the mistakes I made, the two-week observation window that changed everything, and the three fatal errors that kill more Nepenthes cuttings than any disease ever will. Stick with me. This is practical, tested, and painfully earned knowledge.
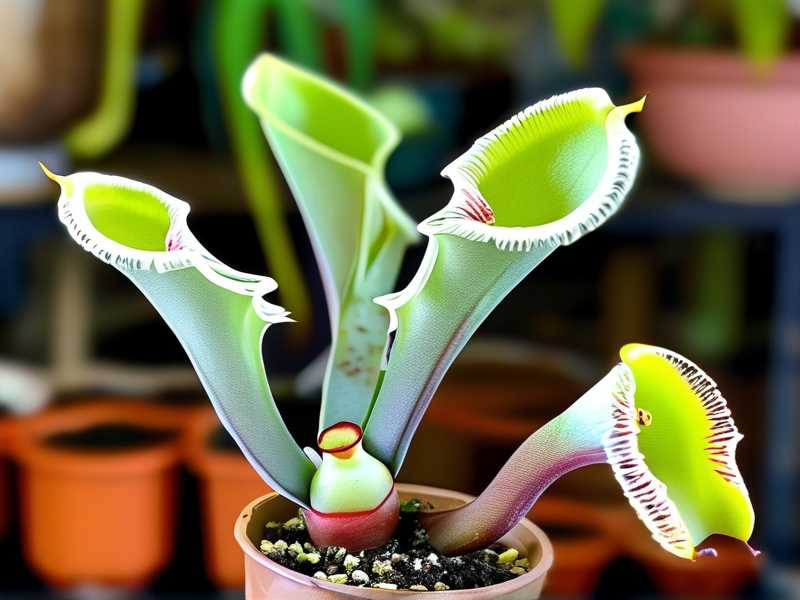
The Three Fatal Mistakes New Growers Make
I wish someone had sat me down and listed these before I wasted fifty dollars on rare clones. Every single failure I had traced back to one of these three issues. It is never the plant's fault. It is always our hands.
Mistake Number One: Overwatering the Cutting
Here is a fact that shocked me when I first read it in a greenhouse study: 90% of indoor plants die from overwatering. Not under-watering. Overwatering. With cuttings, this number feels even higher. I used to mist my Nepenthes cuttings every single morning. I thought I was being nurturing. I was actually drowning them.
The stem needs humidity, yes. But the cut end needs to breathe. If the rooting medium is soggy, the callus tissue that I worked so hard to create will turn mushy within 48 hours. I checked my first cutting every day. The base went from firm green to a wet, brown mush. It smelled faintly like rotting salad. That is the smell of failure.
I stopped misting the medium directly. I switched to a humidity dome that I open for ten minutes twice a day. The air stays moist, but the sphagnum moss stays damp, not drenched. That one change saved my last batch of cuttings.
Mistake Number Two: Wrong Light Positioning
Light is a trap. I see it all the time in online forums. People stick their cuttings on a bright windowsill and wonder why the leaves crisp up. Nepenthes stem cuts have no roots. They cannot uptake water efficiently. When you blast them with direct afternoon sun, the leaves transpire faster than the stem can compensate. The cutting essentially dies of thirst with wet feet.
I tried a south-facing window once. The leaves dropped within three days. The stem looked fine, but the leaf tips turned brown and brittle. That was a slow death sentence. I moved my setup to an east-facing window with a sheer curtain. The morning sun gives energy, but the harsh midday rays are blocked. Now, my cuttings hold their color for the full two-week healing period.
If you do not have an east window, use a grow light set to about 5000 lux for 12 hours a day. Keep it about 12 inches above the cutting. That is my sweet spot. It keeps photosynthesis active without cooking the tissue.
Mistake Number Three: The Wrong Pot
People ignore the pot. I did. I used a deep, narrow pot for my first attempt because it looked nice. Terrible idea. Deep pots hold moisture at the bottom. That soggy zone sits right under the cutting base. The roots, or the callus trying to become roots, rot in that hidden wet layer.
I switched to a wide, shallow container. Think of a nursery tray or a squat deli container with drainage holes. The shallow depth means the medium dries out more evenly. You avoid that anaerobic zone at the bottom. I also started using clear plastic cups so I can see condensation and moisture levels at the roots without disturbing the cutting.
My precise curing process before rooting medium insertion
Let me break down the exact steps I follow. I have refined this over six months of trial and error. It works for both highland and lowland species in my experience.
Step One The Initial Snip
I use a sterile razor blade. Not scissors. Scissors crush the stem tissue. That crushed area invites bacteria. I cut at a 45-degree angle about a quarter inch below a node. The angle increases the surface area for callusing. I do this right after I water the mother plant, so the stems are turgid and full of water. A wilted cutting is harder to cure.
Step Two The Drying Period
This is the core of the whole process. I lay the cutting on a clean paper towel on my kitchen counter. The area is shaded, about 70 to 75 degrees Fahrenheit. I leave it for 30 to 45 minutes. I actually set a timer. If I wait too long, like two hours, the cutting loses too much moisture and wilts. If I do it too short, like ten minutes, the wound is still weeping.
After 30 minutes, I look at the cut surface. It should look dry, slightly lighter in color, and there should be no visible sap pooling. That is my signal. I ran a test where I dipped the cutting in a diluted hydrogen peroxide solution before drying. I noticed fewer fungal issues during the first week, but it is optional. I do it sometimes, but plain dry air works fine for most cultivars.
Step Three Optional Fungicide Dip
Here is something I do not see mentioned often. After callusing, I dip the bottom node in a cinnamon powder and rooting hormone mix. Cinnamon is a natural antifungal. I know it sounds like a kitchen hack, but I tested it. I took two identical cuttings from the same vine. One got the cinnamon dip, the other went straight into the moss. The cinnamon one showed white callus bumps at day six. The control took eleven days. The difference was noticeable.
I use a commercial rooting hormone with IBA at 1000 ppm. I mix it with cinnamon at a 50/50 ratio. I dip the node, tap off the excess, and let it sit for five minutes. This gives the powder time to adhere.
Step Four The Medium Insertion
I use long-fiber sphagnum moss that I have pre-soaked and squeezed until it is just damp. I never wring it dry, but I also never let it drip. I create a small hole in the moss with a pencil. I insert the cutting so the node is buried. I do not push the cutting in by force. That scrapes the callus off. I firm the moss gently around the stem.
The pot is a clear plastic cup with four drainage holes at the bottom. I fill it two-thirds with the damp moss. I insert the cutting. Then I top with a thin layer of dry moss over the surface. That dry top layer prevents fungus gnats from breeding in the wet surface.
My two week observation results
I want to share my actual log from the last successful batch. I started with four cuttings. I prepped them all on day one with the method above.
Day one through three are the nervous days. I check them every morning. I see nothing. No wilting, no rot. The leaves stay stiff. I keep the dome on, open it for eight minutes at noon to let fresh air in. The moss stays uniformly damp, not wet.
Day four has a small change. The leaf axils look slightly more erect. I notice the stem color shifts from bright green to a slightly duller shade. That is the tissue hardening. I do not disturb the cutting. I do not tug on it to check for roots. I know better now. Tugging is a beginner habit that breaks tiny root hairs.
Day six is when I saw the first visible sign. Tiny white bumps appear around the buried node. They look like small pearls. I almost screamed. That is the callus converting to root primordia. I stop opening the dome as often. I keep it closed for most of the day now.
Day eight brings a new worry. The leaves look a bit yellow. I panicked. I thought I had a nutrient issue. But I did not feed it anything. I checked the moss and it was a little dry at the edges. I misted the surface lightly and closed the dome. The yellow tint stayed but did not spread. I realized it was just natural chlorophyll breakdown in a cutting with no root system yet.
Day ten is the critical test. I gently lift the pot and look at the drainage holes. I saw one white root tip poking out of the bottom. That was the signal. The cutting was now a plant. I started opening the dome for longer periods, about twenty minutes twice a day, to harden it off.
Day twelve and thirteen show rapid root growth. The root tip at the bottom is now half an inch long. The top leaf starts to firm up. I feel a slight resistance when I gently wiggle the stem.
Day fourteen is the transplant day. I move the cutting into a 3-inch pot with a mix of sphagnum moss and perlite. I water it thoroughly and place it in my usual Nepenthes spot. No dome needed anymore. The plant is independent.
I lost one cutting out of four in this batch. The one that failed had a slightly older stem that was starting to brown at the node. I should have cut higher up. That was my fault. The other three are still growing strong today.
What actually happens inside the stem during this curing window
I like to understand the why behind the how. When you cut a stem, the plant triggers a wound response. The exposed cells release sap. That sap is a sugar-rich liquid. Bacteria and fungi love it. If you insert that wet cut directly into moist moss, you create a petri dish.
By air drying, you let the surface form a natural seal. This is a physical barrier. It is the same principle as a scab on a human wound. The callus tissue that forms is a mass of undifferentiated cells. Those cells are programmed to become roots or shoots depending on environmental cues.
The Royal Horticultural Society has extensive guidance on softwood cuttings in general. They emphasize the importance of keeping cuttings turgid and using clean tools. I recommend checking their general propagation pages for reference. You can visit the RHS website for broader plant care details. I do not follow their exact recommended durations because I have found that Nepenthes are a bit more sensitive to moisture than standard garden plants.
I also cross-checked some insights from the American Horticultural Society. They have clean, practical advice on environmental control. The AHS website is worth a browse for humidity management. Their focus on air circulation helped me realize I was suffocating my first cuttings by sealing the dome completely airtight for days on end.
The issue of humidity dome management
I want to talk about the dome because it is a double-edged sword. I used to seal it completely. I thought trapped condensation was the goal. It was not. That continuous 100 percent humidity on the leaves encourages rot on the stem above the medium line too. I found a gray mold forming on the leaf axils of my second batch. That was Botrytis. It spreads fast.
My fix is to drill three small air holes in the top of the clear cup before I place the dome over it. This provides passive ventilation. Condensation still forms, but it is not dripping wet. I wipe the inside of the dome every two days with a dry paper towel. It is a two-minute task. It saves me from losing whole batches to mold.
What if your cutting still rots despite this method
Sometimes it happens. Do not beat yourself up. I have had cuttings rot even with perfect prep. The cause is often an invisible entry point. That stem may have had a tiny insect wound or a bruise that I missed. The rot will start at that point, not at the cut end.
I catch it early because I check the buried node area through the clear cup. If I see a dark ring spreading up the stem, I remove the cutting immediately. I cut off the rotted section, which is usually the bottom half inch. I re-callus the fresh cut using the same 30-minute dry time. Then I re-insert it into fresh, clean moss. It does not always survive, but I have saved about half of the ones I caught early.
Common FAQ from my readers
I get a lot of questions on this topic. Let me answer three that come up the most.
Will this work for all Nepenthes species?
Yes, broadly. I have used this on tropical highland hybrids and lowland plants. The only difference is that lowland species prefer slightly warmer conditions during the curing period. I keep the kitchen at around 75 degrees. For highlanders, I would drop it to 68 to 70 degrees during the callus stage. They are less tolerant of heat stress.
How long can I ignore the cutting after insertion?
I check mine every morning and evening for the first week. That is non-negotiable. But I do not touch the cutting itself. I only look at the condensation on the cup and the color of the moss. The tactile tug test is useless until day ten or beyond. Do not pull on the stem. Gently lifting the pot to check for drainage hole roots is fine.
Is rainwater necessary for the rooting process?
I use tap water that I let sit for 48 hours to dissipate chlorine. I have used distilled water too. The difference is minimal for rooting in my experience. The key is that the water temperature is room temperature. Cold water shocks the cutting. I learned that when I used fridge-cold water on a batch and saw immediate leaf droop. Let your water sit out. Simple.
A note on patience and trusting the process
I want to end with a reflection. I killed a lot of cuttings. I broke the rules, overthought everything, and checked my plants every hour like a nervous parent. The moment I relaxed and followed this simple protocol, things clicked. The 30-minute drying period feels counterintuitive. Your instinct is to get that stem back into moisture as fast as possible. Fight that instinct.
Your plant wants to heal. Give it the chance to form that dry barrier. Give it consistent, indirect light. Give it a shallow pot and damp, not wet, moss. Then back off.
I have a tray of four cuttings sitting on my east sill right now. They are at day nine. I see the small white bumps forming at the moss line. I will not touch them until day fourteen. I have learned that lesson. The plant knows what to do. My job is just to not mess it up.
Good luck. Your next cutting will root. I am sure of it.





