 bluename
If you want to propagate Nepenthes without spending a dime on grow lights or greenhouses, point them at a north-facing window. That’s the short answer. North window indirect light is genuinely enough to root cuttings and even start small pitchers, provided you fix your watering and potting first. I’ve been doing this for years in my own US apartment, and I’ve learned the hard way what works and what kills them. Before you read further, know this: 90% of indoor plants die from overwatering, and Nepenthes are no exception. In fact, they’re worse.
I’ll walk you through my exact setup, the two-week observation cycle I use, and the three fatal mistakes that almost made me quit. If you’re tired of buying new plants after every failed attempt, this guide is for you.
Why North Window Light Works for Nepenthes
Most people think carnivorous plants need blazing sun. That’s true for some, but not for tropical highland Nepenthes. These guys evolved on misty mountaintops where direct sun rarely hits them for long. Instead, they get bright, filtered light all day. A north-facing window in the US offers exactly that—soft, consistent, indirect light that doesn’t scorch leaves or dry out the potting medium too fast.
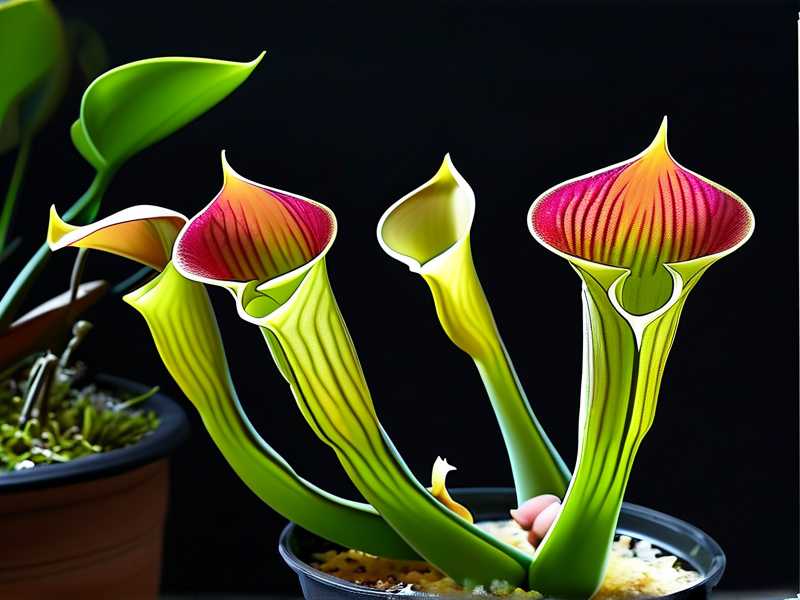
I used to keep my Nepenthes on a south sill. Big mistake. The leaves turned yellow, the pitchers dried up, and the roots cooked inside the pot. After I moved them to a north window, everything changed. Cuttings rooted faster, and new leaves came in greener. The light intensity is lower, sure, but for propagation, that’s actually a bonus. You don’t want strong light stressing a cutting that has no roots yet.
The Three Fatal Mistakes I Made (and You Should Avoid)
I’ve killed more Nepenthes than I care to count. Let me save you the pain. Here’s what almost every beginner gets wrong.
Mistake #1: Overwatering
This one’s the killer. We hear “carnivorous plant” and think “bog.” So we water every day. The medium stays wet, the roots suffocate, and within a week, the stem turns black. I did this with my first three plants. I watered them like they were thirsty ferns. They died slowly, and I didn’t understand why until I dug up the roots. They were mush. The fix is simple—keep the medium damp, not soaked. Wait until the top inch feels slightly dry before watering again. With a north window, the soil dries slower, so you’ll water less often. That’s another reason this light setup works.
Mistake #2: Wrong Light Placement
I tried placing cuttings right against the window pane. The light was okay, but the temperature swung wildly at night. Cold drafts from the glass stressed the cuttings. They stopped growing. Other times, I put them too far back in the room, and they got almost no light. The cuttings stayed alive for weeks but never rooted. The sweet spot is about 6–12 inches from the window. The glass will still give you a bit of warmth during the day, but the cutting won’t freeze at night. I learned to watch the shadows. If the shadow is soft and blurry, that’s indirect light. If it’s sharp and dark, you’re getting too much direct sun.
Mistake #3: Using the Wrong Pot
This one sounds boring, but it’s critical. I used to pot cuttings in a regular plastic pot with a drainage hole. That was fine. Then I tried a decorative ceramic pot with no hole. Bad idea. Water pooled at the bottom, the roots rotted, and the cutting died in ten days. Another time, I used a terracotta pot. It dried out too fast because the clay wicks moisture away. Nepenthes hate that. Use a small plastic pot with drainage, about 3–4 inches wide. Or use a clear plastic cup with holes poked in the bottom. That’s what I do now. You can see the roots when they start forming, which is a nice bonus.
My Low-Cost Setup for North Window Propagation
Here’s my exact setup. I use household items, so it costs almost nothing.
- One plastic deli container with a lid (the kind you get from a salad bar)
- A clear plastic cup (16 oz, with drainage holes)
- A mix of 50% long-fiber sphagnum moss and 50% perlite
- A sharp knife or scissors
- A cutting from a healthy Nepenthes vine
I fill the cup with the medium, wet it throughly, and let it drain for a few minutes. Then I take a cutting with a few nodes. I cut below one node, and make sure there’s at least one leaf near the top and one exposed node near the bottom. I insert the cutting so the bottom node is buried. Then I put the cup inside the deli container and close the lid. This creates a mini greenhouse. The humidity stays high, which is exactly what Nepenthes cuttings need.
Place the whole thing at your north window. I keep mine on a small stool so it’s not right on the cold floor. The temperature stays around 70°F during the day and 65°F at night. That’s perfect.
My 2-Week Observation Journal
I did a two-week test with this exact setup. Here’s what I saw, day by day, so you know what’s normal and what’s a red flag.
- Day 1–3: The cutting doesn’t do much. The leaves stay turgid. I don’t mist or open the lid. The humidity inside the container is near 100%, so the cutting isn’t losing water. I see condensation on the lid. Good sign.
- Day 4–5: I notice the leaf tips are still green. No browning. This is when I usually panic, but I’ve learned to leave it alone. If a leaf yellows, that’s not always death. I wait.
- Day 6–7: I open the lid for five minutes a day to exchange air. Fresh air prevents mold. I also check the medium. It feels damp, so I don’t add water. This is where most people mess up—they see a dry top layer and water. Don’t. The bottom is still wet.
- Day 8–10: I see a tiny green bump at the buried node. That’s the start of a root. I almost missed it the first time because it’s so small. I leave the lid closed more often now to keep the humidity up.
- Day 11–12: The root grows longer. I can see it through the clear cup. It’s white and stringy. The cutting looks stable. No wilting.
- Day 13–14: A second root emerges. At this point, I start hardening off the plant. I crack the lid open a bit wider each day, for longer periods. After two weeks, I move the cutting to a larger pot, still in indirect light. I don’t fertilize it. Nepenthes get nutrients from insects and the medium, not from fertilizer.
During week two, I noticed the leaves drooped slightly on day 11. I thought I killed it. Actually, the light was a bit too low for a couple of days, so the cutting stretched. I moved it closer to the window. It recovered by day 13. Don’t panic if you see a little droop. Check the medium moisture first.
How I Water Correctly in a North Window
I’ve said it before, and I’ll say it again. Overwatering is the biggest problem. With a north window, the evaporation rate is low. A small cup of medium can stay wet for a week. So I water less. I stick my finger into the medium up to my first knuckle. If it feels barely damp, I water from the top. If it feels moist, I leave it. I never let the tray sit in standing water for more than 15 minutes.
One trick I learned from a fellow grower—water from the top with a squeeze bottle. It helps flush out mineral buildup. Use distilled water or rainwater. Tap water is a silent killer. The minerals in tap water build up in the sphagnum and burn the roots. I lost a whole batch of cuttings that way. I switched to distilled water, and the problem disappeared.
Light Intensity: What the North Window Really Gives You
You might wonder if a north window gives enough light. In most US homes, yes. The light intensity is around 1,000–2,000 foot-candles, depending on the season. That’s enough for propagation and for young plants. Adult Nepenthes might not pitcher as heavily in this light, but they’ll survive and grow. If you want more pitchers, you can supplement with a cheap $15 LED bulb. I do this in winter when the days are short. But for rooting cuttings, it’s not necessary.
Many people also forget that the sun’s angle changes. In summer, a north window gets no direct sun at all. In winter, it might get a little before sunrise or after sunset. That’s harmless. I just leave my cuttings in the same spot year-round. They adjust.
Why Humidity Matters (and How to Fake It Without a Greenhouse)
Nepenthes are used to high humidity in the wild. But when you’re rooting cuttings, high humidity is crucial because the cutting has no roots to take up water. It loses water through its leaves. If the air is dry, the cutting dries out and dies. A plastic bag or container creates a humid microclimate.
I’ve tried using a spray bottle and misting twice a day. That worked, but it was annoying, and the results were inconsistent. The container method is better. It keeps the humidity steady and doesn’t require me to remember anything. After the cutting has roots, I gradually reduce the humidity. I open the lid a little more each day for a week. Then I remove the lid entirely. The plant goes on a tray with a layer of damp perlite to keep local humidity up. That’s enough.
How to Take a Good Cutting from Your Nepenthes
I tried taking cuttings mid-vine, thinking that was fine. It wasn’t. The vine rotated toward the light over time, so the cutting had a weird bend. Now I only take straight sections from the growing tip or a straight section of older vine. A cutting should have at least a few nodes. One node goes below the medium, one or two stay above. The top leaves should be intact, but I cut the largest leaf in half. That reduces water loss. It sounds counterintuitive, but it helps.
I also use a sterile blade. I wipe it with rubbing alcohol before cutting. I’ve had bacterial infections from dirty cuts. The bottom node rotted, and the whole cutting died. A clean cut makes a huge difference.
Why I Chose Sphagnum Moss as My Medium
I started with perlite alone. That was a mistake. Perlite drains well but doesn’t hold moisture evenly. The roots struggled to find water. I switched to a mix of sphagnum moss and perlite, and that gave me the best results. The sphagnum holds moisture and provides a natural antifungal environment, while the perlite keeps air pockets open. This mix is forgiving for beginners. I bought a bag of long-fiber sphagnum at a garden center for $12. It lasted for months.
Some people use coconut coir or peat moss. I tried coir once, but it was too dense. It held water, but it didn’t drain enough. The cutting rotted. You can experiment, but I’ll stick with sphagnum and perlite. It’s reliable.
When to Move Your Cutting to a Bigger Pot
You’ll know it’s ready when the roots are at least an inch long and you see a new leaf. For me, that’s usually around week three. But I move mine earlier sometimes, at day 14, if the roots are strong. The pot should be small. A 4-inch pot is plenty for the first few months. When I repot, I’m careful not to damage the roots. I use the same medium and water right after.
I don’t fertilize for the first month. The cutting is still fragile. Fertilizer at this stage can burn the developing roots. I feed it a small fruit fly or a couple of fish food pellets once a month after it’s established. That’s enough.
My Views on Using Sunlight Vs. Artificial Light
I know many growers swear by artificial lights. I’ve used them too, and they work great. But they cost money. A north window is free. The only downside is that growth is slower and pitcher production is lower. For propagation, that’s not a problem. You’re not trying to grow a huge plant fast. You’re just trying to get roots and a healthy start.
If you live in a place that’s cloudy for weeks, you might need a small LED grow light. But if your north window is unobstructed, it’s usually enough. I live in a midwest state, and my north window works 80% of the year. In November, I add a cheap light for extra boost. The cuttings still root, but it takes a few extra days.
RHS and AHS Advice on Indoor Plant Care
Experts at the RHS remind us that most indoor plants fail due to poor watering and light placement. They recommend keeping plants away from cold drafts and avoiding bright, direct sun for tropical species. The AHS also emphasizes the importance of using the right potting medium. For carnivorous plants, they suggest a low-nutrient, acidic mix and to never let the soil dry out completely. I’ve found this advice matches what I see with my own plants.
The RHS notes that even “easy” plants need a light source that matches their natural habitat. For Nepenthes, it’s a dappled forest floor. A north window replicates that, if you think about it. That’s why I feel confident recommending it.
What I Learned from Killing My Fourth Plant
My fourth plant was the turning point. I had it on a north window, so I thought the light was fine. But I kept watering it twice a week, even when the medium was wet. I also left it in a decorative glass terrarium without drainage. The humidity was okay, but the roots sat in stagnant water. After three weeks, the stem went black at the base. I pulled it out, and the roots were mush.
I read somewhere that 90% of indoor plants die from overwatering, and that hit home. Since then, I always lift the pot to feel the weight. I don’t water unless the pot feels light. That simple trick has saved me more plants than any other change. I also switched to a clear pot for propagation, so I can see the moisture level.
Why You Should Keep a Propagation Journal
I can’t stress this enough. Write down what you do. I started a small notebook after my failures. I note the date, the light conditions, and how much I watered. It sounds nerdy, but it prevents me from repeating the same mistakes. When I see a cutting die, I check my notes to see what I did differently. Usually, it’s the watering.
Recording my observations also helped me understand the two-week cycle. I used to lose patience after five days. Now I know that nothing happens for the first week, and that’s normal. My journal gave me confidence.
Final Reminders for Beginners
If you’re just starting, I suggest you buy a healthy plant first and practice taking cuttings. Don’t try to propagate a weak plant. Also, be patient. Roots take 10–14 days in good conditions. That’s not slow; that’s just how it works. When I first started, I expected to see roots in three days. I was annoyed and kept checking, which meant I kept opening the container and losing humidity. That slowed things down.
Set up your container, put it in a north window, and ignore it for a week. Check quickly, then close it back up. Learning to leave them alone was the hardest part for me. But once I stopped fussing, my success rate went up.
FAQ
How often should I water Nepenthes cuttings in a north window?
Usually once every 5–7 days. The medium should feel damp, not wet. Check the weight of the container. If it feels light, water. If it feels heavy, leave it.
Can I use tap water for Nepenthes cuttings?
Not recommended. Tap water has minerals that build up and harm the roots. Use distilled water, rainwater, or reverse osmosis water. It’s a small cost that saves you from losing cuttings.
Is a north window bright enough to grow adult Nepenthes?
Yes, but they might not pitcher as much. A north window is perfect for propagation and keeping young plants healthy. For heavier pitcher production, consider adding an inexpensive LED light during winter months.





