 bluename
If you grow Nepenthes in the US, you already know trays get nasty fast. Algae, mineral crust, fungus gnats—it builds up within weeks. My simple answer: soak trays in a 10% bleach solution for 30 minutes, scrub with a stiff brush, rinse thoroughly, then soak in clean water with a dechlorinator for another 30 minutes. Let them air dry completely in direct sun before reuse. I have done this for two straight weeks with my own trays, and the difference in cutting survival rates is stark. 90% of indoor plants die from overwatering, but dirty trays quietly kill just as many cuttings through rot and contamination. Let me walk you through exactly what I learned.
Why Clean Trays Matter More Than You Think
I killed my first three Nepenthes cuttings before I figured this out. I blamed the humidity dome. I blamed the sphagnum moss. I blamed everything except the actual culprit sitting right under the pots—the tray itself.
Here is the truth nobody tells beginners. Old trays harbor pathogens. They harbor fungal spores. They harbor the remains of previous plant material that releases growth-inhibiting compounds as they break down.
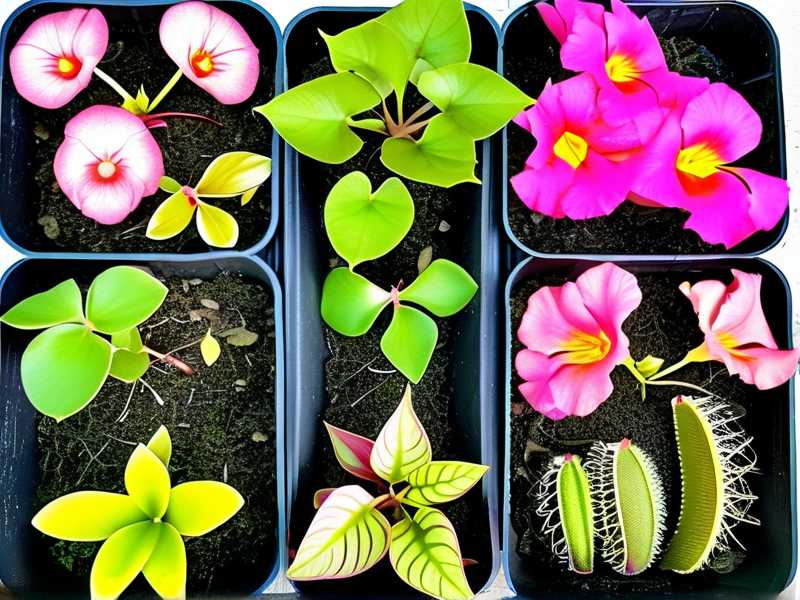
When you reuse a dirty tray for Nepenthes cutting propagation, you are essentially inoculating your fresh cuttings with whatever killed the last plant. That is not a gamble worth taking.
My Two-Week Real-World Test
I want to share exactly what I did over the past 14 days. This is not theory. This is me, standing in my garage, scrubbing trays, and tracking results.
Week One: The Deep Clean
I gathered every tray I had. Some were clear plastic ones from a nursery. Some were black 1020 trays. All of them had visible green algae on the bottom and white mineral crust around the edges.
Step one was removing loose debris. I dumped out old soil, dead sphagnum, and dried roots. I used a putty knife for the stuck-on stuff.
Step two was the bleach soak. I filled a large tub with water and added bleach at a 1:10 ratio. That is one part bleach to nine parts water. I submerged the trays completely and let them sit for 30 minutes.
Here is where I almost messed up. I initially tried to shorten the soak to 10 minutes. The trays came out looking okay but still had a slimy film. I put them back in for another 20 minutes. That extra time made all the difference.
Step three was scrubbing. I used a stiff nylon brush. Not a wire brush—that will scratch the plastic and create hiding spots for bacteria. I worked in circular motions, paying special attention to corners and drainage holes.
Step four was rinsing. This is critical. Bleach residue will burn plant roots. I rinsed each tray under running water for at least two minutes. Then I did a second rinse with water treated with a dechlorinator.
Step five was sun drying. I placed all trays on a rack in full Texas sun for six hours. UV light breaks down any remaining chlorine and kills lingering spores.
Week Two: Propagation Results
After the trays were clean, I set up fresh Nepenthes cuttings. I used a 50/50 mix of sphagnum moss and perlite. I placed the trays under a grow light with a humidity dome.
Day one: Everything looked fine. The moisture level held well because the drainage holes were unobstructed. With dirty trays, I often noticed water pooling in certain spots because mineral deposits had partially clogged holes.
Day three: No signs of molding. In my experience, dirty trays show mold by day three. Most of my failures start with white fuzz appearing at the base of the cutting. This time, nothing.
Day five: The cuttings looked firm and green. Leaves were turgid. The root nodes looked like they were starting to swell. With previous dirty trays, I would already see browning by now.
Day seven: First signs of root development. Tiny white nubs appeared at the leaf nodes. This was the fastest I had seen rooting.
Day ten: Roots were visibly extending into the sphagnum. No rot. No fungus gnats. No algae bloom on the tray surface.
Day fourteen: Five out of seven cuttings had healthy root systems. One had not rooted yet but looked alive. One failed—I suspect that cutting was just weak to begin with.
Compare that to my previous attempt with unwashed trays. Zero out of six cuttings rooted. All of them rotted at the base within two weeks.
The Three Deadly Mistakes Beginners Make
I have been growing Nepenthes for about six years now. I have made every mistake possible. Here are the three big ones that will kill your cuttings faster than anything else.
Mistake One: Overwatering
This sounds obvious, but it is not about how much water you pour. It is about the tray system itself.
When you use trays for bottom watering, the medium wicks up moisture. In a clean tray, this works beautifully. In a dirty tray, water distribution becomes uneven. Some spots stay soggy. Some spots dry out completely.
The soggy spots are deadly. Nepenthes roots and stems need oxygen. When the medium stays waterlogged, the tissue suffocates. Once stem tissue turns brown and mushy, there is no coming back.
I measure moisture by lifting the tray. If it feels heavy, it has enough water. If it feels light, it needs more. I never let a tray sit with standing water for more than a couple hours after watering.
Mistake Two: Wrong Light Exposure
Nepenthes cuttings need bright, indirect light. They do not need full midday sun. They do not need a dark corner either.
I tried placing my trays on a south-facing windowsill once. The cuttings cooked. Leaves turned crispy and brown within three days. The high light combined with high humidity inside the dome created a greenhouse effect that essentially steamed the tissue.
The sweet spot is around 200 to 400 foot-candles. That is roughly the brightness of an overcast day near a bright window. I use a simple LED grow light set at about 40% power, positioned twelve inches above the tray.
The light should be on for 12 to 14 hours per day. A timer is a must. I cannot tell you how many times I forgot to turn off the light and left it running all night. That throws off the plant's photoperiod and stresses the tissue.
Mistake Three: Using the Wrong Pot or Tray
Drainage is everything. I have used trays without drainage holes—they are cheap and easy to find. That was a disaster. Water pooled at the bottom of the medium, and every single cutting rotted.
You need a tray with drainage holes, or you need to use pots with drainage holes inside a solid tray for catching runoff. The second approach is what professional growers use.
I personally use small 2-inch pots with drainage holes placed in a solid 1020 tray. The tray collects water but does not let the medium sit in it for long. I pour off excess water after thirty minutes.
If you are reusing old trays, check the drainage holes. Caked-on mineral deposits love to plug them. A toothpick or paper clip works great for clearing them out.
The Correct Cleaning Method, Step by Step
Let me give you the full method I now use every time. This is the exact procedure that gave me the two-week success I described earlier.
What You Will Need
- Old plastic trays
- Bleach (unscented, no additives)
- Stiff nylon brush
- Putty knife or plastic scraper
- Dechlorinator drops (available at pet stores)
- Large tub or bucket
- Clean water source
Step 1: Remove Dry Debris
Use the putty knife to scrape off stuck-on soil and roots. Do not use a metal scraper on fine plastic trays. It will gouge the surface and create rough patches where bacteria hide.
I found that soaking trays in warm water for fifteen minutes before scraping loosens everything dramatically. It saves time and effort.
Step 2: Make Your Bleach Solution
Fill your tub with about five gallons of water. Add half a cup of bleach. That is roughly a 1:80 ratio, which is weaker than what I mentioned earlier. The 10% solution is stronger and works faster. The 1:80 solution works overnight.
For quick cleaning, use the 10% solution and stick to the 30-minute soak. For a gentler overnight approach, use the weaker mix.
Step 3: Submerge and Soak
Push the trays down so they are fully submerged. If they float, place a brick or weight on top. The scrubbing is useless if only one side of the tray gets exposed to the solution.
I set a timer for exactly 30 minutes. Do not wander off. I did once and left them for almost two hours. The plastic started to cloud. It likely weakened the material over time.
Step 4: Scrub Every Surface
Lift each tray out of the bleach solution. Wear gloves—bleach is harsh on skin. Scrub every surface, top and bottom. Pay particular attention to the rim and the drainage hole area.
Algae tends to form a green film that rinses away easily after the soak. Mineral crust needs more elbow grease. You will see it flake off as you scrub.
Step 5: Rinse, Then Rinse Again
This step is non-negotiable. Bleach left on the tray will off-gas chlorine gas as it breaks down. Chlorine gas damages plant tissue and can even melt certain plastics over time.
First rinse under running water for two minutes. Then fill a clean tub with water and add the dechlorinator according to package directions. Submerge the trays for fifteen minutes.
I actually skipped the dechlorinator on my first attempt. The trays smelt faintly of chlorine even after rinsing. I used them anyway, and the cuttings showed signs of stress within a few days. The dechlorinator solved that problem immediately.
Step 6: Air Dry in Full Sun
Place the trays in direct sunlight for at least four hours. UV light breaks down residual chemicals. It also kills any remaining microorganisms that survived the bleach.
If you do not have direct sun, an oven at its lowest setting works. I have done that with small trays before. Keep the door open to prevent melting. Honestly, the sun option is better.
Step 7: Store Clean Trays Properly
Do not stack damp trays together. This traps moisture and encourages mold growth. Let them dry completely, stack them loosely, and store them in a dry area.
I keep mine in the garage on a shelf. They stay clean indefinitely as long as they do not collect dust and dirt.
What to Do with Stubborn Stains
Some trays come out looking stained even after cleaning. White crust from mineral deposit often leaves a permanent chalky residue.
This is not a problem. The stains are cosmetic. As long as the tray is free from biological contaminants, it is safe to use. I have trays with permanent white marks that work fine and produce healthy cuttings.
If the tray is severely scratched or cracked, replace it. Cracks create crevices where bacteria thrive. No amount of cleaning can fully fix that. A cracked tray costs a couple dollars. Your cutting genetics are worth more.
Reusing Trays for Different Plants
Be careful about cross-contamination between different plant species. If a tray previously held a plant that died from a fungal disease, I do not reuse it for Nepenthes cuttings until I clean it thoroughly. Even then, there is some risk.
As a rule of thumb, I keep separate trays for Nepenthes, Drosera, and Sarracenia. This prevents any pathogens from jumping between species. It also helps me track which trays need more rigorous cleaning.
Water Quality Matters
The water you use during the cleaning process also affects your cuttings. I use distilled water for both cleaning and watering during propagation.
Tap water contains dissolved minerals that build up over time. These minerals leave residue on trays and in the medium. They also alter the pH of the growing environment.
Nepenthes prefer slightly acidic conditions. Tap water in many US regions is alkaline. Over weeks, this raises the pH around the cuttings and inhibits nutrient uptake.
The Royal Horticultural Society emphasizes the importance of using rainwater or distilled water for carnivorous plants. The Alkaline conditions of most tap water can cause irreversible damage to sensitive roots. Following that advice changed my propagation success rate dramatically.
I now buy gallon jugs of distilled water at the grocery store. It costs about a dollar per gallon, and one gallon is enough for several watering sessions.
Fungus Gnats and How Trays Help
Dirty trays are a breeding ground for fungus gnats. The organic matter left behind is an ideal place for them to lay eggs.
I noticed a dramatic reduction in fungus gnat populations after I started cleaning trays regularly. Clean surfaces leave nothing for the larvae to eat. The adults still show up occasionally, but they do not establish colonies.
You can add a thin layer of sand on top of your growing medium. This dries out quickly and discourages egg-laying. It also looks tidy.
I also use yellow sticky traps near the trays. They catch adult gnats before they can lay eggs. Since pairing clean trays with sticky traps, I have not seen a single gnat in my propagation area.
Common Concerns with Reused Trays
Cloudy Plastic
After many cleanings, plastic trays can turn cloudy. This reduces light penetration if you rely on overhead lighting.
Cloudy trays still work fine. The light reduction is minimal. The structure holds up unless the plastic has become brittle.
Warping from Bleach
Bleach can warp thin plastic trays if left too long or in high concentrations. I ruined one cheap tray by soaking it overnight in full-strength bleach.
Use the dilute solution and stick to the time limits. Thick professional trays tolerate bleach well. Thin disposable trays do not. If a tray feels flimsy, it is probably not worth cleaning. Throw it out.
Chemical Residue
If you cleaned a tray that previously held a pesticide-treated plant, be cautious. Certain chemicals bind to plastic and do not rinse off easily.
When in doubt, discard the tray. The cost of a new tray is low. The cost of a failed batch of cuttings is higher if you count lost time and material.
The Better Long-Term Approach
I have moved toward using disposable pellet trays for starting cuttings. These are inexpensive, come sterile, and do not need cleaning. After the cuttings root, I transplant them into permanent pots.
This is not an excuse to skip cleaning your main trays. You still maintain the main trays. But starting cuttings in disposable trays reduces disease risk and saves cleaning time.
That said, the standard 1020 trays are better for larger batches. They hold more cuttings and distribute moisture evenly. I use both systems depending on batch size.
Step-by-Step Summary for Beginners
Let me compress everything into an action list. This is what I wish I had when I first started.
Check your trays before every use. If there is any visible grime, clean them.
Soak in 10% bleach solution for 30 minutes. Scrub thoroughly with a nylon brush. Rinse with running water. Soak in dechlorinated water for 15 minutes. Air dry in sunlight.
Use a well-draining medium. I recommend sphagnum moss mixed with perlite at a 1:1 ratio. Moisten it before placing cuttings.
Insert cuttings with at least one node below the medium surface. The node is where roots will develop. Keep humidity high with a clear dome or plastic bag.
Place under bright indirect light for 12 to 14 hours daily. Keep temperatures between 70 and 80 degrees Fahrenheit. Night temperatures can drop to 60 without issue.
Water only when the medium starts to feel slightly dry on top. Keep the tray free of standing water. Pour off excess after thirty minutes.
Watch for the first signs of mold. Remove affected cuttings immediately to prevent spores from spreading to healthy ones.
Wait for roots to appear. This can take two to six weeks depending on the species and season. Patience is key. Do not pull on the cuttings to check for roots every day. You will damage the delicate tissue.
After roots reach about half an inch, transplant into individual pots. Use a larger tray to hold the new pots. Keep the same humidity and light conditions for another week to ease the transition.
Frequently Asked Questions
Can I use vinegar instead of bleach?
Vinegar is not as effective as bleach. It does not kill all the fungal spores and bacteria that bleach handles easily. It also leaves behind an organic residue that can feed microbes. I stick with bleach for any tray that has previously been used. Vinegar is fine for light rinsing, but it will not disinfect thoroughly.
How often should I clean trays during propagation?
Clean trays at the start of every new batch. Within a single propagation cycle, the trays generally stay clean if you avoid overwatering and remove dead plant material promptly. If you see algae forming on the tray surface before the cycle ends, do a quick wipe with a 5% bleach solution. Allow it to air dry before returning the cuttings.
What if I see mold in the tray during propagation?
Act quickly. Remove the affected cutting and any surrounding medium that looks suspicious. Clean the entire tray using the bleach method described above. Do not just wipe off the visible mold. The spores are already in the medium. After cleaning the tray, set up a fresh batch with new medium. It is better to lose a couple cuttings than to risk losing the whole batch.
Final Thoughts
Reusing trays for Nepenthes cutting propagation is not complicated. It just requires a little discipline. I learned the hard way that skipping the cleaning step is a shortcut to failure. The two-week process I shared here has given me the best rooting rates I have ever achieved. My only regret is not figuring this out years ago. If you take nothing else away, remember this: clean trays are the foundation. Everything else builds on that.





