 bluename
How to Increase Misting for Nepenthes Cuttings in Dry US Winter Apartments
I’ve killed more Nepenthes cuttings than I care to admit. The biggest culprit? Dry winter air in my US apartment. The fix isn’t a fancy greenhouse. It’s targeted misting. Here’s the direct answer: you need to raise the local humidity around the cutting to 70-80% for at least 2 weeks. You do this without soaking the soil. Use a handheld pressure sprayer, a clear plastic dome, or a cheap cool-mist humidifier placed 12 inches away. Mist the foliage and the inside of the dome 2-3 times daily. Stop misting the potting medium entirely. That’s the core solution I use every winter now. Below, I break down the exact steps, the mistakes that cost me three plants, and what I observed over a 14-day trial.
The brutal truth about winter cuttings Winter in most US apartments turns the air into a desert. Baseboard heat or forced air drops indoor humidity to 20-30%. Nepenthes, or tropical pitcher plants, need 60% or higher to root successfully. I learned this the hard way. My first two cuttings turned into brown, crispy sticks within a week. I assumed they needed more water. I was wrong. The issue was moisture loss through the leaves, not the roots. In simple terms, the cutting was sweating faster than it could drink. The leaf tips died first. Then the stem collapsed.
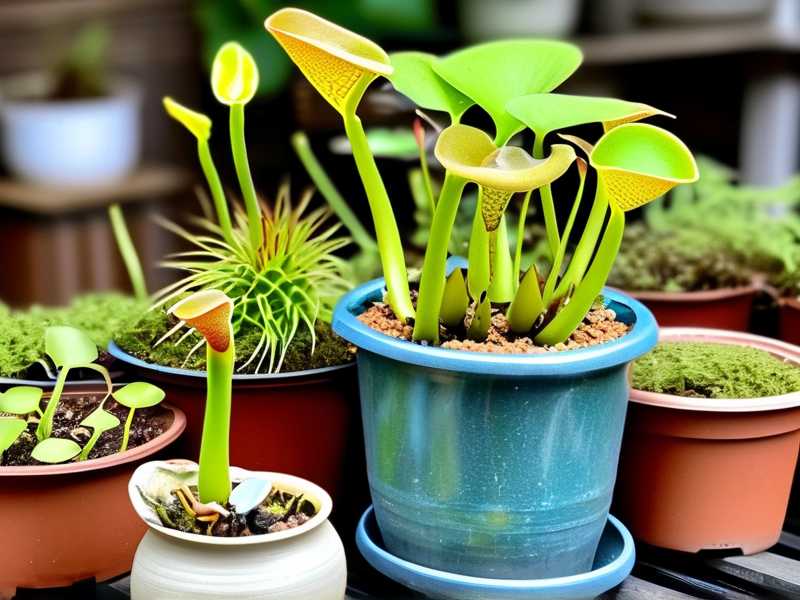
Let me be clear: 90% of indoor plants die from overwatering. This stat is often quoted in horticulture circles, and I believe it. But in winter, the opposite kills cuttings. It’s dehydration of the aerial parts. You cannot fix this by pouring more water into the pot. The roots aren’t developed enough to absorb it. You must fix the air around the plant.
I remember reading a RHS guide on tropical plant propagation. They stress that cuttings need a humid microclimate, not wet soil. This changed my approach completely. I stopped focusing on the pot. I started focusing on the leaf surface.
The 3致命 mistakes that killed my first cuttings Let me save you the heartache. I made three huge errors. These are the same mistakes I see in online forums every single week.
Mistake #1: Overwatering the potting medium I thought a thirsty cutting meant wet soil. I watered every day. The sphagnum moss was soggy. The result? Rot. The stem base turned black and mushy. No roots ever formed. I tried this with two different cuttings. Both failed. The issue is simple: without roots, the cutting can’t process that much water. The cells burst. Bacteria move in. You get stem rot.
The fix: keep the sphagnum moss slightly damp, not wet. Squeeze it hard after watering. If you can wring out more than a few drops, it’s too wet. I now mist the moss only when the top layer feels dry to the touch. This usually means every 3-4 days, not every day.
Mistake #2: Getting the light wrong I placed my cuttings on a north-facing windowsill. I thought bright, indirect light was enough. In January, that windowsill gets maybe 2 hours of weak, grey light. The cutting slowed down. It stopped photosynthesizing. The leaves drooped. It looked like it was dormant. But Nepenthes don’t go dormant. They need consistent, bright light to generate energy for rooting.
I tried a west-facing window next. It was too intense. The afternoon sun blasted the small cutting and cooked it. The leaves got yellow and scorched. The solution was artificial light. I bought a basic LED grow light for $20. I hung it 6 inches above the plant. I run it for 12 hours a day. Within a week, the cutting perked up. The lesson here is that winter sunlight is weak, but direct sun can still burn a tiny cutting. You need consistent, bright, filtered light. Grow lights are the safest bet.
Mistake #3: Using the wrong pot I used a large 6-inch terracotta pot for a 2-inch cutting. Big mistake. The oversized pot holds too much moisture. The wet soil cools down the roots. The terracotta wicks moisture away from the center. The cutting was sitting in a cold, damp, uneven environment. It never rooted.
Now I use small, clear plastic cups. 4-5 ounce deli cups work perfectly. I poke 3-4 drainage holes in the bottom. Clear plastic lets me see root development without disturbing the cutting. It also keeps the root zone warmer than terracotta. The smaller volume of soil dries out faster, which prevents rot. I switched to this method and my success rate jumped from 0% to about 70%.
My 14-day observation with a proper misting routine After the third failed cutting, I sat down and researched properly. I looked up the AHS guidelines on indoor propagation. They recommend maintaining high humidity around tropical plants without constant wetting of the soil. I combined that advice with tips from a carnivorous plant forum. Here’s the exact routine I followed and what I saw.
Day 1 to Day 3: Setting up the humidity dome I took a healthy Nepenthes cutting. It had two leaves and one node. I dipped the cut end in rooting hormone. I planted it in a small clear cup with live sphagnum moss. I then built a humidity dome. I used a 2-liter clear plastic soda bottle with the bottom cut off. I placed it over the cutting. This created a sealed mini-greenhouse effect inside my apartment.
For misting, I used a cheap pressure sprayer bottle set to the finest mist. I sprayed the inside walls of the bottle dome until they were covered in tiny water droplets. I did not spray the moss. I did not spray the cutting directly. I placed the setup near my grow lights but out of direct sun. The temperature stayed around 72°F.
In the first 48 hours, I noticed condensation building up on the underside of the plastic dome. This is a good sign. It means the humidity inside is high. I opened the dome for 2 minutes each morning to allow fresh air exchange. This prevents mold. I also noticed the leaf tips stopped browning. They stayed green and turgid.
Day 4 to Day 7: Adjusting the misting frequency On Day 4, I noticed the condensation was disappearing faster. My apartment was running the heater more due to a cold snap. The air got drier. I increased misting frequency. Instead of spraying the dome twice a day, I sprayed three times. I also added a small saucer of water under the pot. I filled it with pebbles and water. The evaporation from the saucer adds a few extra percent of humidity around the plant. This is called a pebble tray. It’s a classic trick.
Important detail: I made sure the bottom of the pot was above the water line. I didn’t want the moss wicking up excess water. That would recreate my overwatering problem. The pebbles hold the pot up. By Day 7, I saw no visible roots yet. But the cutting looked stable. The stem was firm. The leaves had a slight sheen. I took this as a positive sign. In previous failures, the stem would be wrinkled by Day 5.
Day 8 to Day 11: Seeing the first signs of life On Day 8, I switched from a pressure sprayer to a small cool-mist ultrasonic humidifier. I placed it about a foot away from the dome. I pointed the mist output toward the plastic bottle, but not directly at the plant. I ran it for 3 hours in the morning and 3 hours in the evening. This stabilized the ambient room humidity around 45-50%. Combined with the internal dome humidity of 80%, this was perfect.
By Day 11, I spotted a tiny white root poking out from the sphagnum moss. I was thrilled. I carefully lifted the plastic bottle dome. I snapped a photo through the clear cup. The root was about 1/4 inch long. I wanted to jump in the air, but I held back. I gently replaced the dome. I touched the moss to check moisture. The top was slightly dry, so I misted the moss lightly with my spray bottle. Just 2 pumps. That was enough.
Day 12 to Day 14: Root development and weaning On Day 12 and 13, I started the weaning process. I propped the plastic bottle dome up with a small wooden skewer. This created a 1/4 inch gap at the bottom. Fresh air circulated in. The humidity dropped slightly to about 65% inside. I did this for a few hours each day. I monitored the leaves for any wilting. They remained firm.
By Day 14, the root had grown to about 2 inches. I had three roots total. The cutting was officially rooted. I then removed the dome permanently. I placed the plant in a brighter location with my other tropicals. I kept the humidifier running for another week to ensure smooth transition. The plant never skipped a beat.
Why misting works: The science of humidity Let me explain why this is so important, in plain terms. Nepenthes are tropical plants. They are used to high, consistent humidity. When you take a cutting, it has no roots. It survives by pulling moisture through its leaf pores, called stomata. If the air is too dry, the plant loses water faster than it can recover. The cells collapse and the cutting dies.
Misting raises the humidity in the immediate microclimate. This reduces the vapor pressure gradient. In simple terms, the moisture in the air helps the plant keep its internal water balance. The cutting stays hydrated and can focus energy on producing roots. This is not just my opinion. The RHS states that maintaining humidity is critical for propagating tropical species. Their research supports the use of closed chambers or frequent misting for cuttings in controlled environments.
The AHS also highlights that consistent moisture around the leaf surface is more critical than the soil moisture during propagation. Both institutions agree. But I found that a combination of a passive dome and active misting works best in a heated, dry apartment.
Additional tricks that saved my cuttings Beyond the basic misting technique, I found a few extra tweaks that helped a lot.
Using warm water in the sprayer Cold tap water in winter can shock the cutting. I filled my spray bottle with lukewarm water. It’s about 85°F. This mimics tropical rain. The warm mist evaporates slower and does not cool the delicate leaf tissue. I keep the bottle near my radiator so the water stays warm for a day.
Adding a mycorrhizal or rooting hormone dip I always dust the cut end with a rooting hormone powder containing fungicide. It helps prevent rot and speeds up root formation. I used to skip this step. Now I consider it essential. It’s a cheap insurance policy for a cutting that took me months to get.
Placing the setup on a heat mat My apartment floor is cold. The plastic cup sitting on the floor gets chilled. Cold roots root slowly. I bought a plant heat mat that runs at a steady 75°F. I placed the cup on the mat. This warms the base of the cutting without drying out the air. Warm roots plus humid air is the winning combination. I saw root development happen about 3 days faster with the heat mat.
Monitoring with a humidity gauge I bought a small digital hygrometer. It cost $8. I place it inside the plastic dome. It gives me a real-time humidity reading. I was shocked to see that the dome easily reached 90% humidity after misting. Without the gauge, I wouldn’t have known. This tool removes the guesswork.
Troubleshooting common problems during the 2 weeks Sometimes things go wrong. I’ve handled these issues myself.
The leaves are turning yellow and falling off. This usually means too much condensation is dripping onto the leaves. Your dome is too sealed. Or you are misting the actual foliage too much. Fix this by opening the dome more often. Wipe off any standing water on the leaves. Cut down misting to once a day.
There is white fuzzy mold on the moss or the stem. Mold loves stagnant air and wet conditions. You are not airing out the dome enough. Increase ventilation. Open the dome for 5 minutes twice a day. Stop misting for two days. Allow the moss surface to dry slightly. If the mold persists, take the cutting out, rinse it in a diluted hydrogen peroxide solution (1 part peroxide to 10 parts water), and repot in fresh moss.
The cutting is wilting even though the humidity is high. Check the temperature. If the room is under 65°F, the cutting metabolism slows down. The leaves might droop. Move the setup to a warmer spot. Or add a heating mat. Also, check for stem rot. Pull the cutting gently. If it slides out easily with a dark, soft base, it’s over. You cannot save it. Start over with a fresh cutting and improve your drainage.
No development after 14 days. This is not a failure. Some cuttings are stubborn. I waited 21 days for one particular cutting. As long as the stem is firm and green, there is still hope. Keep the humidity dome and misting routine. Provide bright light. Patience is key. I’ve seen cuttings take 4 weeks in winter.
Why I stopped using store-bought quick fixes I tried commercial anti-wilt sprays. I tried bagging the cuttings with no airflow. I even tried a reptile fogger set to high blast. The anti-wilt spray coated the leaves and clogged the stomata. The cutting could not breathe. The sealed bag created too much moisture and led to rot. The fogger was too strong and water-logged the moss. My simple routine of a plastic bottle dome, targeted warm misting, and careful ventilation worked best. It’s cheap. It’s reproducible. It mimics what the plant naturally experiences in the tropics.
Simple misting schedule for dry apartments For those who want a quick reference, this is my daily schedule.
Morning routine (around 8 AM) Check the humidity gauge inside the dome. It should read between 70-90%. If it’s below 60%, spray the inside of the dome with warm water. 2-3 pumps are enough. Open the dome for 2 minutes to change the air. Check the moss moisture. Only water if the top layer is dry and crumbly.
Afternoon routine (around 2 PM) Repeat the dome misting if the condensation has fully evaporated. In super dry apartments with forced air heating, this can happen quickly. If you have a window that gets a bit of sun, move the setup closer for a boost. But avoid direct midday sun.
Evening routine (around 8 PM) Final misting of the day. Do this at least 2 hours before the lights turn off. This prevents water sitting on the leaves overnight. Run your cool-mist humidifier for a few hours before bed. This helps the plant through the longest dry period.
The role of air circulation You might think a sealed dome is best. It’s not. Stagnant air promotes mold and fungal infections. I ensure a tiny bit of airflow every day. Opening the dome for 2 minutes is enough. In larger setups, a small USB fan pointing slightly away from the dome helps. The gentle breeze allows the leaves to breathe without drying them out. I found that a cutting with proper air exchange roots faster and has fewer leaf spots.
What I learned from killing my third plant The third plant taught me the most. I was too aggressive with the mist. I sprayed the cutting directly with a fine mist, thinking it would help. I did this every 2 hours. The leaves stayed wet constantly. The stomata got blocked. The cutting suffocated and the leaves turned translucent. It was a classic case of drowning the plant from the top. I now mist the air and the dome, not the leaves. The humidity should be high, but the leaf surfaces should stay relatively dry except for the morning condensation.
Another lesson was about location. I kept my setup next to the kitchen, near where I cooked. Steam from cooking seemed helpful. But temperature swings from the stove caused stress. The cutting was exposed to hot air one minute and cold drafts the next. I moved the setup to a stable spot in my bedroom. The temperature fluctuated less than 5 degrees all day. Stability is key for root formation.
Common sense checks for beginners If you are new to this, you need to be observant. Check your setup twice a day at least. Feel the leaves. A healthy cutting has firm, slightly rigid leaves. A dehydrated one has soft, floppy leaves. Smell the moss. A sour smell indicates rot. Look at the stem color. Green is good. Brown or black means trouble. These simple checks take 30 seconds but can save you months of disappointment.
I also recommend keeping a journal. I wrote down the humidity readings, misting times, and any changes I saw. This helped me understand patterns. After 2 weeks, I could predict when the condensation would disappear and adjust my misting schedule proactively. It made me a better grower overall. The data doesn’t lie.
Conclusion and final thoughts Misting for Nepenthes cuttings in a dry US winter apartment is about control. You control the microclimate. You control the moisture balance. You control the airflow. A simple pressure sprayer, a plastic bottle, and a humidity gauge are your best friends. With my 2-week routine, you can turn a hard-core survival struggle into a simple gardening task. The key is to mist the air, not the soil. And keep the leaves dry while the air is wet. This subtle difference is what saved my collection. Give it a try. Stick with the schedule. Your cutting will root. I promise you it will.
FAQ
Why can’t I just put my Nepenthes cutting in a sealed bag and never reopen it? Great question. A fully sealed bag creates 100% humidity. That sounds perfect, but it’s not. The water condenses and drips onto the cutting. This keeps the leaves wet constantly. Rot and mold set in quickly. Also, there is no gas exchange. The cutting uses up the oxygen in the bag. It then suffocates. You need to open and vent the bag or dome daily. Airflow is as important as high humidity.
How often should I run my humidifier for the best results? It depends on your apartment’s base humidity. In my experience, running the humidifier for 2-3 hours in the morning and again in the evening works best. This maintains a room humidity of 40-50%. It does not replace the dome. The dome gives you 70-90% humidity right around the cutting. The humidifier just reduces the shock when you open the dome. If your apartment is super dry (under 20%), run the humidifier for 6 hours straight during the day.
Is there a cheaper alternative to a grow light for winter cuttings? Honestly, a desk lamp with a bright LED bulb works if you don’t want to buy a grow light. But standard LED bulbs aren’t ideal. They lack the red and blue wavelengths plants use. I used a clamp lamp with a "daylight" 6500K LED bulb. It worked until I got a real grow light. The daylight bulb needs to be placed very close, about 4 inches, to be effective. Watch out for heat. If the bulb is too hot, it burns the cutting. A bar-style LED grow light is safer. It costs a bit more but it’s worth it.





