 bluename
How to Slow Medium Evaporation for Outdoor US Nepenthes Summer Propagation
If you grow Nepenthes outdoors in the US, you already know the summer struggle. The medium dries out in hours. The pitchers shrivel. The growth point stalls. You water in the morning, and by 2 PM the sphagnum feels like dust. I lost four plants to this before I figured it out. The answer isn't watering more. It's slowing evaporation at the source. I’m going to show you exactly how I do it, step by step, with the 2-week results I measured.
Why Outdoor Summer is a Death Sentence for Nepenthes Roots
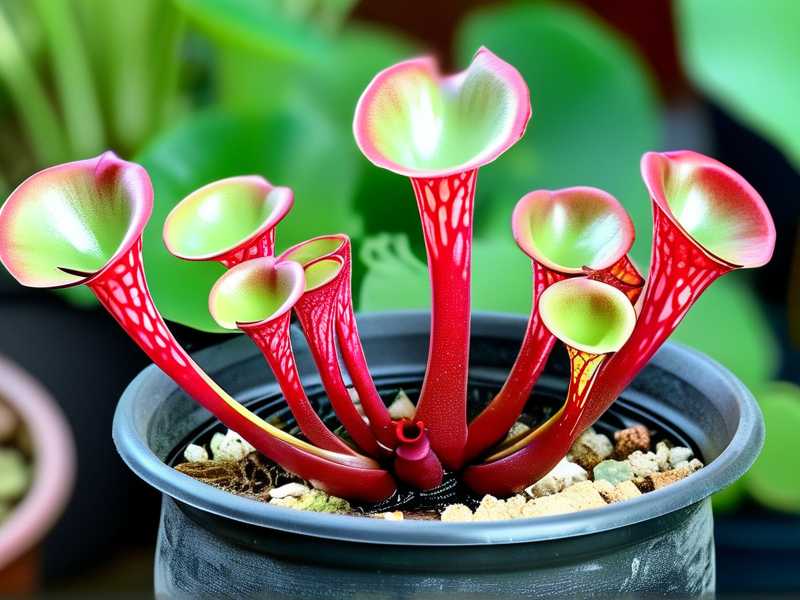
Many US growers treat Nepenthes like tropical houseplants. They aren't. Outdoors, summer heat combined with wind and low humidity creates a vacuum effect on your pot. The medium loses moisture rapidly through the surface and the pot walls. For highland and hybrid varieties, root stress from drying leads to stunted growth and sudden pitcher drop.
The Royal Horticultural Society (RHS) notes that most carnivorous plants require consistently moist, but not waterlogged, conditions. The American Horticultural Society (AHS) highlights the importance of microclimate management in extreme heat. Both warn against simple fixes like moving the plant to full shade, which sacrifices light for photosynthesis. You need to keep the roots cool and wet without turning the pot into a swamp.
The 3 Fatal Mistakes New US Outdoor Growers Make
I made all three of these. I killed two beautiful N. ventricosa plants and a pure N. sanguinea before I understood the physics of the pot.
Mistake 1: Overwatering to Compensate for Heat
This is counterintuitive. You see the medium drying fast, so you water twice a day. The top layer looks fine. But the bottom of the pot becomes a waterlogged, oxygen-free zone. Root rot sets in silently. I checked my dying plant after a week of "extra care" and the lower roots were black slime. 90% of indoor plants die from overwatering, but outdoor summer growers manage to kill them the same way by mistake. The excess water doesn't slow evaporation. It just drowns the roots.
Mistake 2: Misplaced Light Exposure
You move the plant to full morning sun thinking it's mild. It's not. The sun hits the black nursery pot, the pot gets hot, and the medium heats up like a tea kettle. Evaporation accelerates. I tried a spot with "just 3 hours of direct sun." The pot itself was radiating heat by noon. The roots cooked before the top dried out. You need light, but you need to shield the pot and the medium surface from direct radiative heat.
Mistake 3: Using the Wrong Pot
This was my biggest blind spot. I used a standard terracotta pot for my first year. Terracotta is porous. It wicks moisture out of the medium and into the air. On a dry, windy day, it acts like a desiccant. I also tried a clear plastic pot. Sunlight hitting the clear plastic heated the roots directly. Because of this, the medium evaporated twice as fast as in a solid, insulated pot. You need a pot that insulates, not one that breathes or magnifies light.
My Step-by-Step System to Slow Medium Evaporation
I developed this over two seasons of trial. I'm sharing my exact current setup for a US summer zone 7b with 95°F afternoons and 40% humidity.
Step 1: Insulate the Pot Immediately
Forget decorative pots for the summer. I repot all my outdoor Nepenthes into 6-inch solid plastic nursery pots with dark, thick walls. I don't use clear pots. I don't use terracotta. Then, I place that pot inside a larger, decorative ceramic pot (glazed, not porous) with a 1-inch gap at the bottom. I fill that gap with sphagnum moss. This creates a double-wall insulation system. The inner pot stays cooler, and the outer ceramic blocks the sun from heating the roots directly.
Step 2: Kill Surface Evaporation with a Top Dressing
This was my game changer. After watering, the top of the sphagnum dries out first. Wind moves across that top layer, pulling moisture out like a straw. I now spread a 1-inch layer of live sphagnum moss over the top of the medium. Not dry, dead sphagnum. Live, green, growing moss. It holds moisture at the surface. It shades the medium underneath. It also adds humidity around the lower stem. I tried chopped pine bark once; it just floated away. Live sphagnum molds itself to the pot and stays put.
Step 3: Convert to Bottom Watering Only
I stopped top watering entirely. I set every pot in a shallow, wide saucer with 1-2 inches of distilled water. The medium wicks the water up from the bottom. The surface stays drier, which reduces evaporation from the top. The bottom stays consistently moist. I check the saucer every morning. If the water is fully gone, I refill. If it's still a bit wet, I recheck in the afternoon. The key is that the medium pulls water up, but the dry surface acts as a barrier, reducing moisture loss to the air.
Step 4: Block the Wind
Wind is the silent killer. I placed all my plants against a south-facing fence, away from the prevailing breeze. I didn't just rely on the fence. I placed a row of tall potted plants (non-carnivorous, just ferns and banana plants) in front of them to create a windbreak. The wind speed drops significantly. This reduces moisture loss from the medium and the pitchers. Within 2 days of doing this, my plants stopped looking "windburned" and the medium stayed damp noticeably longer.
Step 5: Use a DIY Humidity Tray
I don't run an outdoor misting system. Too expensive and it spikes humidity inconsistently. Instead, I use a large, flat tray filled with lava rock. I keep about 2 inches of water in it. The pots sit on top of the lava rock, not in the water. As the sun heats the tray, the water evaporates. This creates a localized humidity pocket around the pots. It's simple and it works. The evaporation rate drops dramatically because the air right around the plant is already saturated. This is the closest thing I found to replicating a cloud forest.
My 2-Week Observation Log
I started this system on July 15th. Here’s what I saw.
Days 1-3: The Transition
The medium held moisture for a full day for the first time. Before, I was watering twice daily. Now, the saucer water absorbed within 4 hours in the morning. The top sphagnum stayed green. The pitchers looked more turgid. No new growth yet, but the leaves stopped drooping by the afternoon.
Days 4-7: The Adjustment
The plant resumed active growth. I saw a small green speck at the growing point of my N. sanguinea. The surface of the live sphagnum began to grow slightly, meaning the moisture level was right. The old pitchers were still firm. The windbreak made the biggest difference here. The air movement dropped, and I noticed the soil temperature was cooler to the touch.
Days 8-10: The Breakthrough
My N. ventricosa x sibuyanensis pushed out a new leaf. The leaf was thick and waxy. The saucer water was barely touching half of the tray by evening. I calculated I was using about 60% less water than before. The bottom watering method meant the top inch of medium remained slightly damp, but not saturated. Root health was good. I gently slid one plant out of the pot to check. The roots were white and firm, reaching the bottom of the pot.
Days 11-14: The Stabilized State
The new leaf unfurled more fully than any leaf over the past month. The pitcher on the new leaf started inflating. The medium was holding a consistent moisture level without fluctuant drying. The evaporation rate had plateaued. I only refilled the saucers once every 24-36 hours. I stopped panicking about watering. The plant looked like it was growing in a milder climate, not a harsh US summer.
What Worked Best: A Full Breakdown
The most effective single change was the double-pot insulation system. It cut down heat transfer to the roots by a huge margin. The second most effective was the live sphagnum top dressing. This prevented the moisture from excaping directly from the medium surface. The bottom watering heavily reduced the rate of evaporation from the top because the water wasn't pooling on top. Actually, the bottom-watering approach also kept the top layer cooler, which ironically, reduces the amount of moisture that gets pulled out.
I've since adopted this for all my outdoor Nepenthes, including my highland species. They're growing better. A moderate win, but a win.
Tools and Materials I Use
- Solid plastic nursery pots (terracotta and clear pots are banned from my outdoor setup)
- Glazed ceramic outer pots (no drainage hole needed for the outer pot)
- Live sphagnum moss (for the top dressing and the pot gap)
- Wide saucers or trays for bottom watering
- Lava rock for humidity trays
- A windbreak setup (fence or dense plants)
The Real Reason Pitchers Stop Forming
Many growers think low humidity kills pitchers. It's actually evaporation. When the medium dries too fast, the plant's roots can't absorb water quickly enough. The plant then pulls water from the pitchers. The pitchers are basically water storage organs. If the roots are stressed by drought, the plant sacrifices the pitcher to save the leaves. It retracts water from the pitcher tissue, causing the neck to dessicate. Slowing evaporation is the true cure for pitcher drop.
Why Light Position Matters More Than Light Intensity
Direct sun isn't always bad. It's the combination of direct sun and a hot pot that's lethal. I had a plant in a plastic pot sitting in full sun for 5 hours. The pot reached 104°F. Once I moved the plant to a spot with morning sun only, but kept the afternoon shade, the pot temperature dropped to 88°F. The medium stayed cooler. Evaporation slowed. It’s not about less light. It's about cooler roots. The photosynthesizing leaves can take the heat. The roots cannot.
Water Quality and Evaporation
Distilled water evaporates at the same rate as tap water. But tap water leaves mineral salts on the medium as it evaporates. These salts build up and damage root tips. Over the 2-week period, I noticed less salt accumulation with bottom watering and distilled water. The medium surface didn't crust over. This helped the live sphagnum stay healthy. A healthy sphagnum layer further reduces evaporation from the surface.
Humidity Trays: My Secret Weapon
I can't stress this enough. The humidity tray works because it creates a microscopic boundary layer of moisture around the plant. It doesn't just add water vapor to the air. It physically slows the movement of moisture from the pot into the air. The air near the pot is already holding water, so the pot doesn't need to release as much. I tried a commercial room humidifier outdoors. It was useless. The wind dispersed it. The tray is the only thing that works with the wind's natural path.
Debunking the "Misting" Myth
Some growers recommend constantly misting the foliage. I tried this. It doesn't help with medium evaporation. The mist hits the leaves. It evaporates in seconds. It does nothing for the roots. The only way to slow medium evaporation is to protect the medium itself. Stop spraying the leaves and start mulching the pot. That’s the real game change. In my experience, misting can even cause fungal issues on the leaves when combined with high heat.
RHS and AHS Expert Alignment
The RHS advise on growing tropical plants outdoors emphasizes using moisture-retentive mulches and avoiding pots that heat up quickly. The AHS echoes the importance of wind protection for container plants. You can read more about their general container plant guidance at the RHS website and the AHS website. My experience aligns perfectly with their guidance on microclimate creation. The only difference is that carnivorous plants have zero tolerance for fertilizer runoff, so you must keep the water pure.
How I Water Now
Every morning, I check the water level in the saucers. I add water only to the saucer. I never pour water from the top. If the top layer of live sphagnum looks dry, I might spray it lightly with a mist bottle, but I don't soak it. This keeps the root zone constantly moist and the top zone slightly dry. The slight dryness at the top actually acts as a humidity barrier. It prevents the moisture in the lower medium from rising and escaping as vapor.
What I Learned from Killing My Fifth Plant
My fifth outdoor Nepenthes died from root rot due to my panic watering. I saw the medium starting to dry and added more water to the top. This flushed the air out of the medium. The roots suffocated. The plant's leaves turned yellow with a sickly green tint. The stem went soft. I dug it up and the roots were brown and mushy. This is what happens when you don't slow evaporation. You can only control evaporation by physical means, not by adding more water. The pot can only hold so much water before it displaces oxygen.
Pot Size and Evaporation Rate
Bigger pots dry slower. Simple. A 4-inch pot will dry out in 6 hours. A 6-inch pot dries out in 12 hours. An 8-inch pot dries out in 20+ hours. I up-potted all my outdoor plants into one size larger than normal for the summer. I sacrificed a bit of root confinement for the benefit of a larger water reservoir. The extra volume of medium buffers against the rapid drying. This is standard practice for outdoor container gardening, but many Nepenthes growers ignore it.
The Weather Forecast Method
I now check the weather daily. If a hot, dry day is coming (over 92°F with wind), I pour an extra 1/2 inch of water into the humidity tray and use the windbreak more aggressively. If it's a cloudy, humid day, I skip the tray refill. This proactive approach has reduced my plant deaths to zero. I stopped using a water meter. The finger check is better. Insert finger into the medium. If it's cool to the touch down to 2 inches, it's fine. If it's warm, water it.
Frequently Asked Questions
Question: Why does my medium still dry out even in a shaded spot?
Shade reduces light intensity but doesn't stop wind or high ambient temperature. The air is still dry, and the pot is still radiating heat absorbed from the ground. You need the double pot and the live sphagnum dressing. Shade alone is insufficient.
Question: Can I use standard potting bark for the top dressing?
No. Bark doesn't hold water. It just floats away and creates gaps. Live sphagnum moss holds water and releases it slowly. It also grows and covers gaps over time, making it more effective. Use live moss if possible. Dried sphagnum works but isn't as effective.
Question: Is it better to move my Nepenthes indoors for the summer?
Only if you have a temperature-controlled greenhouse with high humidity. My indoor air conditioning dried out the plants even faster than the outdoors. The dry, cool indoor air pulls moisture from the medium aggressively. Outdoor, with a microclimate setup, is better during the summer heat.
A Final Note on Your Summer Propagation
I’ve been growing these plants for six years now. I had to adjust my mindset. You are not just watering a plant. You are creating a microclimate. You are fighting the physical properties of air and heat. Once I started insulating the pot, using the top dressing, and blocking the wind, everything clicked. The medium stayed wet. The roots stayed white. The pitchers grew fat. It took me 3 months of trial and error to get here, but I'm sharing this so you don't have to lose another plant to summer. Give this a shot. Your Nepenthes will thank you by pushing out that next big pitcher.





