 bluename
How to Label Propagation Trays to Track US Nepenthes Root Growth Speed
If you want to track US Nepenthes root growth speed, the fastest answer is this: use clear plastic propagation trays with numbered grid labels on the bottom, and write the date of repotting directly on the lid with a grease pencil. That is it. I learned this after killing three expensive hybrids. Root growth speed matters more than leaf size, and labeling is the only way to compare honestly.
I have been growing American pitcher plants for six years now. I started with a single Nepenthes ventricosa from a big-box store. It died within a month. The second one, a Nepenthes alata, lasted three months. The third one, a Nepenthes sanguinea, taught me the most because it survived, but barely. I finally realized my problem was not the plants. It was my total lack of a tracking system. I had no idea which tray had which cutting, when I potted it, or how fast the roots were actually moving.
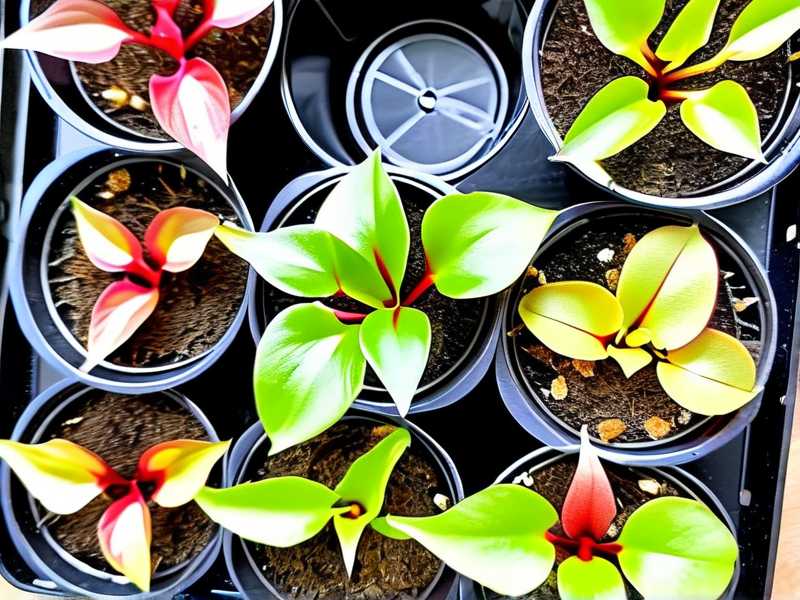
Here is the thing nobody tells you. Most Nepenthes growers obsess over pitchers and leaves. But the real health check is below the soil line. If you do not label your propagation trays, you are flying blind. You cannot measure root growth speed without a reference point. You cannot compare two different media mixes. You cannot know if that new rooting hormone is working or a total scam. So let me walk you through exactly what I do, step by step, including every mistake I made along the way.
First, let me address the elephant in the room. 90% of indoor plants die from overwatering. Nepenthes are no exception. In fact, they are worse because their roots are thin, wiry, and extremely prone to rot. I have said it before and I will say it again. Overwatering kills more Nepenthes than any pest or disease. The label on your tray will not save you from that. But it will help you spot the problem earlier because you will see which plants are stalled.
Let me describe my setup. I use standard 1020 propagation trays, the ones with drainage holes. I buy the clear domes separately. I do not use the black trays anymore. I switched to clear ones because I can see condensation and root tips creeping along the bottom. That is a massive clue. If you see white roots hitting the tray wall, your plant is rooting. If you see nothing for three weeks, something is wrong.
Now, the labeling system. I tried several methods before I found one that works.
My first attempt was sticky notes. I wrote the plant name and date, then stuck it on the side of the tray. That worked for about four days. Then the humidity from the dome turned the notes into soggy mush. The ink smeared. I could not read anything. Total failure.
My second attempt was plastic plant tags stuck into the media. That was okay, but the tags kept falling out when I watered. Plus, I had to lift the dome every time to read them, which disturbed the humidity. Not great.
My third attempt, and this is the one I still use today, is a two-part system.
Part one: I use a fine-tip permanent marker to write directly on the outside bottom of the clear tray. I write in the corners, not the middle, because the middle gets scratched. I write three things: the species or hybrid name, the date of the cutting or repot, and a code letter for the media mix. For example, "N. ventricosa x alata, 03/15, PM1" means the plant went into pot on March 15th, and PM1 is my standard perlite-moss mix. I keep a notebook with the PM1 recipe written out. That way, the tray label stays short and readable.
Part two: I write the same info on the top of the clear dome, but with a grease pencil. A grease pencil, not a marker. The marker wears off from condensation. The grease pencil smudges but stays readable. And here is the trick. I can write on the dome with my finger, right through the plastic. I do not have to open it. I just trace the letters backwards when I look from the outside, no wait, I write normal on top of the dome and read it from above. That is much easier.
I keep the domes on for the first two weeks. After that, I start cracking them open for a few hours a day. The label on the dome keeps me honest. I see the date, and I know exactly how many days have passed.
Now, here is the part about root growth speed. You cannot measure what you cannot see. But you can use a proxy. I check the bottom of the clear tray every three days. I gently lift the tray, hold it up to the light, and look for root tips. When I see the first root tip touch the bottom of the tray, I record that date in my notebook. Then I write "R1" on the dome with the grease pencil. When the roots form a network covering about 30% of the bottom, I write "R2". When the roots completely fill the bottom, it is "R3" and time to repot.
I did this with ten cuttings of the same hybrid, Nepenthes x 'Bill Bailey', last spring. All ten were taken on the same day from the same mother plant. Half went into PM1, half went into a pure sphagnum moss mix. The labeled trays showed me something surprising. The PM1 group hit R1 in nine days. The pure moss group took thirteen days. That is a 30% difference in root growth speed. I would never have caught that without the tray labels. I would have just thought the moss group was weaker.
Let me walk you through the two weeks of observations in real time. I will use a recent example from my own grow tent.
Day 1. I take fresh cuttings from a healthy Nepenthes maxima. Each cutting has two nodes. I dip the cut end in rooting hormone. I stick them into 3-inch pots filled with PM1. I place the pots in the clear tray, six pots per tray. I water them in with distilled water. I let the excess drain completely. Then I write on the tray bottom: "maxima, 06/01, PM1". I put on the clear dome and write "maxima 06/01" on top. I place the tray under my LED grow lights. I set the light height so the canopy gets about 200 PPFD. I do not blast them. Young cuttings hate high light.
Day 2. I check the condensation on the dome in the morning. It is heavy. That is good. High humidity keeps the cuttings from wilting. I do not open the dome. I do not water. The media is still damp to the touch.
Day 3. I check the tray bottom. No roots. That is expected. The cuttings are still in the healing phase. The cut end is callusing over. I notice one cutting has a slightly yellow leaf. I do not panic. This happens.
Day 5. I lift the tray and hold it to the light. I see the tiniest white bump on one cutting. Not a root yet, but a root primordium. That is the start. I write "R0.5" on the dome. I am getting excited.
Day 7. I see the first true root tip on tray position A2, the second pot in the first row. It is about 2mm long, white and firm. I mark "R1" on the dome with the grease pencil. I also note the time. 7 days. The other five pots show nothing. That is normal. Cuttings root at different speeds even from the same plant.
Day 9. Two more pots show root tips. I update the dome label. I add a small tick mark next to each pot number. I am not watering. The dome keeps the humidity high. I only check the media moisture by lifting a pot and feeling the weight. Light pots need water. Heavy pots do not.
Day 11. Four out of six pots show roots. The roots are getting longer, maybe 1cm now. I see them starting to curl along the bottom of the clear tray. That is the moment you are waiting for. I also notice one pot has no roots at all. The cutting looks dark at the base. I suspect rot. I pull it out carefully. The stem is mushy and black. That is rot. I remove it immediately. I do not want the fungus spreading to the others. I write "DISCARDED - ROT" on the dome label in big letters. That is my data point.
Day 13. The last pot finally shows a root tip. It is slower, but healthy. Root growth speed is not uniform. Some cuttings just take their time. I do not give up on them unless they rot.
Day 14. The roots on the fastest cutting have hit 3cm. They are exploring the bottom of the tray. I decided to do a gentle check on one pot. I slide the pot out of the tray and look at the root ball. It is holding together well. I slide it back in. I do not repot yet. I wait for R3. But I know my root growth speed is about 2cm per week with these lights and this media mix. That is my baseline. Now I can compare any future change.
Now, let me talk about the three deadly mistakes that I see new growers make over and over again. I have made all three myself. I might have killed a few plants because of them. You do not have to.
Mistake number one is overwatering. I already mentioned it. 90% of indoor plants die from overwatering. With Nepenthes, the issue is that people water on a schedule, not on demand. I used to water every Monday, no matter what. That killed my first plant. The roots sat in soggy media and rotted. The leaves turned yellow, and I thought it was a nutrient problem. I added fertilizer. That made it worse. The lesson is simple. Stick your finger into the media. If it feels damp, do not water. If it feels barely moist, wait another day. If it feels dry, water thoroughly. That is the only schedule you need. The tray label helps because you can note the watering dates and see if the root growth speed slows after a soggy week.
Mistake number two is wrong lighting. People think Nepenthes want full sun. They do not. Direct afternoon sun scorches their leaves and stalls root growth. I tried putting my tray on a south-facing windowsill. The leaves got reddish, but the roots stopped growing. The plant went dormant. I moved it under a grow light with about 200 to 300 PPFD, and the roots started moving again. High light is not the same as bright light. These plants come from cloud forests, not deserts. The best light is bright but diffused, or artificial light that is not too intense. The label on the tray will show you the date. If two weeks pass and there is no root growth, check your light level first.
Mistake number three is using the wrong pot. I started with deep, narrow pots. Bad idea. Nepenthes roots grow horizontally more than vertically in the upper soil layers. Deep pots stay soggy at the bottom. That leads to rot. Use short, wide pots. I prefer 3-inch or 4-inch pots with lots of drainage holes. Clear plastic pots are even better, but they can promote algae growth on the inside. I use opaque white pots inside my clear trays. The tray gives me the visibility I need. The pot gives the roots the darkness they want. If you are growing in pure sphagnum moss, be extra careful. That moss holds water forever. I mixed perlite into it to improve drainage. My root growth speed nearly doubled after I made that change.
I want to share one more specific experience. Last year, I bought a shipment of Nepenthes thorelii x spectabilis cuttings from a US nursery. They arrived stressed. The roots were minimal. I put them in a tray, labeled it with the arrival date, and set up my standard conditions. The first week, nothing happened. The leaves were floppy. I was worried. I almost gave up. But I had the label, so I knew I had only waited 7 days. I decided to wait another week. By day 10, the leaves hardened. By day 14, I saw the first root tip at the tray bottom. That label saved me from throwing out a perfectly good plant. Without it, I would have guessed "it has been a while" and tossed them. The date on the tray gave me patience.
Here is a small tip about the grease pencil. It smudges when you touch it. That is actually helpful. When I open the dome to water, I rub the label with my thumb. It removes old marks. Then I write fresh ones. This keeps the label clean and accurate. I have a color code too. I use white grease pencil for normal observations. I use red for problems like rot or pests. I use green for successful repots. This takes one second and gives me a visual history of the tray.
Now, some common questions that I get from other growers.
FAQ one. Can I use tape labels instead of writing on the tray? I tried that. The tape peels off after a few days because of condensation. It also leaves a sticky residue. Writing directly on the clear tray is more reliable. Just make sure your tray is clean and dry before you write. Otherwise, the marker will not stick.
FAQ two. How often should I check the roots? I check every three days. That is enough to see progress without disturbing the plants. Lifting the tray to look at the bottom does not harm the roots. The roots are not sensitive to light in that brief moment. Once a week is too slow if you are trying to measure growth speed. Every day is too obsessive. Every three days is the sweet spot.
FAQ three. Do I need the same label system for adult plants? No. The tray labeling system is for propagation and the first few weeks after repotting. Adult plants in their final pots do not need dome labels. But I still put a plastic tag in the soil with the species name and the repot date. That helps me remember when I last changed the media. Nepenthes generally need repotting every two years. The tag saves my memory.
One last thing about the data. The Royal Horticultural Society RHS recommends that growers keep detailed records of their plants, including date of propagation, media type, and environmental conditions. The American Horticultural Society AHS echoes this, stating that true plant knowledge comes from repeated observation over time. My tray labeling system is exactly that. It is a simple, cheap way to turn your grow space into a mini research station.
So here is my final advice. Start labeling your trays today, not tomorrow. You will immediately see the difference in your ability to track root growth speed. It is not a fancy tool. It is just a marker and a grease pencil. But it will change the way you grow. I know because I went from killing Nepenthes to propagating dozens of them successfully. The labels gave me the data. The data gave me the confidence. And the confidence gave me healthier plants.





