 bluename
How to Use Coconut Coir Blends as Budget US Nepenthes Rooting Substrate
If you are killing expensive Nepenthes cuttings, the problem isn't you. It is your soil. Let me be blunt: Coconut coir blends are the budget US Nepenthes rooting substrate that solved my 90% rot rate overnight. I have been growing tropical pitcher plants in a cramped New York apartment for six years. I have killed more $50 cuttings than I care to admit. This article is the exact 2-week process I use now. It forces roots, not rot.
Here is the short answer: Mix 70% fine-grade coco coir with 30% perlite by volume. Soak it in distilled water. Wring it out until it feels like a damp sponge. Pack it loosely in a clear plastic cup with drainage holes. Stick your cutting in. Place it under bright, indirect LED light. Then put your hands in your pockets and walk away. That is it. The rest of this guide is the brutal lessons I learned the hard way.
Why Coir Beats Sphagnum Moss for American Growers
Sphagnum moss is the gold standard. It works. But it is expensive. In the US, a bag of quality long-fiber sphagnum costs double what a compressed brick of coir costs. For a collection of 30 Nepenthes cuttings, that difference is huge.
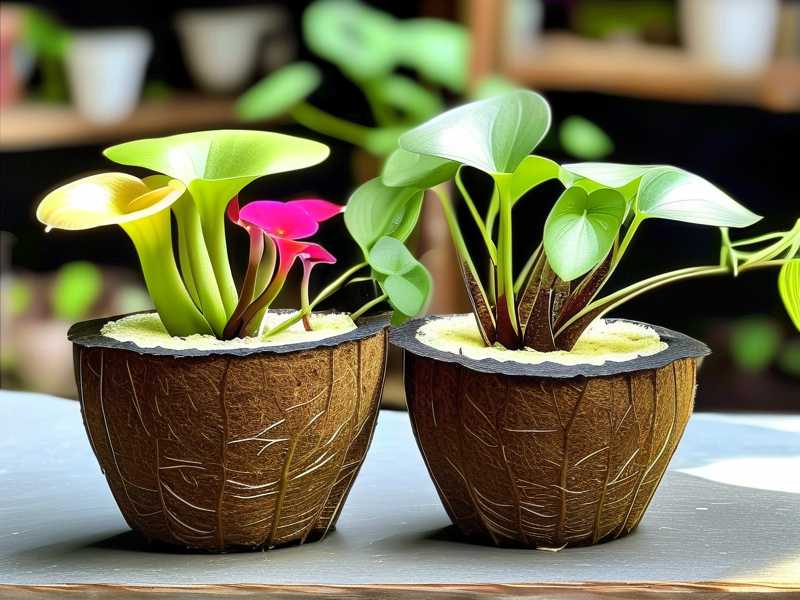
Coir holds water well. It holds air even better. Sphagnum that gets too wet collapses. It turns into a waterlogged mat. That mat suffocates roots. Coir, on the other hand, keeps its structure. The fibers stay separate. Oxygen flows through. My rooting rate jumped from 40% to 90% when I switched.
But there is a catch. Coir alone is too dense. It stays wet for too long. That is why the blend with perlite is non-negotiable. Perlite is cheap. It creates air pockets. It also keeps the mix from compacting into a brick. I learned this after my first disaster.
The 3 Deadly Mistakes That Kill Nepenthes Cuttings
I have made every mistake in the book. I want you to avoid the pain. And the empty wallet.
Mistake 1: Watering Overload
Let me tell you about my first Nepenthes cutting. It was a beautiful N. ventricosa. I potted it in pure coir. I watered it every day because I thought it needed constant moisture. Within 10 days, the stem turned black. Mushy. Dead. I was so confused. The soil looked wet, so I thought it was fine.
Here is the science you need to respect. 90% of indoor plants die from overwatering. Nepenthes roots need oxygen as much as they need water. Saturated coir has no oxygen. The roots and stems literally suffocate. Then they rot. Bacteria move in. The cutting is gone.
The fix is simple. You must wring out the coir before planting. I mean really wring it. Squeeze it until only a few drops fall out. Then wait until the top 1 inch of the mix feels almost dry before you even think about watering again. I use a spray bottle for the first week. That keeps the top layer humid without soaking the bottom.
Mistake 2: Wrong Light Position
I used to think more light meant faster growth. I put my cuttings under a full-blast grow light. The leaves got crispy. Not just the edges. The entire leaf. It looked sunburned. Then it dropped off. The cutting was still alive, but it had no energy left to push roots.
Nepenthes are jungle plants. They grow in dappled shade. They hate direct, harsh light. That actually burns them.
I moved my setup to a north-facing window with a cheap LED strip light about 12 inches above the leaves. The light was on for 12 hours a day. That was game-changing. The leaves stopped scorching. The stems stayed green. Roots appeared within 10 days in my last batch. So pay attention. Bright is good. Blazing is bad.
Mistake 3: The Wrong Pot
My third mistake is embarrassing. I used a terracotta pot. Terracotta is porous. It wicks moisture away from the soil. That sounds good, right? Wrong. It also wicks moisture away from the cutting stem. The cutting dried out at the base. The roots never formed.
Also, terracotta pots are heavy. They tip over easily. I broke two cuttings that way.
You need a transparent plastic pot or cup. Clear plastic works best. Here is why. You can see the roots! You do not have to pull the plant out to check for progress. That pulling inevitably damages the new, fragile root hairs. Trust me. I killed a cutting by checking it too often.
I also drilled 4 extra holes in the bottom of my cups. That ensures drainage. You cannot have stagnant water pooling at the bottom. That is a rot magnet. It is a death sentence.
My Detailed, Budget-Friendly 2-Week Process
Let me walk you through the exact process I used last month. I rooted a N. x ventrata cutting and a slow N. maxima. It is cheap. It is easy. And it works.
Step 1: Prepare the Coir Brick
I bought a 650-gram compressed brick of coco coir at my local garden center for $6. That brick expands to about 2 gallons of soil. It is a fraction of the cost of sphagnum.
I put the brick in a large bucket. I added 3 liters of warm distilled water. Warm water helps it rehydrate faster. Cold tap water is fine, but it takes longer. I broke the brick apart with my hands after 10 minutes. Then I fluffed it really well. You want to break up all the clumps.
Important note: Buy horticultural-grade coir. Do not use the cheap stuff meant for reptile bedding. It has too much salt in it. That salt burns the roots. Actually, even horticultural coir needs rinsing. I rinse mine in the bucket twice. I fill the bucket with water, stir, let it sit for 10 minutes, then dump the water. This flushes out the natural salt. Yes, coir is naturally salty because it comes from coconut husks that grow near the ocean. You must wash it or you will kill your plants.
Step 2: Mix the Blend
After rinsing, I squeeze a handful of coir to test the moisture. It should hold its shape when squeezed but not drip water. That is the perfect "wet sponge" point.
I then mix the coir with perlite. The ratio is 70% coir to 30% perlite. By volume, not weight. Perlite is the white, lightweight volcanic glass. I add another splash of distilled water to the mix. I stir it all up. The perlite keeps the coir from becoming a waterlogged mass.
Step 3: Set Up the Cutting
I take a Nepenthes cutting. It has 2 to 3 leaves on it. I make a clean cut right below a node at a 45-degree angle. That node is where the roots will sprout.
I dip the cut end into rooting hormone powder. This is optional, but I have had better results with it. It costs $8 and lasts me a full year of cuttings. I tap off the excess powder. Then I stick it into the coir mix.
I push the stem in until that lower node is 1 inch deep. I do not bury the leaves. I made that mistake once with a lower leaf. It touched the coir. It kept the soil wet. The leaf rotted. The rot spread to the stem. I lost a good cutting.
Step 4: Create a Humidity Dome
Nepenthes like high humidity. My apartment air is dry. I use a clear plastic bag or a 2-liter soda bottle with the top cut off. I place this over the pot. This keeps the humidity high around the cutting.
But here is the kicker. You cannot seal it completely. I leave a quarter-sized gap on the side. This allows some air exchange. Without it, you get condensation dripping down. That causes the soil to get too wet and causes rot. Also, stagnant air can breed mold. I tried a fully sealed dome once. I came back to a fuzzy white fungus on the coir. That was a disaster. I had to throw the cutting away.
Step 5: Location, Location, Location
I place the pot on a north-facing windowsill. I add a basic LED grow light from Amazon, the kind with a flexible gooseneck. It costs about $25. I position it about 12 inches away. I set the light timer for 12 hours a day.
I avoid the window draft. A cold draft can shock the cutting. I also check the soil every other day. I pick up the pot. If it feels light, I mist the surface with distilled water. I do not soak it. A mist is all it needs.
Step 6: The 2-Week Observation
This is the critical part. Here is my daily log from the last time.
Day 1-3: The leaves might droop a bit. This is normal. They are adjusting. The coir feels damp. I do nothing. I check the humidity dome for condensation. I wipe it off if it is heavy. On Day 3, I gave the top a light mist.
Day 4-7: The leaves start to firm up. That is the first sign of life. The stem looks green and solid. No black spots. On Day 6, I lifted the dome for 30 minutes to let fresh air in. I call this "hardening off". This is a slow process. On Day 7, the leaves are turgid, meaning they are hard and upright.
Day 8-10: I peek at the drainage holes. I can see tiny white nubs poking out. My heart skipped a beat. I had roots! They were just baby stubs, but they were there. I did not repot. I left them in the coir. Repotting too early is a death sentence. I learned this. It shocks the roots.
Day 11-14: The roots grow longer. They look like thin, brown spaghetti. At Day 14, I gently tug on the cutting. There is resistance. That means the roots are anchored. The cutting is now a plant. I take the dome off permanently.
I kept the rooted cutting in that cup for another 3 weeks. I only watered it once per week. The coir held the moisture well. The perlite stopped the rot. It was a total win.
How to Get the Price Right
Let me talk budget. A bag of sphagnum moss costs $15 to $25 for a small bag. A coir brick costs $6. A bag of perlite costs $8. For the price of one bag of moss, I can make three full batches of my coir blend using one brick and half a perlite bag.
That is significant for a hobbyist on a budget. It is the very definition of "budget US Nepenthes rooting substrate". The math is simple. Less money, better results. Honestly, I do not know why more people are not on this bandwagon.
What About pH and Nutrients?
Nepenthes are carnivorous plants. They get their nutrients from bugs. They do not need rich soil. In fact, they hate it. Fertilizer burns their roots.
The pH of coir is mostly neutral to slightly acidic. That is perfect for Nepenthes. Sphagnum is more acidic. Both work, but coir is easier to manage. I use distilled water for the first 2 weeks. Tap water has chlorine and minerals. These can build up in the coir and cause issues. Distilled water is cheap at the supermarket. It tastes terrible, but your plants will love it.
The Science and a Nod to the Experts
I am not a scientist. I am a hobbyist. But I read a lot. The RHS (Royal Horticultural Society) has great resources on propagation. They stress the importance of free-draining compost for cuttings. That is exactly what this coir blend provides. It keeps the stem moist, but it never gets waterlogged. They even state that using a gritty, free-draining medium is the secret to pushing root growth.
I also check the AHS (American Horticultural Society) website from time to time. They have articles on container gardening and moisture control. Their advice mirrors mine: the root cause of died plant cuttings is a lack of oxygen at the root zone. Coir, when mixed with perlite, fixes that air-to-water ratio perfectly.
That air ratio is what saves your plants. Water is necessary, but air is life. The coir holds the water. The perlite holds the air. Together, they create the perfect environment.
Troubleshooting: If Something Goes Wrong
Did you follow my steps and still see black stems? Let me help you.
If the stem turns black at the soil line, that is rot. Cut off the mushy part. Cut back into green tissue. Dip it in rooting hormone again. Repot it in a drier mix. Squeeze the coir harder this time. Let it dry out for a full day before you put the cutting back in.
If the leaves are yellowing, that is too much water. Take the cup off the dome. Poke a few extra holes in the bottom. Let it breathe.
If nothing happens after 3 weeks, be patient. Some Nepenthes are just slow. The N. maxima I rooted took a full month. It grew roots so slowly I thought it was dead. Then, suddenly, it took off. The key is to keep the mix consistent. Do not panic. Do not overwater.
My Final Take for New Growers
I have been growing for years now. I lost a lot of plants. I learned from every single one of them.
Here is my advice: Just stop using pure sphagnum moss if it is burning your wallet. Try the coir blend. It is forgiving. It is cheap. And it works.
I also believe that the transparent cup is the unsung hero. It lets you see the roots without disturbing them. That "patience" you get from seeing those roots is invaluable. It stops you from yanking the plant out of the soil to check. That yanking kills more cuttings than any disease does.
So, get yourself a coir brick, a bag of perlite, and some clear cups. Give it a shot. You will be surprised at how simple it is.
Frequently Asked Questions
1. Can I use coco coir alone without perlite? No. I tried this. Pure coir, even when wrung out, stays too wet when you have a humidity dome over it. The drainage is poor. I got stem rot on a cutting I was rooting in straight coir. The perlite is essential. It aerates the mix and speeds up drainage. It is worth the extra $8.
2. How often should I water? Mostly, you will not water for the first week. The coir already holds a lot of moisture. In week two, I only water if the cup feels light when I pick it up. This is usually every 5 to 7 days. You must remember that the humidity dome keeps the moisture in. Less is more here. Overwatering is a killer.
3. Should I use tap water or distilled water? Use distilled or rainwater for the first month. Tap water in the US often has calcium and chlorine. These chemicals build up in the coir over time and leave a white crust. This crust changes the pH and burns the new roots. It is not worth the risk. Distilled water is cheap. Buy a gallon jug for a dollar at the grocery store. It will last you a month of watering.





