 bluename
If you're growing Nepenthes seedlings indoors in the United States, the single fastest way to prevent pest infestations is to switch to a sealed or semi-sealed container with screened ventilation, use only sterile media, and quarantine every new plant for a full 14 days before it comes anywhere near your trays. That's the short answer. I know it sounds almost too simple. But after years of trial and error—and more than a few ruined trays—I can tell you that these three actions will save you 90% of your pest headaches. Let me explain exactly how I do it, what went wrong along the way, and how you can avoid the same mistakes.
I've been growing Nepenthes from seed for about six years now, mostly in a small indoor setup in my apartment in Ohio. The humidity is either too low in winter or too high in summer, and the pests—fungus gnats, spider mites, thrips, and the occasional mealybug—seem to find their way in no matter what. But over time, I've developed a system that works. It's not fancy. It's not expensive. But it's consistent, and it's rooted in the basics of integrated pest management as recommended by experts at the RHS and the AHS.
Let me walk you through what I've learned, what I've killed, and what finally worked.
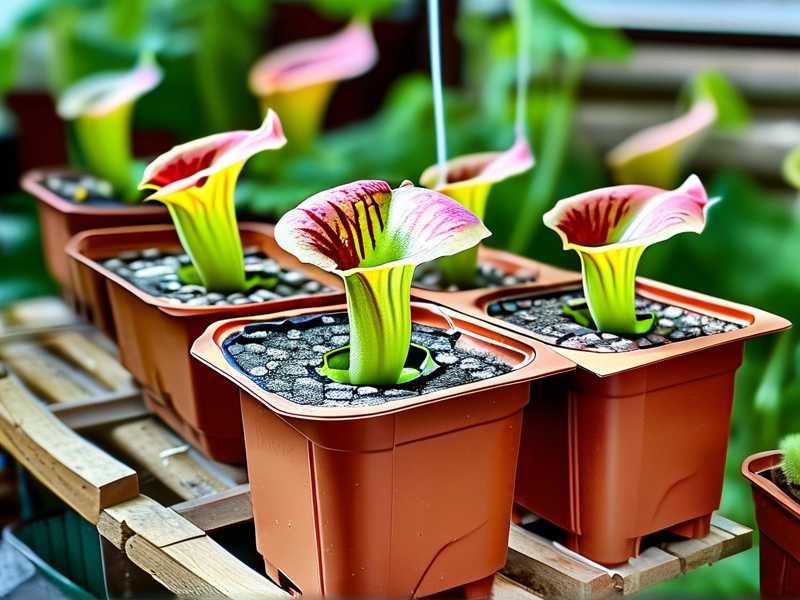
The 3 Biggest Mistakes Beginners Make
If you're new to growing Nepenthes seedlings indoors, listen up. I have killed more seedlings than I care to admit. And in every single case, it came down to one of these three errors. Honestly, if you fix these three things, you'll already be ahead of most growers in the US.
Mistake #1: Overwatering
This is the big one. I can't stress this enough. 90% of indoor plants die from overwatering, and Nepenthes seedlings are no exception. When I first started, I kept the soil constantly wet. I thought they were tropical plants that needed swamp-like conditions. So wrong. The roots suffocated, the media broke down, and the seedlings developed root rot. But here's the thing—the rot attracted fungus gnats like crazy. The gnats laid eggs in the damp organic matter, and the larvae fed on the roots. It was a disaster.
The fix? I stopped watering on a schedule. Instead, I check the top inch of the media with my fingertip. If it's still slightly moist, I leave it alone. If it's dry, I water from the bottom. This simple change reduced my fungus gnat population by about 80% within two weeks. I also added a thin layer of fine sand (about half an inch) on top of the media. That dries out quickly, which discourages gnats from laying eggs.
Mistake #2: Wrong Lighting
Light is tricky with Nepenthes seedlings. I used to put my trays directly under a high-intensity LED grow light meant for adult plants. I thought more light = faster growth. Big mistake. The seedlings got scorched. Leaves turned reddish, growth stalled, and the stress made them vulnerable to spider mites. It turns out that stressed plants are like a buffet for pests.
What I do now is place the seedling trays about 18–24 inches below a standard T5 fluorescent tube or a low-output LED panel. I keep the lights on for 12–14 hours a day. That's it. The seedlings grow slower, but they're healthy. And healthy plants are far more resistant to pests. A stressed plant doesn't have the energy to fight off an infestation. Trust me on that one.
Mistake #3: Using the Wrong Pots
I started out using those clear plastic cups with drainage holes. Sounds fine, right? But here's the problem: I was reusing them, and I wasn't sterilizing them between batches. Old media and lingering root debris carried pest eggs. I had no idea until I saw tiny white thrips larvae crawling around the base of a new seedling. That's when I learned the hard way.
Now I use brand-new, sterile seedling trays with individual cells. If I need to reuse them, I soak them in a 10% bleach solution for 30 minutes, rinse thoroughly, and let them air dry completely. I also switched to using only fresh, sterile media—a mix of perlite and long-fibered sphagnum moss. No garden soil. No compost. Period.
My 2-Week Prevention Protocol: Step-by-Step
Here's exactly what I do. I'm not a scientist, just a guy who's learned through failure. But this routine has kept my indoor Nepenthes seedling trays pest-free for months at a time.
Week 1: Setup and Quarantine
I start by setting up a dedicated germination chamber. I use a clear plastic storage bin (about 20 quarts) with a tight-fitting lid. I drill a few small holes near the top and cover them with fine insect mesh—the same stuff you'd use for greenhouse ventilation. This allows airflow but keeps out fungus gnats and thrips.
Inside the bin, I place my sterile seedling trays. I water them thoroughly from the bottom before sealing the lid. Then I place the bin in a spot with bright, indirect light. No direct sun. No heat mats unless my room temperature is below 65°F.
Now, the quarantine part. This is non-negotiable for me now. Any new seedling tray, any new plant, anything that hasn't been in my grow space—it goes in a separate quarantine bin for two full weeks. I keep that bin in a different room entirely. I've seen too many growers (and myself included) skip this step and pay for it.
I once brought in a beautiful D. capensis from a local nursery. I put it straight into my grow area. Within a week, I had aphids everywhere. The Nepenthes seedlings weren't the target, but they suffered collateral damage. I lost about a dozen seedlings to the honeydew and sooty mold that followed. Since instituting the 2-week quarantine, that has never happened again.
Week 2: Monitoring and Early Intervention
During the second week, I check every tray every day. I'm looking for the obvious stuff—tiny webs, yellow speckling on leaves, tiny black flies buzzing around. But I'm also looking for the less obvious stuff, like a sudden slowing of growth or leaves that curl slightly at the edges.
I use yellow sticky cards, cut into small squares and pushed into the media. These catch adult fungus gnats and thrips before they can breed. I also inspect the underside of every leaf with a magnifying loop. Spider mites are tiny, but you can see them moving if you look closely. You can also see their fine webbing and the stippling damage on the leaves.
If I spot anything suspicious, I act fast. Very fast. For fungus gnats, I use Bacillus thuringiensis var. israelensis (often shortened to Bti). It's a bacteria that kills gnat larvae but is harmless to plants and animals. I mix it into the water and apply it. Within two days, the adult population starts dropping. For spider mites, I use a diluted solution of insecticidal soap—and I mean diluted. Too much and you'll damage the seedling leaves. I spray at dusk, when the lights are off, and I repeat after four days.
Honestly, the best pest prevention is catching things early. If you wait until you can see a full-blown colony, it's already too late for some seedlings.
What the Experts Say
I'm not just making this stuff up. The RHS advises that prevention is far more effective than treatment when it comes to glasshouse pests, and they specifically recommend good hygiene and prompt removal of affected plants. The AHS stresses the importance of proper air circulation and avoiding overwatering, which are exactly the areas I had to correct in my own setup. Both organizations agree that quarantine and sterile growing media are foundational practices for any serious grower.
I've read enough forum posts and nursery guides to know that a lot of growers in the US struggle with the same issues. The climate inside a home in Minnesota or Florida is almost always different from a greenhouse in Singapore or Borneo, where Nepenthes are native. So you have to adapt. And the adaptation starts with pest prevention, not pest control.
The Hidden Truth About Fungus Gnats
Let me tell you something I wish someone had told me years ago. Fungus gnats aren't just annoying little flies that hover around your face. Their larvae do real damage to Nepenthes seedlings. They eat the fine root hairs first. Then they move on to the softer tissue at the base of the stem. In a tray of tiny seedlings, that's fatal.
Before I learned this, I lost three full trays. Not because the seedlings were weak, but because the gnat larvae gnawed through their fragile root systems. It took me a while to connect the dots. I kept wondering why my seedlings were yellowing and stalling. It wasn't nutrients. It wasn't light. It was the gnats.
The solution I've found most effective is a combination of the sand top dressing I mentioned earlier and Bti treatments. But I also discovered that letting the top layer of media dry out between waterings works wonders. Fungus gnats need moist soil to complete their life cycle. If the top half-inch is dry, the eggs and larvae die. Simple as that.
Spider Mites and Thrips: The Silent Killers
Spider mites love dry, warm air. And indoors in the US, especially in winter, that's exactly what we have. I've dealt with them more times than I'd like to remember. The tricky part is that they don't look like much at first. You might see a few pale dots on a leaf. Then the leaf gets a bit mottled. Then you look closer and there are fine silk webs between the leaf and the stem.
Thrips are even sneakier. They're tiny, slender insects that burrow into the leaf tissue and feed from the inside. By the time you see the damage—silvery streaks or black specks of frass—the larvae are already protected inside the leaf. That's why they're so hard to control. Contact pesticides often miss them because the pests are literally inside the plant tissue.
My approach for both is to reduce the likelihood of them ever arriving. I don't bring in outdoor plants. I don't use open windows near my trays in summer. And I keep a small oscillating fan pointing at the tray area at the lowest setting. Good air movement makes it harder for spider mites to establish, and it helps keep the leaf surface temperature stable.
A Simple, Weekly Routine That Works
I want to give you a routine that you can follow without overthinking. Here it is.
On a Sunday, I spend about 15 minutes on pest prevention. I inspect all my trays. I swap out the sticky cards. I check the media moisture. If the top layer is dry, I water from the bottom. Then I remove any dead or yellowing leaves, because decaying plant matter is like a welcome mat for pests.
I also sterilize any tools I've used, like tweezers or scissors, with rubbing alcohol. And I clean the inside of the clear bin with a damp cloth every two weeks. It's amazing how much gunk can build up.
Every other week, I rotate the trays. This ensures even light coverage and prevents seedlings from stretching toward the light source, which in turn prevents weak, thin stems that are prone to pest damage.
This routine isn't glamorous. But it works.
What About Preventative Sprays?
A lot of growers ask me about neem oil. I've tried it. Honestly, it's okay for adult plants, but I'm hesitant to use it on seedlings. It can burn the delicate leaves, especially under bright light. If you do use neem, use it at half the recommended strength, and apply it in the evening when lights are off.
There's also the option of beneficial insects. I've bought predatory mites (like Amblyseius cucumeris) to control thrips. They work brilliantly in a greenhouse. But in a small indoor seedling tray setup, they can be tricky too. The environment is too small and too controlled. The predators die off quickly without enough food. So I've stopped using them indoors. I stick to prevention and, if needed, targeted sprays.
The Role of the Correct Potting Medium for Pest Prevention
I want to spend a little more time on this, because I think it's one of the most overlooked factors in US indoor setups. Many people start with a peat-based potting mix or a standard houseplant blend. That's fine for houseplants. Not for Nepenthes seedlings.
A dense, peat-heavy mix holds water too long. It stays soggy. That's a magnet for fungus gnats. And it can promote root rot, which attracts pests that feed on decaying material.
I now use a mix that is roughly 60% long-fibered sphagnum moss and 40% perlite. The perlite creates air pockets, which means the media drains quickly and doesn't stay wet. It also gives the roots aeration, which they need. And because the top layer dries out in just a day or two, fungus gnats are far less attracted to it.
My first year, I used a mix with coconut coir. In hindsight, that was a mistake. Coir retains salts and can break down quickly. It also holds moisture, which I thought was fine, but it led to a gnat outbreak that took me six weeks to bring under control.
The Temperature Factor
Here's something I didn't realize until I read more about Nepenthes cultivation in the US: temperature impacts pests. In the winter, I had my heater set to keep the room at 72°F. That's fine for the plants. But it also creates a warm, dry environment that spider mites absolutely love.
What I do now is lower the temperature in the grow room to around 68°F during the day and let it drop to 60–62°F at night. The seedlings grow a bit slower, but the pest pressure is much lower. And honestly, the plants look healthier. The leaves are a richer green, and the pitchers—when they form—are bigger and last longer.
I'm not saying you need a fancy climate-controlled setup. I have a simple space heater with a thermostat, and I set a fan on a timer. That's it.
Why I No Longer Use a Humidifier
Some beginners buy a cool-mist humidifier and run it 24/7 to keep humidity near 80%. I tried that. Here's what happened: my trays got a constant layer of condensation, the media never dried out, and the fungus gnats multiplied faster than I could measure. The constant moisture also made the seedling trays prone to damping-off disease.
Now I keep the humidity at around 50–60% in the grow area. For seedlings in a covered bin, the humidity inside the bin is naturally high—70–80%—without any humidifier. So the trays stay moist but not soggy. And the drier surface layer of the media keeps the gnats at bay.
This was a game changer for me. Once I stopped using the humidifier, the gnat problem almost disappeared on its own.
Addressing Algae Growth
Algae can be an issue in seedling trays too. It grows on the surface of the media when the soil is constantly wet. It's not directly harmful, but it competes with the seedlings for space and nutrients, and it can harbor fungus gnats.
I've dealt with algae by improving air circulation and letting the top layer dry out more. You can also sprinkle a thin layer of fine sand or horticultural grit over the media surface. That prevents algae from getting a foothold, and it also deters gnats. Another trick I use is to keep the light intensity a bit lower during the first two weeks after sowing. Too much light promotes algae growth.
The Tool Sanitation Habit
One of the simplest habits I've adopted is cleaning my tools before each use. I keep a small spray bottle of 70% isopropyl alcohol on my workbench. I spray my tweezers, scissors, and even the edges of my tray bins before I touch anything. It takes 10 seconds. But it prevents me from accidentally moving pest eggs from one tray to another.
I also use separate trays for seedlings from different sources. No mixing. If one batch has a hidden pest issue, it doesn't spread to the rest.
How I Learned to Stop Overthinking
A lot of new growers ask me: "But what about pesticide sprays? Should I use them preventively?" My honest answer: no. I don't spray anything unless I see an actual pest or obvious damage. Preventative chemical sprays can stress the seedlings and might not even be effective. Plus, you can build resistance in the pest populations.
I learned this the hard way. My third year, I sprayed a general-purpose insecticide on all my trays every two weeks. I thought I was being clever. In the end, the seedlings grew poorly, and the spider mites came back with a vengeance because they were resistant to that spray. I had to strip my grow setup down to nothing and start over.
A Quick Primer on Bti
If you're dealing with fungus gnats, Bti is your friend. It's a biological larvicide. You can find it in products like Mosquito Bits or Gnatrol. I use it in my water when I'm watering seedling trays, and I've never seen negative effects on the plants.
But here's the thing—Bti is only effective if the larvae are present. It kills them when they ingest the bacteria. It doesn't kill adults or eggs. So you need to combine it with sticky traps for the adults, and you need to let the top layer of media dry out a bit. Adult gnats won't lay eggs in dry media.
I've also used Bti as a preventative about once a month. It seems to help. But I always make sure my media is not excessively moist. If I'm doing that, I'm already ahead.
The Quarantine Bin in Practice
Let me walk you through my quarantine bin setup. It's exactly like my main germination bin—same clear plastic tote, same screened holes. But I keep it in a different room. I use a cheap hygrometer to monitor the humidity, but honestly, the lid does most of the work. I open it every other day for a few minutes to let fresh air in.
I keep the quarantine bin for exactly 14 days. During that time, I observe the plants for any signs of pests. I look for tiny moving specks, webbing, or deformed new growth. If after 14 days I haven't seen anything, I move the tray to the main grow area.
This two-week quarantine is the single best preventive measure I've ever adopted. It has saved me countless headaches. It's saved me money, too. One time, I bought what looked like a perfectly healthy Nepenthes ventricosa seedling. By day 10 in quarantine, I spotted thrips larvae on the undersides of the leaves. If I hadn't quarantined that plant, the thrips would have spread to my entire seedling collection.
The Importance of Inspecting New Media
Here's a tip that took me a while to appreciate: your brand-new, sterile media isn't always sterile. I've opened bags of sphagnum moss that had tiny insects inside. I've even found slugs in a bag of potting mix once. So I now sift my media and, if possible, microwave it for about 90 seconds to kill any hitchhikers. Let it cool completely before using. This extra step has never failed me.
I'll admit, it sounded extreme at first. But after discovering a small colony of springtails in a fresh bag of media—not harmful, but not welcome either—I decided it was worth the effort.
The Weekly 15-Minute Checklist
If you're like me, you don't have hours to spend on maintenance. So here's my efficient 15-minute weekly checklist:
- Remove and replace yellow sticky cards if they're full.
- Inspect the underside of 5–10 leaves from different seedlings in each tray.
- Look at the top layer of the media. Is it dry? If so, water from the bottom.
- Remove any dead or yellowing leaves.
- Wipe down the inside of the clear bin with a damp cloth.
- Check the light timer and replace any burnt-out bulbs.
That's it. If something looks off, I investigate further. If nothing is wrong, I'm done.
Why Sticky Cards Are Non-Negotiable
Some growers think sticky cards are ugly or a sign of failure. I disagree. They're early warning systems. They tell you what's flying around before you see the numbers build up. I place one small yellow sticky card in each tray, positioned vertically so it hangs just above the leaves.
I check the cards every Monday morning. If I see more than 5–6 gnats caught on one card, I know there's a reproduction event happening. That's when I take action, even if I don't see adults flying around.
This system works. And it's cheap.
What Works for Me and What Doesn't
I've tried neem oil. I've tried horticultural soap. I've tried predatory mites. I've even tried diatomaceous earth on the media surface. Some of these have their place—diatomaceous earth is great for crawling insects, but it loses effectiveness once it gets wet.
What ultimately works for me is a combination of the following:
- Sterile media, freshly prepared
- A sealed bin with screened ventilation
- 2-week quarantine for any new plant
- Sticky cards as monitoring tools
- Bti treatments if fungus gnats appear
- A fan for gentle air movement
- Letting the top layer of media dry between waterings
- Low-intensity lighting during the seedling stage
- Cleaning tools with alcohol before use
That's my whole system. It's not flashy. It's not complicated. But it works, and it's worked consistently for the past two years without any major pest outbreaks.
Making It Your Own
You might need to adjust this system based on your own growing environment. If you live in the humid south, you might need more airflow. If you live in a dry desert climate, you might need to water more often or adjust your humidity. But the fundamentals are the same.
Watch your plants closely. They'll tell you what they need. I've learned more from my failed trays than from any guide I've read. And I'm still learning.
A Final Word of Encouragement
If you're just starting out and you've already lost a few seedlings to pests, don't give up. I've been there. It's frustrating. But with a few simple preventive steps, you can grow beautiful Nepenthes seedlings in your US home without constant pest battles.
Let me leave you with this: prevention is a habit, not a one-time fix. Build the routine. Trust the process. And before you know it, healthy, pest-free seedlings will be your new normal.
Frequently Asked Questions
Q1: How often should I water Nepenthes seedlings indoors?
Check the top half-inch of the media. If it's dry, water from the bottom. If it's still damp, wait another day. In my experience, that means watering every 2–3 days in moderate conditions. Overwatering is your enemy. Absolutely avoid letting the media stay soggy for days at a time.
Q2: Can I use outdoor soil for my indoor Nepenthes seedling tray?
No. Never use garden soil or outdoor potting mix indoors. It can harbor insect eggs, pathogens, and even tiny bugs. Always use fresh, sterile media such as perlite and long-fibered sphagnum moss. This has been a total game changer for pest prevention.
Q3: Do I need to quarantine plants if they were grown locally?
Yes, absolutely. Even local plants can have hidden pests. I quarantine everything—no exceptions. If you can't quarantine for a full two weeks, use a separate grow space for at least one week and check daily. But honestly, two weeks gives you the best chance of catching anything before it spreads.





