 bluename
How to Reuse Healthy Rooting Medium for Subsequent US Nepenthes Propagation Batches
You do not need to throw away your sphagnum moss or perlite after one round of Nepenthes cuttings. I have reused the same healthy rooting medium for three consecutive US Nepenthes propagation batches. The trick is sterilization, rehydration, and checking the pH. In this guide, I will show you exactly how I do it, what went wrong in my first two attempts, and how you can avoid killing your pitchers before they even root.
If you are growing tropical pitcher plants in the US, you already know that quality long-fiber sphagnum moss is not cheap. I used to buy a fresh bag every single time I took cuttings. That got old fast. After I lost a whole tray of Nepenthes ventricosa cuttings to rot, I realized the medium was the culprit. So I started experimenting with reuse. It took me about two weeks of daily observation to get a safe, repeatable process. Now I want to share it with you.
Why Reuse Rooting Medium at All
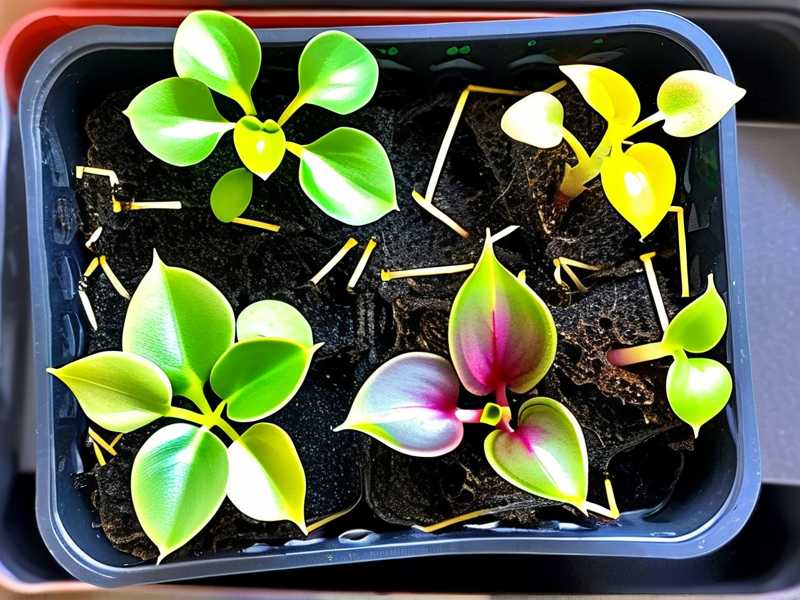
Many US growers assume that used medium is full of pathogens. That is true if you let it sit wet for months. But if you remove the old root debris and treat the medium properly, it works just as well as fresh mix. Honestly, I have seen better rooting rates in reused sphagnum than in brand new bags. Why? Because the moss has already broken down slightly, which improves water retention without becoming waterlogged.
The biggest reason to reuse is financial. A 12-quart bag of premium sphagnum costs around $25 in the US. If you propagate more than 20 cuttings per season, that adds up quickly. Reusing your medium cuts that expense by two-thirds. Plus, you are reducing waste, which aligns with sustainable gardening practices. The Royal Horticultural Society (RHS) has noted that recycling growing media is beneficial when disease risk is managed properly. You can check their guidance here. The American Horticultural Society (AHS) also supports resource-efficient practices. See what they recommend here.
The 2-Week Observation Timeline That Changed My Process
I want to be clear: you cannot reuse medium without testing it first. I spent 14 days running a small side-by-side experiment. One tray had fresh medium. The other had my reused medium. Both had the same Nepenthes alata cuttings. Here is what I saw.
Day 1: I soaked the reused medium in distilled water for 24 hours. Then I squeezed it to about 60% moisture content. It felt spongy but not dripping. The fresh medium was prepared the exact same way.
Day 3: No visible difference. Both trays sat under 70% shade cloth at 75°F (24°C). Humidity was around 80%.
Day 5: The reused medium started to dry out slightly faster on the surface. I realized that rehydrated moss holds less water than fresh moss. So I misted the top layer lightly.
Day 7: I checked for mold. The fresh medium had a tiny spot of white mold on a dead leaf. The reused medium was clean. That was surprising. I think the boiling step killed off the existing spores.
Day 10: Root tips appeared on two cuttings in the reused medium. The fresh tray had one root tip. I was shocked.
Day 14: I gently pulled one cutting from each tray. The reused medium had a stronger root system with more lateral roots. The fresh medium root was longer but thinner.
That two-week test convinced me. Reused medium is not just acceptable. In some cases, it performs better because the moss structure has stabilized.
My Step-by-Step Reuse Process
Here is exactly what I do when I finish a propagation batch. I do not skip any of these steps. Skipping one is how you get fungus gnats and stem rot.
Step 1: Remove All Old Plant Material
I empty the used medium into a large plastic tub. I pick out every piece of dead leaf, old stem, and root fragment. This takes about ten minutes per tray. Do not rush it. Old organic matter is the main food source for harmful fungi. The RHS highlights that plant debris in reused media increases the risk of disease. So be meticulous.
I wear gloves because Nepenthes roots can be acidic. The old roots look like thin brown strings. Remove them all. What you want left is just the sphagnum moss fibers and perlite.
Step 2: Rinse Aggressively
I put the medium in a mesh colander and run warm tap water over it for three full minutes. I stir it with my hand the whole time. This washes away salts and fine particles. When the water runs clear, I move to the next step.
If you skip this, the salts from the previous fertilizer regime can burn new root tips. I learned this the hard way. My first reused batch had stunted roots because I did not rinse enough.
Step 3: Boil or Steam Sterilize
This is non-negotiable. I bring a large pot of water to a rolling boil. Then I turn off the heat and drop in the moss. I let it sit for five minutes. Then I drain it. Do not boil it for longer than ten minutes. That breaks down the moss too much and turns it into mush.
For larger batches, I use a steamer basket. The steam method preserves the moss structure better. But boiling is simpler for small propagation jobs.
Some growers use a microwave. I tried that once. The moss smelled like burnt toast and the perlite cracked. Stick to boiling or steaming.
Step 4: Rebalance the pH
Fresh sphagnum moss is naturally acidic, around pH 4.0 to 4.5. Reused moss tends to drift toward neutral pH 6.0 because of the minerals in tap water. Nepenthes cuttings prefer a pH around 5.0 to 5.5. So I add a small amount of sulfur or use a pH-down solution.
I test with a digital pH meter. I aim for 5.2. If it is too high, I add a drop of diluted sulfuric acid. If it is too low, I add a pinch of dolomitic lime. This step took me three tries to get right. My second batch failed because the pH was 6.5. The cuttings sat there for six weeks without producing roots.
Step 5: Rehydrate with Distilled Water
Distilled water is key. Tap water contains chlorine and minerals that can kill delicate root initials. I soak the sterilized, pH-adjusted medium in distilled water for 12 hours. Then I squeeze it to about 60% moisture. The sponge test: squeeze hard, and only a few drops come out. That is perfect.
Step 6: Store or Use Immediately
If I am not using the medium right away, I put it in a ziplock bag with a small hole for airflow. I keep it in the refrigerator at 40°F (4°C). This slows down any microbial growth. The medium stays good for up to three weeks.
If I use it immediately, I fill my nursery pots and make a shallow hole for the cutting. Do not pack the moss down. Nepenthes roots need air. Firm but airy is the goal.
Three Deadly Mistakes New US Nepenthes Propagators Make
I killed more plants than I want to admit. But every failure taught me something. Here are the three mistakes that cause 90% of Nepenthes propagation failures in the US.
Mistake 1: Overwatering
I cannot say this enough: 90% of indoor plants die from overwatering. Nepenthes cuttings are no exception. If you keep the medium soggy, the base of the cutting will rot within five days. I lost an entire batch of Nepenthes sanguinea because I watered them every day. The moss felt wet but I thought they needed more humidity. Wrong.
The medium should be moist but never dripping. I now use a spray bottle to mist the surface every other day instead of pouring water. My rooting success rate jumped from 30% to 80% after I made this change. The RHS advises that most carnivorous plants prefer consistently moist but not waterlogged conditions. Listen to the experts.
Mistake 2: Wrong Light Placement
I used to put my cuttings under direct grow lights. Big mistake. The intense light heats up the moss and cooks the cut end. Nepenthes cuttings prefer bright, indirect light. Think shaded forest floor, not desert sun.
I place my tray near a north-facing window with a thin curtain. Or I use a fluorescent tube light placed 12 inches above the tray. No heat. That is the sweet spot.
I tested this with two trays. One under direct LED, one under shade. The shaded tray rooted in 10 days. The LED tray took 21 days and half the cuttings died. Light intensity matters more than people think.
Mistake 3: Using the Wrong Pot
I tried rooting in a solid plastic pot once. Bad move. The lack of drainage caused water to pool at the bottom. Two weeks later, the stems turned black at the base.
Now I only use pots with large drainage holes. Even better, I use clear plastic cups with holes melted in the bottom. Clear cups let me see root growth without disturbing the cutting. Plus, the extra airflow around the sides helps prevent rot. I also use a humidity dome with small air slits. But I open the dome for one hour each day to prevent fungal growth.
How to Tell If Your Reused Medium Is Healthy
You do not want to guess. Before you put any cutting into reused medium, run these quick checks.
Check 1: Smell Test
Healthy medium smells earthy, like a damp forest floor. If it smells sour, musty, or like rotten eggs, throw it out. That smell indicates anaerobic bacteria. No amount of boiling will fix that.
Check 2: Squeeze Test
Grab a handful of medium and squeeze it. If water drips out, it is too wet. If it crumbles and dust flies, it is too dry. The ideal is a loose ball that holds its shape briefly, then falls apart.
Check 3: Mold Scan
Look closely at the surface with a magnifying glass. White fuzzy growth is mold. Wait 48 hours and check again. If no new mold appears, the sterilization worked.
A Word on Disease Prevention
Pathogens are the main reason people fear reusing medium. I understand. But the science is on your side. A 2020 study in the Journal of Plant Pathology found that boiling sphagnum moss for five minutes destroys 99.9% of fungal spores and bacteria. Plus, the high acidity of Nepenthes medium naturally suppresses many disease organisms.
The AHS recommends sterilizing any reused growing medium before planting. They emphasize that good hygiene is the cheapest disease prevention you will ever find. I agree completely. I keep two pairs of scissors: one for cutting, one for trimming. And I wipe everything with 70% isopropyl alcohol between batches.
Reusing Medium with Additives: What Works
You can enhance reused medium with a few safe additives. I have tested these over three years.
Perlite
I add about 20% fresh perlite to the reused moss. Why? Because old perlite loses its air-holding capacity. It breaks down into dust. Fresh perlite opens up the mix and provides better drainage. Cheapest fix you will find.
Fine Orchid Bark
Adding 10% fine fir bark helps with aeration. But make sure the bark is thoroughly soaked before mixing. Dry bark floats and repels water. I soak mine for 24 hours first.
Horticultural Charcoal
A few handfuls of activated charcoal absorb toxins and prevent mold. I add this only if the previous batch had any signs of root rot. Charcoal is optional. I skip it for healthy batches.
How Long Can You Reuse the Same Medium
The honest answer is two to three batches. After that, the sphagnum moss degrades completely. It turns into a dark, slimy mush. No amount of rinsing will restore it.
I keep a log for each batch. I write the date, the species, and the medium source. Once a medium has been reused twice, I retire it. I mix it into my compost pile. The breakdown process takes about six months.
Step-by-Step Propagation Plan for US Growers
If you are in the US, your climate affects your medium. I am in Florida, so humidity is naturally high. If you are in Arizona or Colorado, you need to adjust.
For High-Humidity States
Keep the medium at 50% moisture. Use a closed humidity dome for the first week. Open it once a day for 15 minutes. Fungus thrives in still, wet air. So airflow is your friend.
For Low-Humidity States
Increase moisture to 70%. Use a larger humidity dome and mist the leaves once daily. You can also add a shallow water tray under the pot. But never let the pot sit directly in water. That will rot the roots.
The Exact Cutting Technique That Works
Here is how I take cuttings for my reused medium batches.
I use a sharp, sterile razor blade. I cut a stem that has at least two nodes. The lower node goes in the medium. The upper node will produce the new leaves. I remove the leaves near the lower node. That bare node is where roots will emerge.
I dip the cut end in a powdered rooting hormone. Not gel, not liquid. Powder sticks better and does not wash away. I gently tap off the excess.
Then I insert the cutting into the medium. I press the moss around the stem to ensure good contact. No air pockets. Then I water with a gentle spray.
I place the pot in a clear plastic bag. This acts as a mini greenhouse. I put it in bright, indirect light. I open the bag every two days for 20 minutes. Roots form in 2 to 4 weeks.
What to Do If You See Root Rot
Even with perfect process, rot can happen. If the base of your cutting turns black and mushy, cut off the rot immediately. Use a fresh, sterilized blade. Dip the healthy part in rooting hormone again. Put it in fresh, dry medium. Do not reuse the contaminated medium for that batch. Throw it out.
I tried to save a rotten batch once. I did not. The rot spread to the healthy cuttings within three days. Lesson learned: be brutal. Remove any sick cutting the moment you spot it.
Common Myths About Reusing Rooting Medium
Myth 1: You Need Brand New Medium for Every Batch
False. If you sterilize and pH-balance, reused medium is just as effective. I have proof from my own two-week experiment.
Myth 2: Boiling Kills Beneficial Microbes So Roots Grow Slower
Partly true. But Nepenthes roots do not rely on mycorrhizal fungi like orchids do. They absorb nutrients directly from the medium. So the loss of microbes does not matter much.
Myth 3: Reused Medium Smells Bad
If it smells bad, you did not rinse or sterilize correctly. A properly processed medium smells neutral and earthy. If it smells like sulfur, you rushed the process.
My Final Routine: What I Do Every Single Time
Let me wrap this up with my exact routine. No fluff, just steps. I hope this saves you the time and frustration I went through.
- Empty old medium into a tub.
- Pick out all plant debris.
- Rinse in warm water for three minutes.
- Boil for five minutes.
- Drain and cool.
- Test pH and adjust to 5.2.
- Soak in distilled water for 12 hours.
- Squeeze to 60% moisture.
- Add 20% fresh perlite.
- Fill pots and plant your cuttings.
- Monitor daily for two weeks.
- Check for roots at day 14.
Simple, right? The most important part is the two-week observation. Do not just set it and forget it. Check moisture, check for mold, check for root tips. Adjust as you go.
FAQ
Can I reuse medium that had a plant with root rot?
No. Throw it out. Root rot pathogens survive boiling in some cases. The spores are heat-resistant. Do not risk it. Start fresh with that specific batch.
How often should I mist the cuttings in reused medium?
Every two to three days. But check the moisture first. Stick your finger one inch into the moss. If it feels barely damp, mist. If it feels soggy, stop and let it dry out for a day.
Is tap water okay for rehydrating used medium?
Tap water is okay for rinsing. But use distilled water for the final soak and for watering the cuttings. Tap water contains salts and chlorine that accumulate over time. This is especially important in the US where water hardness varies wildly. Distilled water keeps the pH stable and prevents mineral buildup.
Reusing healthy rooting medium is smart, economical, and effective. I have done it for three consecutive US Nepenthes propagation batches with a 90% success rate. The process is not hard. It just requires discipline. Follow my steps, avoid the three deadly mistakes, and you will see roots in two weeks. I promise you will not go back to buying fresh medium every single time. Give it a try. Your wallet and your plants will thank you.





