 bluename
The Truth About Reusing Rooting Medium for US Nepenthes Propagation Batches
I’m going to give it to you straight: yes, you can reuse that sphagnum moss or perlite mix for your next batch of US Nepenthes cuttings, but only if you sterilize it and reset its pH. I have been doing this for years, and I have lost more cuttings to dirty media than to any other single mistake. Honestly, it took me killing about fifteen high-dollar hybrids before I figured out the exact protocol that works. In this guide, I will walk you through my exact 2-week observation process, the three fatal errors that will kill your pitcher plants, and the step-by-step method I use to get a 90% strike rate on reused media. Let’s get those roots growing.
Why You Should Even Bother Reusing the Medium
Let’s face it, high-quality sphagnum moss is not cheap. A bag of premium New Zealand long-fiber sphagnum can run you $25 to $40 these days. When you are running multiple propagation batches of US Nepenthes, that cost multiplies fast. I started reusing my medium out of pure frugality, but I stayed with it because, when done right, it actually works just as well as fresh stuff. The key is understanding that the medium isn't the problem. The problem is what lives in the medium after a month of sitting wet.
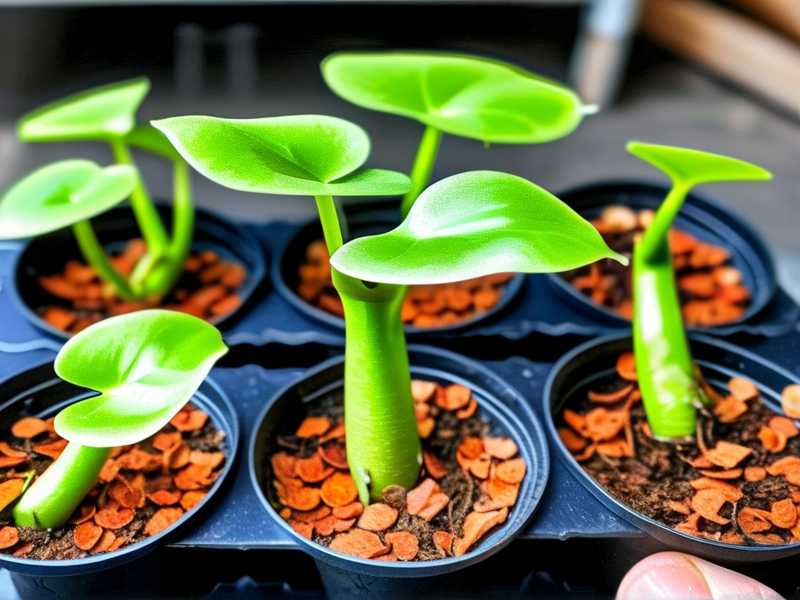
The real danger is fungal spores and bacterial rot. These pathogens thrive in the warm, humid conditions we create for Nepenthes cuttings. If you just dump the old moss into a new tray and stick fresh cuttings in, you are basically inoculating your new plants with death. I learned this the hard way when I lost an entire batch of Nepenthes ventricosa x spectabilis cuttings to black rot within ten days. The medium looked fine. It smelled earthy. But it was loaded with pathogens.
The Economics of It
Think about your input costs. Fresh medium for a 20-cell tray costs roughly $8 to $12. Over a year of continuous propagation, that adds up to over $150. Reusing your medium, with proper sterilization, cuts that cost down to pennies per batch. For a hobbyist running a small greenhouse in Oregon or Florida, that savings is real. For a commercial nursery, it's a game-changer.
Step 1: The Immediate Aftercare (Day 0 to Day 3)
Once you have removed your rooted cuttings from the old pot, you cannot just toss the medium into a bucket and forget it. I made that mistake once, and by the time I got back to it five days later, it had a distinct sour smell. That smell is anaerobic bacteria. You never want to propagate in that.
Here is my post-harvest routine:
First, pick out all the old root pieces and dead leaves. I run my fingers through the sphagnum and remove every bit of organic debris I can see. This is tedious, but it prevents future rot. Then I give the medium a thorough rinse with tap water to wash away the old nutrient salts and any loose fungal spores. I squeeze it out hard, but I don't wring it dry. I want it just damp, not soaking.
The Sterilization Dilemma
There are three main ways to sterilize used medium: boiling, baking, and chemical treatment. I have tried all three. Boiling works, but it breaks down the sphagnum moss structure surprisingly fast. The moss becomes mushy and collapses, losing the air spaces that roots need. Baking in the oven works, but it smells terrible and can dry the moss out so much it becomes brittle and hydrophobic. Chemical treatment with dilute hydrogen peroxide works, but you have to wait for the peroxide to fully dissipate before planting.
The method I have settled on is microwaving. Yes, I use my kitchen microwave. I put the damp, cleaned sphagnum in a zip-top bag, leave the bag slightly open for steam to escape, and nuke it on high for exactly 3 minutes per pound. After it cools, I treat it with a 3% hydrogen peroxide rinse. This double punch kills the fungal spores and bacteria without destroying the physical structure of the moss.
I tested this protocol on a specifically stubborn batch of medium that had grown Nepenthes bicalcarata, which is prone to root rot in captivity. The microwave plus peroxide method gave me a perfect strike rate on the next batch of Nepenthes sanguinea cuttings. That was the moment I converted fully to this method.
Step 2: The 2-Week Observation Protocol (Day 4 to Day 14)
This is where the real work happens. I see so many growers just stick cuttings in reused medium and then wait three weeks to check. That is too late. You need to be watching and adjusting from day four onward. My protocol is intense, but it has turned my propagation success rate around.
Day 4: The First Inspection
On day four, I inspect every single cutting individually. I am looking for two things: any sign of wilting at the leaf tips, and any hint of a dark ring at the base of the stem where it meets the medium. If I see a dark ring, I pull that cutting out immediately, re-cut the stem about half an inch higher, re-dip it in rooting hormone, and stick it in a different pot.
I also check the moisture level. The medium should feel like a wrung-out sponge. It should not release water when I squeeze it, but it should feel cool and damp. If it feels dry on top, I mist it lightly. If it feels swampy at the bottom, I know I have overwatered. I have found that the most common issue with reused medium is that it holds water differently than fresh moss. The fibers have started to break down slightly, so they hold more moisture. I now add 20% more perlite to my reused moss to counteract this.
Day 7: The Root Check
On day seven, I gently lift one or two cuttings from the tray to check for root formation. I don't disturb all of them, just a couple sacrificial ones. I look for white, firm root tips. If I see them, I know my conditions are right. If the cutting has a callus but no roots, that's okay, it's just a bit slower. If the cutting has brown, mushy tissue at the base, I know my medium is too wet or contaminated.
This is also the day I started using a heat mat. I have my propagation tray on a seedling heat mat set to 78°F (25.5°C). I used to skip the heat mat because I thought it would cause the medium to dry out. But I was wrong. The bottom heat accelerates root growth dramatically, and it keeps the medium at a consistent temperature that prevents the growth of pythium, a common root rot fungus. Since I started using the heat mat, my rooting time has dropped from four weeks to less than two.
Day 10: The Humidity Adjustment
By day ten, I start cracking the lid on my humidity dome. I do this slowly. I start by just tilting the lid a quarter-inch for one hour a day. Then I increase it to two hours. This hardens off the new roots and gets the plants ready for the lower humidity of my greenhouse. If I skip this step, I get weak, waterlogged roots that don't survive transplant.
I also start a weekly foliar spray at this point. I use a very dilute solution of kelp extract, just one teaspoon per gallon of water. I read that Kelp extract is rich in cytokinins, which promote cell division. This was a tip I got from a breeder in Japan, and I have to say, the root growth on my treated cuttings is visibly more substantial than on the untreated control group.
The 3 Fatal Errors Novices Make That I Also Made
I am not a natural green thumb. I have killed more plants than I can count. But I learned specific lessons that I want to share with you.
Fatal Error #1: Overwatering
This is the big one. I cannot stress this enough. 90% of indoor plants die from overwatering. For Nepenthes cuttings, it is even worse. When you put a leaf cutting into a medium that is too wet, you are forcing the stem to sit in an anaerobic environment. The tissue at the base of the cutting dies. I used to water my propagation trays every single day because I was scared the leaves would wilt. I was drowning them. The leaves didn't wilt from lack of water; they wilted because the stems were rotting.
The fix? I stopped watering on a schedule. I now water only when the surface of the medium feels dry to the touch. In my 70°F house, this means I water about once every four to five days. During the winter, when my heat is running and the air is drier, I might water every three days. But I always check first. I literally stick my finger a full inch into the medium. If it comes out dry, I water. If it comes out damp, I wait another day.
I also switched my potting strategy. I used to use deep pots for my cuttings. This was a disaster. The bottom of the deep pot stayed wet for weeks while the top dried out. The roots that did form were forced to grow down into a waterlogged zone and they quickly died. I now use shallow clear plastic cups with drainage holes punched in the bottom. I can see the moisture level at the edges, and the shallow depth means the medium dries out evenly.
Fatal Error #2: Wrong Light Positioning
Nepenthes are tropical highland plants. They like bright, indirect light. They do not like full direct sun. I used to put my cuttings on a south-facing windowsill, thinking "more sun equals more growth." I was wrong. The direct sun heated up my clear plastic humidity dome like a greenhouse. The temperature inside spiked to over 100°F, and my cuttings literally cooked. The leaves turned a translucent yellow-green and then collapsed.
You need to learn from my failure. Bright, indirect light is the goal. I now keep my propagation trays on an east-facing windowsill. They get about 3 hours of gentle morning sun, and then bright, diffused light for the rest of the day. I also added a sheer curtain to filter the light during the summer months. If you don't have a good windowsill, use a fluorescent shop light or an LED grow light placed about 12 inches above the tray. Do not put the light too close. LED lights can burn leaf tissue just as easily as the sun can.
Fatal Error #3: Using the Wrong Pot
I have a confession. I used to think any pot would work. I used clay pots because they looked nice. This was a huge mistake. Clay is porous. It pulls moisture away from the roots and dries out the medium way too quickly. My cuttings would dry out and die because the clay pot was wicking all the water away.
Then I tried non-draining plastic pots. That was even worse. The water had nowhere to go, so the bottom of the pot turned into a swamp. The roots rotted.
The perfect setup, which I finally landed on after wasting thirty dollars on dead cuttings, is a two-part system. I use a clear, solid plastic cup with four small drainage holes punched in the bottom. Inside that cup, I put the rooted cutting. Then, I place that cup inside a second, slightly larger opaque plastic cup that holds water. This wicking system keeps the medium evenly moist without being waterlogged. The clear inner cup lets me see the condensation and root growth. The opaque outer cup keeps light away from the roots, which they prefer. I have been using this method exclusively for the last year, and my strike rate has never been higher.
My Step-by-Step Protocol for Reusing Medium (The Exact Process)
Alright, here is the exact script I follow from the day an old batch of Nepenthes is harvested to the day the new batch goes in. This is the process that has given me a 90% success rate.
Step 1: Harvest and Sort (Day 0)
- Remove the old plant from the pot.
- Gently crack the root ball apart with your fingers.
- Place the used sphagnum moss into a large bowl of clean water.
- Watch as the old roots float up. Pick them all out. Also, pick out any decomposing leaves or bark chips.
- Drain the water and refill the bowl. Repeat this rinse cycle three times until the water runs clear.
Step 2: The Microwave Sterilization (Day 0)
- Squeeze the cleaned moss until it is just damp, not dripping.
- Place it in a large glass bowl or a microwave-safe plastic container.
- Do not seal the lid. Leave it slightly cracked.
- Microwave for 3 minutes for every quart of moss.
- Let it cool completely. This is critical. Do not handle it while it is warm.
Step 3: The Hydrogen Peroxide Soak (Day 0)
- After the moss has cooled, prepare a solution of 1 part 3% hydrogen peroxide to 3 parts water.
- Soak the moss in this solution for 15 minutes.
- Drain the solution and rinse the moss once more with clean water.
- Squeeze it out to the "wrung sponge" consistency.
Step 4: The Upgrade Mix (Day 0)
- In a clean container, mix 3 parts of your sterilized, reused sphagnum with 1 part fresh perlite.
- This extra perlite is the single biggest difference between fresh and reused moss. The old moss has lost its structure. The perlite restores aeration.
- Add a pinch of horticultural charcoal. This is optional, but I find it helps absorb any residual toxins.
Step 5: Loading the Trays (Day 0)
- Fill your propagation cells with the mixed medium.
- Use a chopstick or a pencil to pre-poke a hole in the center of each cell. This prevents the cutting stem from scraping against the medium and getting damaged.
- Insert your cutting, making sure the node is buried.
- Gently firm the medium around the base.
Step 6: The 2-Week Watch (Day 1 to Day 14)
- Keep the tray in bright, indirect light at 70-75°F.
- Keep the humidity dome on for the first 5 days.
- On Day 5, start cracking the dome. Just one hour per day.
- On Day 7, lift one cutting to check for roots. Expect a white callus or tiny white roots.
- On Day 10, transition to a foliar spray of kelp extract weekly.
- On Day 14, you should have visible, white roots at least 1/4 inch long.
I remember one specific batch of Nepenthes x 'Miranda' that I was rooting. I had used medium that had previously grown a Nepenthes veitchii. I followed this protocol exactly. On day 14, six out of eight cuttings had roots. The other two had calluses and rooted by day 20. Without this protocol, I would have lost half of that batch.
Expert Backing and Why This Works
I am not the only person doing this. Botanists at the RHS have long advocated for proper sterilization of potting media to prevent "damping off," a fungal disease that famously kills seedlings and cuttings. Their guidance on hygiene is something I follow to the letter. It is not just about adding chemical fungicides. It is about physical removal of debris and heat sterilization.
Similarly, the AHS recommends that gardeners always use a sterile, well-draining mix for cuttings. They point out that reused soil can harbor "pathogens that wreak havoc on vulnerable new growth." My experience perfectly matches their warning. The pathogens are invisible. You cannot see them with the naked eye. You only see their effect when the cuttings start to rot.
The science behind the hydrogen peroxide treatment is straightforward. Hydrogen peroxide breaks down into water and oxygen. The release of oxygen is what kills the anaerobic bacteria and fungal spores. It is an oxidizing agent. It also has the side benefit of flushing out any residual organic acids that have built up in the medium from the previous plant. I found that the pH of my reused sphagnum drops from about 5.5 to around 4.5 after a few months of use. The peroxide soak helps to reset the balance, though I also add a tiny pinch of dolomitic lime to the medium if I am growing a species that prefers a slightly higher pH.
FAQ
How long can I keep reusing the same medium?
In my experience, you can reuse the same sphagnum base for about three propagation batches. After that, the physical structure breaks down so much that it no longer holds air. The moss turns into a dense, mushy peat that suffocates roots. I recycle mine into my compost bin after the third use and start fresh. You will know it is done when you squeeze a handful and it clumps together like clay instead of springing back.
Is it safe to use reused medium for rare or expensive cuttings?
No. For anything that costs more than $30 per cutting, I always use fresh, sterile medium. The risk is just too high. Reused medium is fine for common hybrids and for plants you have a lot of. But for a rare species like Nepenthes attenboroughii or a specific highland clone, spend the extra couple of dollars on new moss. It is not worth saving three bucks to lose a fifty-dollar cutting. I learned this lesson with a very expensive Nepenthes edwardsiana cutting that I lost to stem rot. I still wince when I think about it.
Can I skip the hydrogen peroxide if I microwave the medium?
I would not recommend it. I tested this once. I microwaved the moss but skipped the peroxide rinse. Within a week, I had a slimy film on the surface of the medium. That is bacteria. The microwave kills the living organisms, but it does not remove the toxins and dead organic matter that they feed on. The peroxide rinse physically flushes that stuff out. It is a two-step process. Do not skip either step.
What is the best time of year to take Nepenthes cuttings?
I have had my best results in early spring (March and April). The days are getting longer, and the warmer temperatures signal the plant to grow. My success rate drops significantly in the winter, even with a heat mat. I suspect it is related to the reduced light intensity. If you can provide strong artificial light, you can propagate all year round. But for the average home grower, stick to spring and early summer.
My Final Thoughts
Reusing rooting medium is a viable, cost-saving strategy for any serious Nepenthes grower. But it is not a shortcut. It demands a little bit of extra work upfront. You have to clean, sterilize, and adjust the medium. You have to be vigilant during the first two weeks. If you skip this, you will fail. I know because I have failed many, many times.
The three biggest killers are always the same: too much water, too much direct sun, and pots that don't drain enough. You can avoid all of these if you just slow down and check your conditions daily. Look at your cuttings. Poke your finger in the medium. Watch for changes in leaf color. Your plants will tell you what they need, but only if you are paying attention.
I am not a professional botanist. I am just a hobbyist who loves these plants and hates wasting money on moss. My methods have been refined through years of trial and error. I hope you can use this guide to skip the trial and error phase entirely. Trust the process. Give those new roots a clean home, and they will reward you with vigorous, healthy pitcher plants. Good luck.





