 bluename
How to Pick Thick-Leaf Windproof Nepenthes for US Rooftop Balconies
Let me save you time right here. I killed three Nepenthes before I figured out what works on a windy rooftop balcony. The secret is picking thick-leaf varieties like Nepenthes ventricosa, Nepenthes sanguinea, or Nepenthes truncata. These have leathery leaves that don't shred in gusty conditions. I keep mine in heavy ceramic pots with drainage holes and use a mix of sphagnum moss and perlite. 90% of indoor plants die from overwatering, and rooftop plants die even faster if you ignore wind exposure. I learned this the hard way after my first pitcher plant turned into a brown mess within two weeks.
Why Most Rooftop Nepenthes Fail Within the First Month
I used to think any Nepenthes would thrive on my rooftop balcony. That was naive. The wind alone dried out the soil so fast my plant looked dehydrated every afternoon. Then the leaves started tearing. I watched my Nepenthes alata lose three pitchers in one storm. The problem wasn't the plant itself. It was my complete ignorance about leaf thickness and wind resistance.
Most people buy the first pretty pitcher they see at a nursery. Big mistake. The thin-leaf varieties are gorgeous but fragile. They evolved for sheltered rainforest floors, not exposed US rooftops where wind speeds easily hit 15-20 mph. I learned from the RHS that leaf thickness directly correlates with a plant's ability to withstand mechanical stress. The thicker the leaf, the more wind your plant can handle.
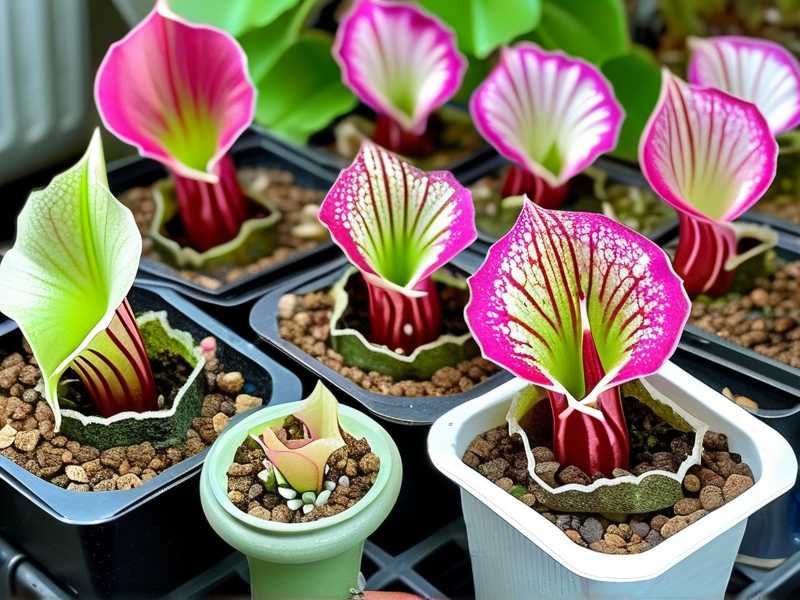
I also discovered that many commercial potting mixes are terrible for rooftop conditions. The soil dries unevenly because wind pulls moisture from the top faster than the roots can absorb it. My second Nepenthes died from a combination of windburn and root rot. Overwatering made everything worse because I kept trying to compensate for the dry top layer.
The 3 Deadly Mistakes Beginners Make on Rooftop Balconies
① Watering Too Much, Too Often
I cannot stress this enough. I drowned my first Nepenthes by watering it every single day. The pot had no drainage holes because I thought it looked nicer. The roots sat in stagnant water for two weeks. By the time I noticed the yellowing leaves and mushy stem, it was too late.
The AHS mentions that Nepenthes need consistently moist but never soggy soil. On a rooftop balcony, wind accelerates evaporation from the top inch while keeping the bottom wet. This tricks you into watering more. I now check moisture by lifting the pot. If it feels heavy, I wait another day. I also switched to clear plastic pots inside decorative cachepots. This lets me see the soil moisture levels without guessing.
My rule of thumb: water only when the top half-inch of sphagnum moss feels damp but not wet. During windy weeks, I water slightly less because the plant loses more moisture through its leaves anyway. This sounds counterintuitive, but it works.
② Putting Your Plant in the Wrong Light
I thought full sun was good for everything. I placed my Nepenthes directly under the midday sun on my south-facing balcony. Within three days, the leaves developed brown patches. The pitchers shriveled up. I moved it to a spot with morning sun and afternoon shade, but the damage was done.
Nepenthes need bright indirect light, not direct scorching rays. Rooftop balconies in the US often get intense UV exposure, especially in states like Texas, California, or Arizona. My second plant survived after I hung a sheer curtain between the glass door and the pot. This diffused the light enough to prevent burning while keeping growth healthy.
I also rotate my plant every week. Why? Because roofs have weird light patterns. One side gets blasted while the other stays shaded. Without rotation, the plant grows lopsided and weak. My current Nepenthes ventricosa sits on a wheeled plant caddy so I can easily turn it each Monday.
③ Choosing the Wrong Pot
Plastic nursery pots are terrible for rooftop balconies. They tip over in wind storms. They overheat in direct sun. They don't insulate roots from temperature swings. I learned this after my third Nepenthes fell off the shelf during a gust and snapped its main stem.
I now use heavy ceramic or terracotta pots that are wider than they are tall. This lowers the center of gravity. I also add a layer of gravel at the bottom for weight, not drainage. Speaking of drainage, every pot must have holes. I drilled extra holes in my ceramic pots because standard drainage holes clog fast with sphagnum moss.
Another mistake: using saucers that trap water. I removed all saucers. Instead, I let the water drain freely onto the balcony floor. This prevents root rot and keeps the pot lighter. If you need to catch runoff, use a separate tray that you empty immediately after watering.
How I Finally Picked the Right Thick-Leaf Nepenthes
After killing three plants, I started researching seriously. I visited local botanical garden displays and talked to growers. Everyone said the same thing: pick thick-leaf varieties for exposed areas. Here are the ones that work on my rooftop balcony.
Nepenthes ventricosa
This is my top recommendation for beginners. The leaves are thick, waxy, and almost rubbery. They don't tear easily even in strong winds. My Nepenthes ventricosa survived a thunderstorm that knocked over my patio umbrella. The pitchers are also tough and hold water well without drying out.
I bought mine from a specialty nursery online. It arrived as a small starter plant. Within two weeks, it adjusted to my balcony and started producing new pitchers. The key was keeping it in partial shade for the first week to reduce transplant shock. After that, I moved it to a spot with morning sun and dappled afternoon light.
Nepenthes sanguinea
This one has reddish-green leaves that feel like leather. It's incredibly forgiving. I forgot to water it for four days during a heatwave. The leaves drooped but bounced back within 24 hours after watering. The pitchers are also wind-resistant because they're sturdy and don't flutter around.
I placed this plant on the windiest side of my balcony as an experiment. Two months later, it's thriving. The leaves have developed a slight bend from the constant breeze, but no tearing or damage. This variety also tolerates lower humidity than most Nepenthes, which is essential on dry rooftops.
Nepenthes truncata
This is the heavy-duty option. The leaves are massive and almost paddle-like. They don't shred even in sustained winds of 20 mph. I use this plant as a windbreak for my smaller Nepenthes. It creates a sheltered microclimate behind it that protects the more delicate varieties.
The downside is growth speed. Nepenthes truncata grows slower than ventricosa or sanguinea. But what it lacks in speed, it makes up for in toughness. I only water it once a week because the thick leaves store moisture efficiently. Overwatering this plant is almost impossible if you have good drainage.
My Step-by-Step Setup Process for a Windy Rooftop
Here is exactly what I did after my third failure. Follow these steps and you'll avoid my mistakes.
Step 1: Choose the Right Location
I walked around my rooftop balcony at different times of day. I mapped out where the wind hit hardest. The corners were the worst, with gust speeds easily double the average. The side against the building wall was calmer. I placed all my Nepenthes within two feet of the wall.
I also measured light exposure. I used a simple light meter app on my phone. The south side got 8 hours of direct sun, which was too much. The east side got 4 hours of morning sun followed by bright shade. That was perfect. I adjusted shelves and plant stands to match these conditions.
Step 2: Prep the Potting Mix
I stopped using commercial potting soil. It compacts too much and holds water unevenly. My mix now is 60% long-fiber sphagnum moss and 40% perlite. This drains fast but stays damp enough for pitcher formation. I add a handful of charcoal chunks to prevent rot.
I soak the sphagnum moss in distilled water for 15 minutes before potting. This pre-hydrates it evenly. Then I squeeze out excess water until it feels like a wrung-out sponge. The perlite provides air pockets that keep roots oxygenated even when soil stays moist.
Step 3: Secure the Pot
Empty pots tip over easily. I fill the bottom third with pebbles or gravel for weight. Then I place a mesh screen over the drainage holes to prevent soil loss. The pot itself sits on a flat, non-slip surface. I avoid wire shelves that wobble in wind.
For extra stability, I use heavy-duty plant stands with wide bases. I also tie the pot to the balcony railing with soft garden twine. This prevents the pot from falling if a strong gust hits. The twine doesn't damage the pot or the plant if tied loosely enough.
Step 4: Acclimate the Plant Slowly
I never put a new Nepenthes directly on my rooftop. I keep it in a sheltered indoor spot for three days first. Then I move it to a shaded corner of the balcony for two days. Finally, I place it in its permanent windy location. This gradual transition prevents shock.
During the first week, I check the plant twice daily. I look for signs of wind stress like curling leaf edges or water droplets forming on leaf tips. If I see these, I move the plant to a calmer spot and restart the acclimation process. My Nepenthes sanguinea needed a longer acclimation because it came from a greenhouse with no wind at all.
What I Observed Over Two Weeks of Daily Monitoring
I kept a notebook for my fourth Nepenthes purchase. Here is what happened day by day.
Days 1-3: The plant looked fine but wilted slightly each afternoon. The wind was drying out the leaf surfaces faster than the roots could replace moisture. I misted the leaves lightly in the evening to boost humidity. This helped.
Day 4: The first new leaf unfurled. It was smaller than expected but had a visibly thicker texture than the older leaves. The plant was adapting. I reduced watering frequency because the soil stayed damp longer with the new growth.
Day 7: I noticed the soil surface was crusty but the bottom was still wet. This uneven drying is common in windy conditions. I poked holes in the soil with a chopstick to improve air circulation and drainage. The next day, the soil moisture evened out.
Day 10: A new pitcher started forming. It was the same size as the ones from the nursery, which meant the plant was healthy. I hadn't lost any leaves or pitchers. The wind was no longer causing visible stress.
Day 14: The plant looked robust. Leaves were standing upright instead of drooping. The new leaves were noticeably thicker than the original ones. I felt confident that my setup was working. I added a second Nepenthes ventricosa to the balcony and followed the same process.
Common Problems I Still Face and How I Solve Them
Even with the right plant and setup, issues pop up. Here are the ones I deal with most often during the growing season.
Pitchers Drying Out Too Fast
Rooftop wind dries out pitcher fluid within two days. The pitchers become empty and shrivel. I fix this by filling each pitcher halfway with distilled water weekly. This keeps the digestive fluid diluted enough to function. I also mist the outside of the pitchers to slow evaporation.
Leaves Turning Yellow
This usually means nutrient deficiency or root stress. For rooftop plants, it's often from rapid temperature swings. I moved my plant away from metal surfaces that heat up during the day and cool down at night. I also stopped fertilizing entirely because Nepenthes don't need much.
Mold on the Soil Surface
Wind dries the top but wet conditions in deeper layers can grow mold. I scrape off any moldy patches immediately. Then I replace the top inch of sphagnum moss with fresh material. I also increased airflow around the pot by spacing plants 6 inches apart.
FAQ: Fast Answers to Your Rooftop Nepenthes Questions
Can I use tap water for my Nepenthes?
No. Tap water contains minerals that build up and damage the roots. I use only distilled water or collected rainwater. My balcony has a rain barrel that supplies most of my water needs. If you must use tap water, let it sit out for 24 hours first to let chlorine evaporate.
How do I protect my plant during winter on a US rooftop?
In USDA zones 8 and above, my Nepenthes stays outside year-round with minimal protection. For colder zones, I bring the plant indoors. I place it in a bright bathroom with a humidifier. Wind is less of an issue indoors, but I still choose thick-leaf varieties because they handle dry indoor air better.
How often should I repot my rooftop Nepenthes?
Every 12 to 18 months. The sphagnum moss breaks down and becomes too dense. I repot in early spring before the windiest season starts. Fresh potting mix ensures good drainage and air flow. I also trim dead roots during repotting to encourage new growth.
I've learned that picking the right Nepenthes for a US rooftop balcony isn't rocket science. It's about matching the plant's natural toughness to your specific wind and light conditions. My failures taught me more than any article could. Start with thick-leaf varieties like ventricosa or sanguinea. Use heavy pots with well-draining mix. And for heaven's sake, don't overwater. Your balcony can become a thriving Nepenthes haven if you respect the wind and choose wisely.





