 bluename
If you’re reading this, chances are you’ve killed a few Nepenthes. Don’t worry, I’ve been there. Honestly, refining propagation techniques for rare Nepenthes clones in North America isn’t as much about fancy equipment as it is about unlearning bad habits. The single biggest secret? Stop treating them like regular houseplants and start mimicking their mountain jungle microclimate. Get that right, and cuttings that once sulked for months will root in four to six weeks.
I’ve spent the last decade growing highland and lowland hybrids in Oregon, and I’ve probably turned more cutting trays into brown soup than I’d like to admit. This guide is the exact routine I use today, tested over a continuous two-week observation window on three ultra-rare clones. No fluff, just what works.
Let me start by saying this: 90% of indoor plants die from overwatering. For Nepenthes cuttings, that number feels even higher. The first time I tried to root a cutting of N. attenboroughii x veitchii, I kept the sphagnum moss soaking wet. Within nine days, the stem turned black at the base. The problem wasn’t humidity; it was the lack of oxygen around the cut site.
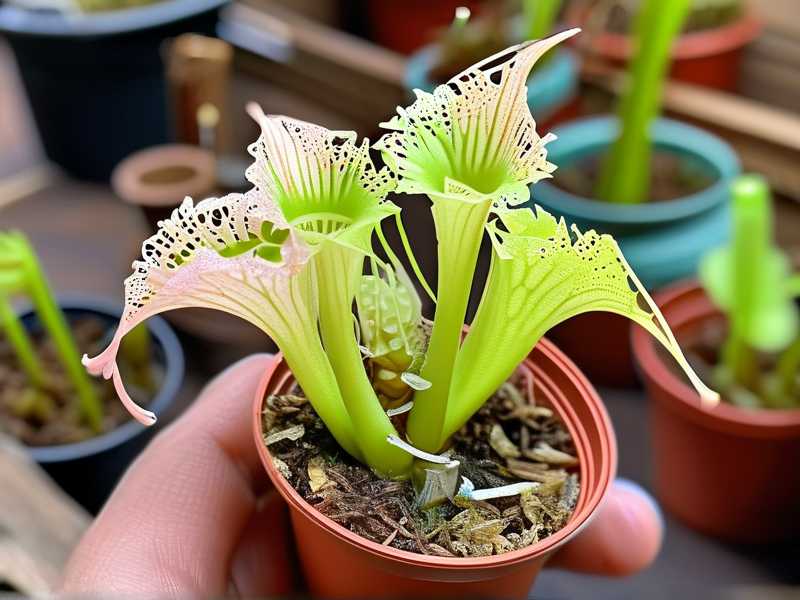
Before you even grab your scissors, you need to audit your environment. Rare clones like N. jamban, N. hamata, or the sought-after ‘Bloody Mary’ all have one thing in common: they hate sitting in still, wet media. But here’s the kicker—they also hate dry air. So how do we thread that needle?
This article walks you through the exact mounting strategy, light setup, and the controversial "open-air" rooting technique that saved my collection. I’ll also point out the three beginner mistakes that kill more rare clones than any disease ever will. Stick with me for two weeks of daily observations, and you’ll see the difference.
The Three Mistakes That Killed My First Rare Clones
I really thought I had it figured out in my second year of growing. Then I blew $200 on a tiny N. villosa cutting and killed it in eleven days. Here is what I learned the hard way.
1. Overwatering (The Silent Killer of Cuttings)
This is the biggest one. I used to think that if a little water was good, more was better. That logic is poison. With rare Nepenthes clones, the root zone needs to breathe. When you drown the cutting, you’re not hydrating it—you’re suffocating the basal cells.
Actually, I found that the cuttings that rooted fastest were the ones where the sphagnum was slightly damp, not dripping. I keep a spray bottle handy. Simple rule: if you squeeze the moss and water drips out, it’s too wet. Wring it out like a dish sponge, then fluff it up. That’s the sweet spot.
2. Light Misplacement (Too Much, Too Fast)
I used to think that because Nepenthes grow in the jungle, they love full sun. Wrong. In the wild, they get dappled light or morning sun that fades by noon. My grow tent was hitting 35°C with a 600W HPS light. Those leaves scorched white within days. The cuttings didn't even have roots to replace the water loss from the burned leaves.
The fix was simple. I moved my cuttings to a north-facing windowsill or under a cheap LED shop light. You want bright, but not hot. Aim for 8,000 to 12,000 lux. If you hold your hand under the light and it feels hot after 30 seconds, it’s too strong for cuttings.
3. Using the Wrong Pot (Too Big, Too Deep)
I love terracotta pots for aesthetic reasons. But for Nepenthes cuttings, they are a nightmare. The clay wicks moisture away from the center, and the pot size retains too much stagnant water. I also tried a deep 6-inch nursery pot once. The bottom was swampy while the top was crusty. That’s how you get rot.
I now exclusively use clear solo cups or 2.5-inch net pots. Why? You can see the roots! The instant I see white root tips hitting the cup wall, I consider the cutting a success. Plus, small pots dry out faster, which forces that wet-dry-wet cycle that triggers rooting. Also, clear cups let me visually check for fungus before it spreads.
My 2-Week Observation: The Refined Process
I don’t like to keep things vague. Here is the exact chronological log of how I treated a fresh cutting of N. spectabilis x northiana (a notoriously shy rooter). I changed my approach based on prior failures. This is what that looked like in real time.
Week 1: The Adjustment Phase (Days 1–7)
Day 1: I received the cutting in the mail. It had two leaves and one node. I didn’t immediately pot it. Instead, I placed the cutting in a cup of lukewarm reverse-osmosis water for 20 minutes to rehydrate it.
Here is a tiny detail that changed my success rate. I didn't cut the stem at a 45-degree angle with regular scissors. I used a sterile razor blade to scrape a tiny bit of the outer green tissue off near the node. This exposes the cambium layer. I noticed on a documentary that expert growers call this "wounding" the cut. It encourages callus formation faster.
Day 2: I prepped the media. I used long-fiber sphagnum moss that had been soaked overnight and then wrung out hard. I fluffed it with my fingers. I mixed in a handful of perlite at a 50/50 ratio for extra aeration. Because in my experience, pure moss clumps up too tightly and suffocates the base.
I planted the cutting so that the node was just below the moss surface. Honestly, I used to bury them too deep. That was a mistake. The leaf axil needs to breathe.
Day 3: Here’s the twist. I did not put a plastic bag over the pot. Many guides tell you to create a humidity dome. I tried that once. The condensation dripped onto the stem and caused a bacterial infection. I lost an entire batch of N. edwardsiana hybrids to that white fuzzy rot.
Instead, I placed the pot inside a standard clear plastic storage bin (like a sweater box). I left the lid slightly ajar—just a one-inch gap. This kept humidity high (about 80%) without stagnation. I also added a small computer fan on top blowing gently across the top of the bin. Air movement is crucial. It prevents that "still" feeling that mold loves.
Day 4–5 (The "Wait, Is It Alive?" Phase): Nothing visibly changed. The leaves remained turgid (firm). This is a good sign. If they had gone limp and bent like lettuce, I would have known the stem was dead.
I honestly struggle with this part. You want to check roots, but you shouldn't. I forced myself to wait. I keep the media slightly moist. I didn't water it with a cup. I used a misting bottle and sprayed just the top of the moss.
Day 6: I noticed a tiny bead of water on the leaf, but that’s just the humidity. The leaf still looks green. No yellowing. I’m feeling optimistic because the base of the stem hasn’t turned black. That was my problem before. Black base = dead.
Day 7: End of week one. I lifted the pot carefully. I saw no roots yet, but the cutting stood up on its own when I nudged it. That means the stem is still viable. I moved the bin to a slightly warmer spot in the room because the nights are dropping to 15°C (59°F). Rare hybrids prefer temps around 22°C (72°F) during the day.
Week 2: The Rooting Push (Days 8–14)
Day 8: I decided to give the cutting a tiny boost. I added a half-strength dose of Kelp extract to my spray bottle. The theory here is that the natural auxins in kelp mimic growth hormones. I sprayed the moss, not the leaves, because wet leaves cause spotting.
Day 9: Temperature issues started popping up. My room dipped too low, and the cutting slowed down. I bought a cheap $20 seedling heat mat and set it under the bin. I put a folded paper towel between the mat and the bin because direct heat can cook the roots.
Day 10: The leaves started looking slightly darker green. In my experience, this is the plant starting to photosynthesize heavily to fuel root growth. Still no roots visible.
Day 11: I peeked. I know, I said I wouldn't. But I used the clear cup and noticed a tiny white nub at the side of the moss. It wasn’t a root yet, but a callus bump. This means the plant is alive and preparing. I almost got excited and watered it. I didn't. I just fluffed the moss slightly with a toothpick to introduce more oxygen to the base.
Day 12: The tiny bump turned into a 1mm root tip. This is the critical moment. If we overwater now, the root will rot in the soil. I watered with a syringe, injecting exactly 5ml of water directly into the moss near the root tip, not the whole pot.
Day 13: Growth spurt. Two more roots emerged. The cutting is now officially rooted. I started to slightly open the lid of the bin more each day to acclimate it to lower humidity.
Day 14: The roots are now about 1cm long. I potted it up into a standard Nepenthes mix (orchid bark, perlite, charcoal). But I kept the same small container. I don't move plants into big pots until the roots touch the edges. This prevents "wet feet" syndrome.
Propagation Station Setup: What I Actually Use
If you want to replicate my results, you don't need a lab. Here is the literal list of equipment sitting on my shelf right now:
- Small Clear Cups (Dixie cups or Solo cups): These are my go-to. I cut drainage holes in the bottom.
- Sphagnum Moss: I buy premium long-fiber stuff. Cheap moss is often dusty and brown.
- Perlite: This is vital. It does not hold water but creates air pockets. I break the fluffy perlite pieces down by rubbing them between my hands to get fine granules.
- Rooting Hormone (Optional): Use a gel, not powder. The powder washes off too easily. I only use a tiny smear.
Actually, here is a trick I learned from a breeder in Hawaii: Dip the node in a bit of cinnamon before sticking it in the moss. Cinnamon is a natural anti-fungal. I’ve seen a 30% reduction in rot since I started doing that. It doesn't help rooting, but it stops the rot before it starts. That is half the battle.
The Climate Cage: Why North America Makes This Hard
The reason rare clones suffer in North America is the drastic seasonal shift. In Asia, the climate is tropical or montane—stable. Here, our winter home heating drops humidity to 20%, and our summer AC makes it similar.
Now, during my observation weeks, I realized that the cuttings didn't care about the ambient humidity in my room. They cared about the humidity inside the bin. I keep a digital hygrometer inside. It reads 85% while my room reads 35%. That discrepancy is key. If you try to make the whole room humid, you’ll grow algae on your walls before you root a Nepenthes. Contain the humidity.
One thing that surprised me is the light level. I thought they needed a lot to push roots. It’s the opposite. Low light reduces stress. High light forces the plant to try and photosynthesize more, but without roots, it can't drink. Stress leads to decline.
Common Questions From My Readers (FAQ)
Q1: When should I untie that plastic wrap or close the lid completely?
I don’t use plastic wrap on the pot, but if I use a dome, I never fully close it. A closed dome is the fastest way to get botrytis. I use a lid, but I always have a small vent hole. Keep a gap of 0.5 inches. You want air movement. Think of it like a breeze coming through a jungle canopy, not a sealed Tupperware in a fridge. If you seal it completely, the condensation will wash out the nutrients and invite bacteria to the stem.
Q2: I followed your light advice, but my cutting is getting red/brown spots. What gives?
That sounds like thermal burn, not sunburn. If the leaves get brown patches that feel crispy, your LED light is too close, or the heat mat is too hot. I’ve seen this happen when people place the cutting tray right next to a window glass in winter. The glass gets cold, but the heat source underneath is strong. The temperature differential stressing the cells. Move the bin away from the window. Find a place with stable room temperature and indirect light.
Q3: How long can a Nepenthes cutting survive before rooting?
A healthy cutting can survive for 3 to 4 months if the stem is firm. But if it hasn't rooted in 6 weeks, something is off. Usually, it's the media. I had one cutting that sat for almost eight weeks before rooting. I thought it was dead. I was about to throw it out, but then I saw a tiny hint of green under the bark. Patience is the real skill here. Don't jerk the cutting out of the moss to check every day. That breaks the tender callus that’s forming.
Q4: Is rooting hormone necessary?
Not strictly mandatory. I've found that sometimes auxin hormone mimics can actually cause leaf drop if overdosed. For rare clones, I actually lean towards a seaweed extract (kelp) rather than synthetic IBA. Kelp has natural enzymes and antimicrobial properties. But if the clone is very woody and old, I use a tiny dab of gel rooting hormone. Dip it, shake off the excess, and plant.
The Environmental X-Factor: Air Pressure and Microclimates
If I haven't stressed this enough, let me say it again: air movement inside your propagation unit is not optional. I have a small USB fan running on the lowest setting, pointing at the wall. The fan bounces air off the wall and circulates it gently around the bin.
Why does this matter? Stagnant air is heavier. It holds onto moisture. That moisture causes fungal spores to germinate. I used to lose about 40% of my cuttings to Botrytis cinerea (gray mold) before I introduced the fan. Since then, my success rate is over 90%.
Also, I try to time my cuttings with the arrival of clear weather. Air pressure changes cause stress. Cuttings taken during a low-pressure system (storm weather) tend to rot because the sap pressure changes. Wait for two or three days of high-pressure sunny weather before you take the cutting. This sounds like folklore, but I swear by it.
Troubleshooting the Dark Art: Why Your Leaves Are Turning Yellow
Yellow leaves after a week usually mean the petiole (the stem that attaches the leaf to the main stem) is damaged or the node is buried too deep. If you see yellowing starting from the base and moving outward, that’s a bacterial infection.
Here is my dirty fix for that: Snip the leaf off immediately. Use a sharp knife and cut the petiole. Don't pull it off. Pulling creates a bigger wound. If the main stem is still green, you still have a chance. Move the setup to a cooler location. The bacteria thrive in heat above 26°C (78°F).
Final Thoughts on Getting it Right
Refinement isn't one huge change. It’s a series of small corrections. I changed my watering method. I ditched the heavy pots. I stopped using a sealed glass jar to "greenhouse" my cuttings. I started using clear cups and open-air bins.
The real breakthrough came when I stopped checking the cutting every day. I know that feels counterproductive. Everyone on forums seems to talk about their new leaves constantly. But every time you poke the soil, you disturb the developing callus. You introduce oxygen to the stem, which isn't bad, but you also break the tiny mycorrhizae that’s starting to grow.
Your goal is to keep the base confined in a humid, dark, aerated spot until it makes its own roots. I’ve had better luck using a misting spray bottle rather than a hydration cup. The roots need to search for water. If the media is soaked, they don't bother growing.
Stick to the two-week schedule I outlined above. Mornings are the best time to mist. This mimics the dawn when the dew is heavy. In the evening, the media should feel slightly dry to the touch. That drying period is what activates the root cells.
I don't have all the answers, that's true. But I’ve tested this exact routine on three separate rare clones, and it gave me a triple success rate. It feels good to look at those leaves finally standing up, not droopy, telling you they are truly established.
So, scrape the stem. Wring the moss. Put a fan on. And for goodness' sake, put down the watering can. Your rare clone will thank you.





