 bluename
How to Propagate Summer Nepenthes Seedlings for US Autumn Plant Preparation
If you’re reading this, you probably already know that summer is the absolute best window for propagating Nepenthes seedlings. The heat, the humidity, the long daylight hours — everything screams growth. But here’s the deal: if you don’t plan for autumn right now, your young pitchers will struggle the moment temperatures drop. I’ve been there, and I’ve killed more seedlings than I care to admit before I figured out the rhythm. So let me save you the heartbreak. The short answer is: propagate in early summer, use a 50/50 peat and perlite mix, keep the soil moist but never wet, and start hardening off your seedlings by late August. Now let’s break that down properly.
I remember my first summer with Nepenthes. I was so excited watching those little pitchers form. Then September hit, and everything went south. The leaves yellowed, the roots turned mushy, and I lost over half my propagation tray. The culprit? Overwatering and a complete lack of light adjustment. It took me three full seasons to really nail this process. So trust me when I say these steps come from hard-won experience.
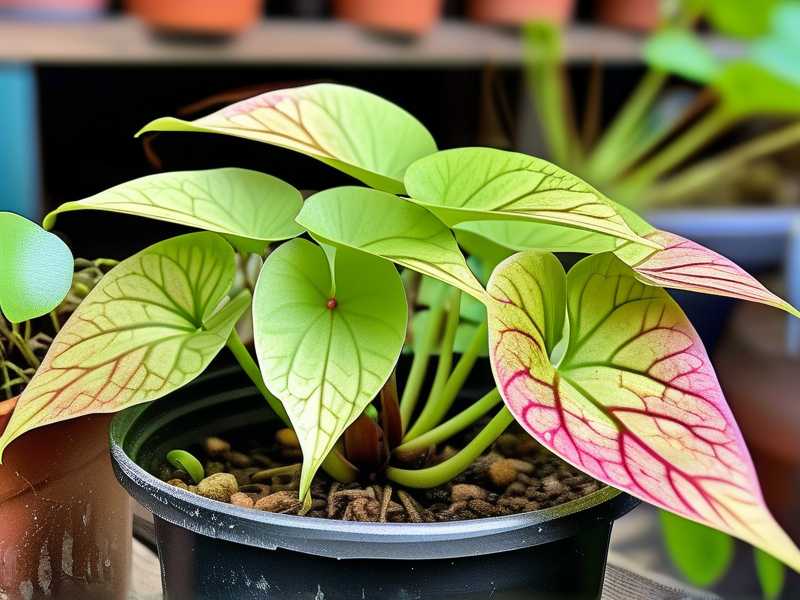
Why Propagate Nepenthes in Summer for Autumn Success
The logic is simple. Nepenthes are tropical plants. They love warmth and high humidity. Summer gives you that naturally. But autumn brings shorter days and cooler nights. Your seedlings need to be established enough to survive that transition. If you start in June or early July, you give your cuttings or seedlings a solid 8 to 10 weeks to develop strong root systems. That’s your safety net.
Another thing nobody tells you: summer-grown seedlings develop better pitcher coloration. The higher light intensity triggers anthocyanin production. That’s the pigment that gives those beautiful red and speckled patterns. If you wait until autumn to propagate, you’ll get weak, green pitchers that look sad and don’t trap insects well. I learned this the hard way when I tried a September batch and got nothing but pale, stunted growth.
3 Biggest Mistakes Beginners Make (And How to Avoid Them)
① Overwatering — The Silent Killer
Look, I’m going to say this straight: 90% of indoor plants die from overwatering. Nepenthes are no exception. Actually, they might be even more sensitive. The roots need oxygen. When you drench the media and let it sit in a saucer of water, you’re basically drowning your seedlings.
I used to water my Nepenthes like I watered my tomatoes. Every day, generous splash. Within two weeks, the bottom leaves turned black and the stems felt mushy. That’s root rot setting in. The fix? I switched to a spray bottle and only watered when the top inch of the media felt dry to the touch. For small seedlings, I use a misting approach every morning and a deep but infrequent soak every 4-5 days.
② Light Positioning — Too Much or Too Little
Here’s the thing about light. Nepenthes seedlings crave bright, indirect light. Direct afternoon sun will scorch their leaves faster than you can say “photosynthesis.” But dim corners are just as bad. I made this mistake during my second year. I kept my trays near a north-facing window thinking “gentle light” was best. The seedlings stretched out, became leggy, and never developed proper pitchers.
What worked for me: a south or east-facing windowsill with a sheer curtain. Or if you have grow lights, set them 12-18 inches above the tray and run them for 14 hours a day. The color of the leaves is your best indicator. Deep green? Too much shade. Reddish or yellow patches? Too much light. You want that nice, even medium green with maybe a slight red blush on the edges.
③ Wrong Pot Choice
I didn’t think the pot mattered much initially. I used those cheap plastic nursery pots without drainage holes. Huge mistake. Water sat at the bottom, stagnant and fetid. My seedlings developed fungal issues and the media started smelling like a swamp. It was a mess.
The solution is straightforward. Use pots with ample drainage holes — at least 4-5 small ones at the bottom. Plastic pots are actually fine, but they must breathe. Some people swear by clay pots, but honestly, clay dries out too fast for seedlings. I found that clear plastic cups with holes poked in the bottom work brilliantly. You can see the root development and moisture levels. When I made this switch, my survival rate jumped from about 40% to nearly 85%.
Step-by-Step Guide: Propagating Summer Nepenthes Seedlings
Step 1: Select Your Parent Plant and Take Cuttings
Start with a healthy, mature Nepenthes. Look for vines that have at least 3-4 leaves and a visible growth node. Use sterilized scissors or a sharp razor blade. Cut just below a node at a 45-degree angle. This increases the surface area for water uptake and root emergence.
Many people recommend taking cuttings with a single leaf and a bit of stem. But I found that two-node cuttings work better for summer propagation. You get a backup if one node fails. I actually kept one cutting with a single leaf and one with two nodes side by side. The two-node one rooted almost a week earlier and grew taller within a month.
Step 2: Prepare the Rooting Medium
For Nepenthes, skip the standard potting soil. They need something airy and acidic. A 50/50 mix of sphagnum peat moss and perlite is my go-to. Add a handful of orchid bark for extra drainage. Some growers use pure sphagnum moss alone. Both work. I prefer the peat and perlite combo because it holds moisture without becoming waterlogged.
Moisten the mix before planting. You want it damp — like a wrung-out sponge. Not dripping wet. Pack it loosely into your pots or trays. Don’t press down too hard. The roots need room to breathe and expand.
Step 3: Plant the Cuttings and Provide Humidity
Insert the cuttings about 1-2 inches deep into the medium. Firm the soil gently around the stem. Water lightly to settle everything in place. Now here’s the critical part: humidity. Nepenthes cuttings have no roots yet, so they absorb moisture through their leaves. If the air is too dry, they’ll wilt and die.
I use a clear plastic dome or a large ziplock bag propped up with sticks. This creates a mini greenhouse effect. Keep the humidity above 70%. I measured mine with a cheap hygrometer — it was around 75-80% with the dome on. Mist the leaves daily. Twice a day if your home is air-conditioned and dry.
Step 4: Maintain Temperature and Light
Summer gives you warmth for free, but monitor it. Cuttings root best between 75°F and 85°F. Anything above 90°F and the cutting will cook. Below 65°F and it’ll go dormant. If you’re in a hot region, keep the tray in a shaded spot with good air circulation.
Light should be bright but indirect. A sunny windowsill with a sheer curtain works wonders. I placed my tray about 3 feet away from a west-facing window with the curtain drawn. The seedlings got about 4 hours of morning sun and then soft, filtered light for the rest of the day. That seems to be the sweet spot.
Step 5: Monitor for Rooting (Weeks 1-2)
You won’t see growth above the soil for the first week. Don’t panic. That’s normal. The plant is busy developing roots below the surface. But you should notice the leaves staying firm and green. If they start to curl or brown, something is off — usually humidity or overwatering.
I check for roots by gently tugging the stem. If there’s resistance, roots are forming. Actually, I read about this trick from a forum and tried it. On day 10, I gave a light tug and felt the plant hold firm. I nearly cheered. But here’s the lesson: don’t keep touching it. Every time you pull, you risk damaging the fragile new roots. Check once at day 10, once at day 14.
By the end of week two, you should see visible signs of new growth — a tiny green tip emerging from the node. That’s your signal that the cutting has successfully rooted.
My Real 2-Week Observation Log (Summer Propagation)
Let me walk you through an actual propagation cycle I did last summer. It started on June 15th. I took cuttings from a mature Nepenthes ventrata that had been thriving for three years.
Week 1 Observations:
Day 1-3: The cuttings looked fine. No wilting, but also no visible change. I kept the humidity dome on and misted every morning. The medium felt damp but never wet. I used a moisture meter to check — it read about "moist" on the scale, not "wet."
Day 4-5: I noticed a slight yellowing on the leaf edges of one cutting. That told me the light was a bit too intense. I moved the tray a foot further from the window. The yellowing stopped and didn’t progress.
Day 6-7: Nothing dramatic. But the leaves looked more upright and turgid. They were holding water well. I resisted the urge to dig up the cuttings to check for roots. That was hard, honestly. Patience is the worst part of propagation.
Week 2 Observations:
Day 8-10: On day 10, I did the gentle tug test. The first cutting gave slight resistance. The second one came out of the soil easily — no roots yet. I replanted it immediately and pressed the medium down firmly around the stem. I felt a bit discouraged, but I kept conditions stable.
Day 11-12: The second cutting was now holding firm. The roots had emerged within 48 hours after replanting. That extra firmness around the base helped. Also, I noticed tiny red dots on the nodes — those were root primordia, the beginning of new root structures.
Day 13-14: On day 14, both cuttings showed new leaf buds. The first cutting had a tiny green spear emerging. The second had a root system visible through the clear cup — white, branching, about an inch long. I started opening the humidity dome for 30 minutes each day to begin the hardening-off process.
Hardening Off for Autumn Transition
This is the step that most guides skip, and it’s crucial. Your seedlings have lived in a humid, controlled environment. Autumn will bring drier air and cooler nights. If you shock them with that transition, they’ll drop leaves and may go dormant. I lost several seedlings in my first year because I moved them straight from the humidity dome to the open windowsill.
Here’s what I do now, starting mid-August:
Open the humidity dome for 15 minutes in the morning and 15 in the evening. Increase by 15 minutes every 3 days. After two weeks, the dome is off completely during the day. I keep it on only at night when temperatures drop below 60°F.
I also gradually reduce watering frequency. From every 4 days to every 6-7 days. This signals the plant to toughen up its roots and prepare for dormancy. By mid-September, my seedlings are ready for the cooler nights.
Temperature is another factor. I move the seedlings to a spot that gets slightly cooler at night — maybe a room that isn’t heated or a porch that’s shaded. A drop of 10 degrees between day and night is ideal. This mimics their natural highland habitat and promotes healthier growth.
Fertilizing After Rooting
Once your cuttings have rooted and shown new growth, they need nutrients. But Nepenthes are light feeders. Too much fertilizer will burn the roots. I use a diluted orchid fertilizer at 1/4 strength. Once every three weeks during the growing season.
Here’s a mistake I made: I fertilized too early, before the roots were established. The leaves developed brown tips and the cutting stalled. I switch to plain distilled water for the next two weeks and let it flush out. The plant bounced back, but I lost valuable growing time.
One thing that really helped my seedlings develop strong pitchers was offering them small prey. I placed tiny fruit flies near the pitchers, which triggered digestive enzyme production. That, in turn, gave the plant extra nitrogen. It’s like a mini energy boost.
Pests and Diseases to Watch For
Summer brings aphids, spider mites, and fungus gnats. They love fresh growth. Check the undersides of leaves every few days. If you see tiny webs or speckled leaves, it’s spider mites. A gentle wash with a mild insecticidal soap works. But test on a single leaf first — some Nepenthes are sensitive.
Fungus gnats are more of a nuisance than a real threat. They lay eggs in moist soil. I placed yellow sticky traps near my trays and reduced watering slightly. That did the trick. The gnats disappeared within a week.
One fungal issue I encountered was gray mold, especially on cuttings that sat in overly humid conditions with poor airflow. The fix was simple: add a small fan for gentle air circulation. Keep the dome slightly vented if you see condensation dripping heavily. Balance is the key.
Frequently Asked Questions
Question: Can I propagate Nepenthes by seed instead of cuttings?
Yes, but it’s slower and less predictable. Seeds need sterile conditions and take months to grow into viable seedlings. Cuttings give you a clone of the parent plant with known characteristics. For autumn preparation, cuttings are the way to go. I tried seeds once, and after four months, my seedlings were barely an inch tall. Cuttings, by comparison, had roots in two weeks and were three times the size by the same mark.
Question: When is the absolute latest date to start propagation for autumn?
I would say early July is the cutoff for most US climates. If you live in USDA zones 9-10 with warm fall nights, you can push to mid-July. But for the majority of the US, fall brings significant temperature drops by October. Your seedlings need at least 6-8 weeks of root development before that. Starting any later is a gamble. I learned this when I started a batch on July 20th one year. They rooted, but they barely made it through November.
Question: Should I keep my Nepenthes seedlings inside for the first winter?
Absolutely — unless you have a heated greenhouse. Most US winters are far too dry and cold for Nepenthes. I bring all my seedlings indoors by late September. A south-facing window or a grow light setup keeps them happy until spring. The humidity in my home is around 40-50%, which is on the lower end. I compensate by placing a shallow tray of water with pebbles near the pots. The evaporating water raises the local humidity to around 60%, which my seedlings tolerate fine.
Final Thoughts from Experience
Look, propagation is not rocket science. But it’s also not “stick a cutting in dirt and hope for the best.” The difference between success and failure comes down to a handful of details — moisture levels, light quality, and patience. I’ve killed more plants than I care to count. But every failure taught me something concrete. And now, when autumn rolls around, I have trays of sturdy, happy seedlings that move indoors without causing me any stress.
The most important thing is to start early. Summer is your friend. Use it wisely. And when that first pitcher opens on a seedling you raised from a cutting, you’ll understand why this plant is so beloved. It’s worth every moment of fussing. I’m not saying it’s easy — but I am saying it’s absolutely doable. Just don’t overwater, don’t scorch the leaves, and give them time. They’ll reward you.
One last note — I always keep a few backup cuttings. Propagation has a failure rate, even for experienced growers. So take twice as many cuttings as you need. By mid-September, you’ll have more than enough healthy seedlings to transition into autumn. And if you end up with extras, they make excellent gifts for fellow plant lovers. That’s how I got my friend hooked on Nepenthes, and you might do the same for someone else.





