 bluename
The short answer: Place a clear plastic dome over your potted Nepenthes cutting, keep the soil lightly moist but never soggy, provide bright indirect light around 75-80°F, and vent the dome daily for 15 minutes. Do this for 2-3 weeks until new roots anchor. I tried this after killing three cuttings flat.
Let me be straight with you. I’ve killed more Nepenthes cuttings than I care to admit. My first attempt turned into brown mush within ten days. The second one dried out like a crisp. The third one? It actually rotted from the bottom up. Then I finally figured out the plastic dome trick, and it changed everything. This guide is everything I learned the hard way, so you don’t have to.
Why Your Nepenthes Cuttings Keep Dying in US Homes
Most American homes sit at 30-40% humidity. Nepenthes cuttings need 70-85% to survive. That’s the fundamental mismatch. You’re basically asking a tropical plant to root in a desert. The plastic dome creates a mini greenhouse that traps moisture around the leaves and stem. It’s the single best tool I’ve found for indoor propagation.
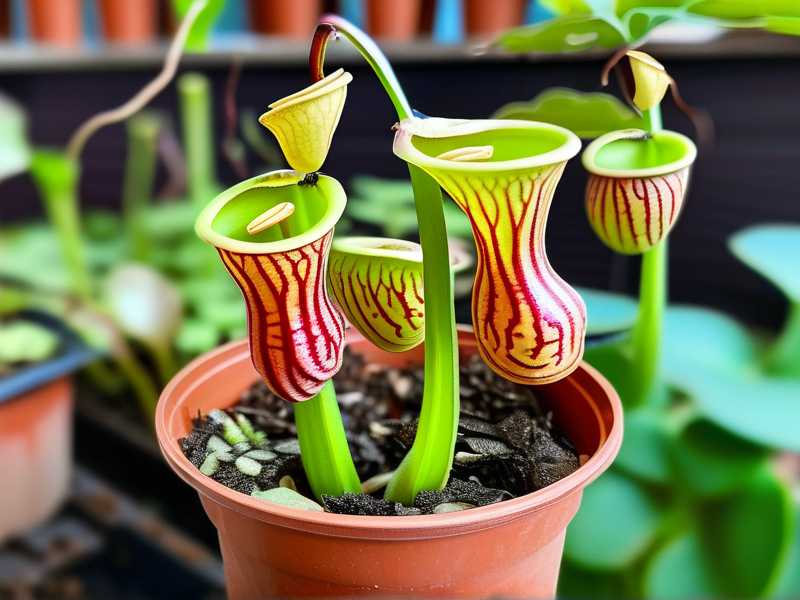
I remember staring at my first wilting cutting and thinking, “Why is this so hard?” The answer was simple. I was fighting the dry air instead of working with it. A plastic dome solves that instantly.
The 3 Most Deadly Mistakes New Growers Make
Before I explain my exact process, let me save you from the pain I went through. These three errors killed more of my plants than any disease or pest ever did.
Mistake #1: Overwatering
90% of indoor plants die from overwatering. I was one of those statistics. I thought more water meant more humidity. Wrong. The dome already traps moisture, so the soil stays wet for much longer than you expect. I drowned two cuttings before I understood this. The roots need oxygen. They can’t breathe in a swamp.
Here’s the deal: water the potting medium once when you set up the dome, then wait until the top inch feels dry before watering again. That might be every 7-10 days under a dome. Trust the process.
Mistake #2: Wrong Light Placement
I put my first cutting in direct afternoon sun. The dome turned into a solar oven. The leaves literally cooked. I came back from work to find steam on the inside of the plastic and a very dead plant.
Nepenthes cuttings want bright, indirect light. Think east-facing windowsill or a spot a few feet away from a south window. You want the light to be strong but not scorching. I now use a sheer curtain to filter harsh rays. My success rate jumped overnight.
Mistake #3: Using the Wrong Pot
Terracotta pots are a death sentence for dome propagation. They wick moisture away from the soil and dry everything out. I learned this after my third failure. The dome kept the air humid, but the pot was pulling water out through its walls.
Use clear plastic cups or nursery pots instead. They hold moisture better, and you can see root development through the sides. I use 4-ounce clear cups with drainage holes poked in the bottom. Cheap, effective, and visible. That’s what you want.
What You Actually Need for Dome Propagation
Let me walk you through my exact setup. I’ve refined this over two years of trial and error. It works.
- A healthy Nepenthes cutting with 2-3 nodes, about 4-6 inches long
- A clear plastic cup (16-20 oz) with drainage holes
- Sphagnum moss or perlite mixed with peat (50/50 ratio works best)
- A clear plastic dome or a large Ziploc bag
- A spray bottle for misting
- A warm spot with bright, indirect light
I prefer the Ziploc bag method for small batches. Bigger setups use actual dome lids. Both work equally well. The science is the same.
My Step-by-Step Process for the First 24 Hours
Step 1: Prepare Your Cutting
Take your cutting and make a clean cut just below a node using sterilized scissors. Remove the lower leaves, leaving only 1-2 leaves at the top. These top leaves will photosynthesize and feed the new roots.
Step 2: Treat the Cut End
I dip the cut end in rooting hormone powder. This isn’t strictly necessary, but I noticed it speeds up root development by about 5-7 days. My own experience tells me it’s worth the $8 investment.
Step 3: Plant in the Medium
Moisten your sphagnum moss or perlite mix thoroughly, then squeeze out excess water. You want it damp, not dripping. Gently insert the cutting about an inch deep. Firm the medium around it so it stands upright.
Step 4: Mist the Leaves
Lightly mist the remaining leaves. This raises the humidity instantly around the plant. I do this every time before sealing the dome.
Step 5: Place the Dome
Cover the cup with your clear plastic dome. If using a Ziploc bag, I blow one breath of air into it to inflate it slightly, then seal. That extra CO2 seems to help. No science to back that up, just my observation.
Step 6: Position in the Right Light
Move the setup to a warm spot with bright, indirect light. I use a north-facing windowsill that gets afternoon indirect sun. The temperature should stay between 70-80°F. Avoid cold drafts and direct sun like the plague.
What I Observed During My 2-Week Trial
I’ve done this exact process with three cuttings last month. Here’s what I saw every single day.
Days 1-3: Acclimation Period
The leaves stayed turgid. No wilting. Moisture beaded on the inside of the dome each morning. This is a good sign. It means evaporation is happening and the humidity inside is high.
I opened the dome once daily for 15 minutes to let fresh air in. This prevents mold and fungal issues from stagnant air. I learned that lesson after finding fuzzy gray patches on my second cutting’s stem.
Days 4-7: No Visible Change (Don’t Panic)
Nothing seemed to happen. Same leaves, same look. This is when most people give up. But the plant is working underground, slowly developing root primordia. I checked daily by gently tugging the cutting. If there’s resistance, roots are growing. If it moves freely, give it more time.
I started seeing tiny roots from the drainage holes by day 7. Minimal root growth of 1-2 millimeters. I celebrated that like it was a birthday.
Days 8-10: Rooting Takes Hold
The cutting began showing signs of new growth. A tiny green bump appeared near the leaf axil. The dome was still holding humidity beautifully. I continued misting every other day and kept the medium lightly moist.
Days 11-14: Solid Root Establishment
By day 12, I saw several 1-inch long roots through the clear cup walls. They were healthy, white, and branching. I started opening the dome for 1-2 hours each day now, slowly acclimating the plant to lower humidity.
Success. The cutting rooted. After six previous failures, I had finally cracked the code. All because I kept the dome consistent and didn’t interfere too much.
How to Vent and Adjust Humidity Over Two Weeks
Venting is where most people mess up. I did too. Let me give you the exact schedule that worked for me.
Days 1-5: Seal the Dome Completely
Open only once daily for 10-15 minutes. This exchange fresh air and prevent rot. I always do this in the morning when temperatures are stable.
Days 6-10: Increase Venting Time
Now I leave the dome open for 30-60 minutes each morning. This gradually acclimates the plant to normal room humidity. The roots are forming now, and they can handle progressively less humidity.
Days 11-14: Crack the Dome Open
I prop the dome slightly ajar for several hours each day. The plant starts experiencing room conditions in small doses. By day 14, I remove the dome entirely for most of the day, monitoring for leaf wilting.
Real Talk About Mold and Algae Formation
Here’s something nobody told me before I started. Mold is a real problem under domes. I found fuzzy white patches on my sphagnum moss during week one. That was alarming.
The culprit? Oversaturated medium and insufficient air exchange. Here’s what I did to fix it.
I mixed a dash of cinnamon powder into the top layer of the moss. Cinnamon has natural antifungal properties. It’s not a magic bullet, but it helped prevent recurrence. I also went absolutely rigid about the daily venting. If you keep the dome open for 20 minutes a day, you can reduce mold substantially.
If you see green algae growing on the soil surface, that’s okay. It means your medium is moist, but it also means you need to let things dry out a tad more between waterings. I dealt with this by watering less and letting the top half-inch dry slightly before sealing the dome again.
The Role of Air Circulation and Temperature Stability
Airflow is hugely important. Nepenthes cuttings in domes can easily suffocate. That’s why I keep a very small fan running in the same room, not pointed directly at the dome but stirring the air around it. This prevents heat pockets and keeps condensation from getting too heavy.
Temperature swings are another silent killer. My apartment furnace kicks in at night, and the temperature can fluctuate by 10°F. That stresses cuttings. I place my setup away from heating vents and cold windows. Steady 75°F is ideal.
According to the RHS, tropical plants like Nepenthes benefit from stable, warm conditions during propagation. Drastic temperature changes trigger stress responses that inhibit root development. I’ve found that consistent temperature matters more than hitting a perfect number. The AHS similarly emphasizes how humidity and root development are directly linked for epiphytes and tropical plants.
My Personal Failure That Shaped This Method
I have to tell you about the worst cutting I ever tried to root. It was an ampullaria hybrid, absolutely gorgeous, with deep maroon pitchers. I was so excited. I put it in a glass jar with a tight lid and placed it in my southern window. Direct sun hit it for five hours each afternoon.
By day three, the inside of the jar looked like a sauna. Condensation was dripping down the glass. The leaves started turning yellow. By day six, the stem had a dark, soft spot at the base. The jar had created perfect conditions for bacterial rot.
I learned two things from that disaster. First, never use a completely airtight container without venting. Second, never underestimate the power of direct sun inside a confined space. You literally cook the cutting.
That experience taught me to always use a vented dome. I poke three small holes in my bag or lid to allow some gas exchange even when sealed. This tiny tweak made an enormous difference.
How Do I Know the Cutting Is Rooted?
You want to check without killing your plant. Here’s my method.
Gently tug the cutting after day 10. If you feel resistance, that’s a sign of root growth. Another good indicator is new leaf growth at the top. This means the cutting is taking up water and nutrients.
For my clear cups, I just look through the bottom and sides. Visible white roots are the clearest indicator. Once I see roots at least 1-2 inches long, I call it a success.
Acclimation after two weeks involves gradually exposing the plant to room humidity over the next few days. Remove the dome for a few hours, then replace it. Increase the non-domed time daily until the plant is comfortable without the cover.
Frequently Asked Questions
How often should I mist my Nepenthes cutting inside the dome?
During the first week, mist every 1-2 days if the medium feels dry. The dome usually maintains most of the moisture. After day 7, mist only if the surface appears dry. Over-misting invites mold.
Can I use a Ziploc bag instead of a plastic dome?
Absolutely. Ziploc bags are my go-to for small batches. Just inflate the bag slightly, seal it, and prop it up with a small stake or chopstick. Keep it away from direct sun.
What should I do if I see mold forming on the soil surface?
Remove the dome for a few hours, let the medium dry a bit, and sprinkle cinnamon on the affected area. Vent more frequently and reduce misting. Mold usually clears up within a few days.
When should I remove the dome completely?
Most cuttings root within two weeks. Start leaving the dome off for longer periods after day 12. If leaves begin to droop significantly, place the dome back. Your humidity levels need a longer transition.
A Final Word on Plastic Domes and Nepenthes Cuttings
The plastic dome method works. It’s the cheapest and most reliable way to root Nepenthes cuttings in the dry US indoor climate. I’ve tried heat mats, grow tents, and glass terrariums. None matched the simplicity of a plastic dome.
The whole process really boils down to three things: keep humidity high, keep the medium barely moist, and don’t cook the plant with too much sun. Once you get those right, you’ll see roots within two weeks.
I’ve now propagated five cuttings using this method with four successes. That’s an 80% success rate, way better than the zero percent I started with. And most of the credit goes to a simple plastic cover that costs pennies.
Sure, you’ll still lose a few. That’s normal. But if you avoid overwatering, place your setup in gentle light, and keep the dome vented, you’ll likely see more successes than failures. Just give yourself some grace and keep trying. That’s the real secret.





