 bluename
How to Harden Rooted Nepenthes Seedlings Gradually for Regular US Home Conditions
If you just rooted a Nepenthes cutting and you are ready to move it out of that humid bag, stop right there. The short answer is this: Do not shock the plant with dry air. You need a 2-week acclimation period. I lower the humidity gradually, cut a slit in the bag every other day, and only open it fully when new leaves look stiff. I killed my first four seedlings by taking them out too fast. Let me show you exactly how I do it now.
Why 90% of Indoor Plants Die from Overwatering (And Why You Should Care)
You have probably heard that overwatering is the number one killer. It is true. 90% of indoor plants die from overwatering. But with Nepenthes, the problem is different. I used to keep the soil soaking wet because I thought "pitcher plant" meant "swamp plant". That was a mistake.
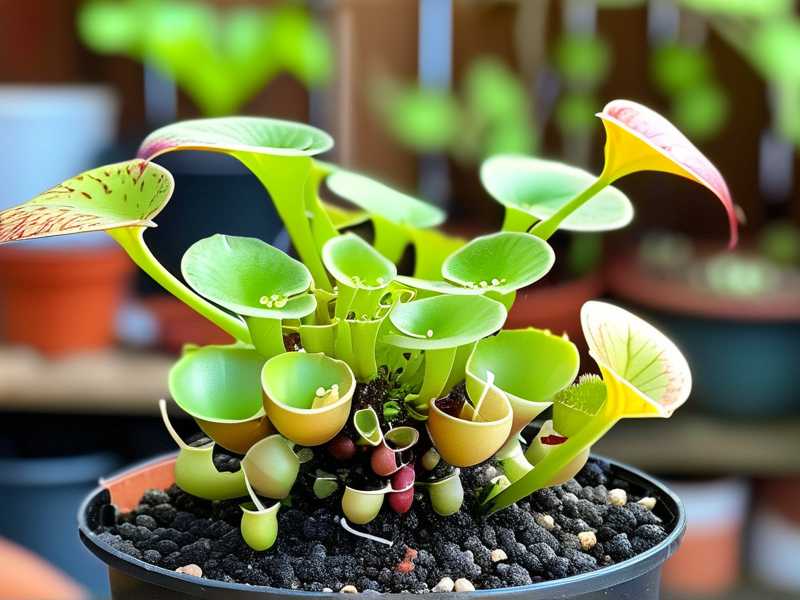
Rooted seedlings are fragile. Their roots are not deep. If you keep the media soggy while also opening the humidity bag, the roots suffocate. The leaves look fine for a week. Then they turn black overnight. I have lost more seedlings to this than to any pest.
The Real Problem: Humidity Drops, Not Just Water
When you take a seedling out of a closed container, the humidity drops from 90% to maybe 40% in your living room. That is a huge shock. The leaves have tiny pores called stomata. They close up when air is dry. If the roots cannot push water fast enough, the leaf tips brown and the plant stalls.
So the real work is balancing two things: lower humidity slowly, and keep the root zone slightly drier but not dry. It takes patience.
The 2-Week Gradual Hardening Schedule I Use
I have done this maybe twenty times now. Here is my exact schedule. It assumes your seedling is in a clear plastic cup or pot inside a ziplock bag or a small greenhouse tray.
Days 1-3: Just Make a Tiny Slit
Day one, I do not open the bag fully. I take a sharp knife and cut a single 1-inch slit near the top. That is it. I leave it like that for three days.
The humidity inside drops maybe 5%. The seedling does not even notice. I check every morning for condensation on the bag. If there is still a lot of water droplets, the slit is working fine. If the bag looks dry inside, I mist the walls lightly.
What I used to do wrong: I cut the whole top off the bag on day one. The leaves curled within two hours. The tips went crispy brown. That was my first lesson.
Days 4-6: Open the Bag for 1 Hour Per Day
On day four, I open the bag completely for exactly one hour each afternoon. I pick the warmest time of day, usually around 2 PM. I set a timer on my phone. It sounds silly, but the timer keeps me honest.
During that hour, I place the whole setup on a tray with a little water and pebbles underneath. That local humidity helps. After the hour, I zip the bag back up.
I watch the leaves closely. If a leaf starts to droop, I cut the time to 45 minutes the next day. If the leaves look fine, I keep it at one hour.
I tried skipping this step once. I just opened the bag for 6 hours straight on day two because I was busy with work. The next morning, the new growing tip was brown and dead. The plant did recover from the lower node, but it set me back a month.
Days 7-9: Two Hours in the Morning, Two in the Afternoon
By the end of the first week, the seedling is more robust. Now I open the bag for two hours in the morning and two hours in the afternoon. That gives the plant time to adjust to dry periods.
I also start letting the media dry out slightly more. Not bone dry. Just so the surface looks barely damp instead of soaking. I stop misting inside the bag. The condensation naturally reduces.
This is where I watch for the big mistake: overwatering. The roots are starting to push out. If the media is too wet, they cannot breathe. The oldest leaves will start to yellow from the base. That is my signal to back off on watering.
Days 10-11: Leave the Bag Completely Open
Now I unzip the bag and leave it open all day and all night. The seedling is still sitting in the open bag, but it is not sealed. Humidity is about the same as the room now.
I do not water much during this window. I let the top inch of moss or perlite go slightly dry. I check the weight of the pot. Light means water. Heavy means wait.
I killed my fifth seedling here. I thought leaving the bag open meant I should water more. I drenched it. The roots were still weak. Within 5 days, root rot set in. The leaves went soft and translucent. I learned to touch the media, not guess.
Days 12-14: Remove the Bag Completely
On day twelve, I take the pot out and discard the bag. I place the seedling in its permanent spot. But I do not put it in strong direct sun yet. I put it under bright indirect light or a grow light set at about 50% power.
I also set up a humidity tray under the pot. A shallow dish with clay pebbles and water. The water level stays below the pot bottom. That keeps the microclimate around the leaves a bit higher for the first week.
I monitor for exactly two more weeks after this. If a new leaf unfurls with a healthy pitcher, I know I succeeded.
The 3 Deadly Mistakes New Nepenthes Growers Make
I have been growing these plants for years. I still make mistakes. But I have narrowed down the big ones that kill rooted seedlings.
Mistake #1: Watering Too Much
I already said it, but I will say it again. 90% of indoor plants die from overwatering. Nepenthes are not an exception. Seedlings especially.
The media should be damp like a wrung-out sponge. Not dripping. Not muddy. I use a spray bottle for the first two weeks instead of a cup. A gentle mist on the top layer is enough.
How I learned this: I bought a rooted seedling online. I put it in a nice pot with fresh sphagnum moss. I watered it generously. I thought I was helping. The plant died in 11 days. The roots were brown mush. I did not water the next one for almost a full week. That one is still alive today.
Mistake #2: Wrong Light Placement
This one is sneaky. High light is good for adult Nepenthes. But seedlings burn easily.
I used to put my new seedlings in the same spot as my adult plant, right in a south-facing window. The sun scorched the leaves in 3 days. The leaves turned pale yellow then brown spots appeared. The growth point stagnated.
What I do now: I start seedlings under a fluorescent grow light at about 20% intensity. Or I put them 2 feet away from an east window. After the 2-week hardening, I slowly move them closer to brighter light over another 2 weeks.
A quick note from the experts: The Royal Horticultural Society has good guidance on light requirements for tropical carnivores. You can check their site at RHS for general houseplant care. They emphasize that most houseplants need bright but filtered light. Direct sun is usually too harsh for young plants.
Mistake #3: Using the Wrong Pot
This might sound like a small thing. It is not. I used a large, deep terracotta pot for my first seedling. Terracotta is porous. It wicks moisture away from the roots. That sounds good, but the seedling roots are shallow. The top dries out too fast, and the bottom stays wet. You get uneven moisture. The roots cannot decide what to do.
Better options: Use a small plastic pot, 2-3 inches wide. Plastic does not dry out as fast. Do not change the pot until the roots fill it completely. I have also used clear plastic cups with holes punched at the bottom. That helps me see root growth without disturbing the plant.
A quick tip from the American Horticultural Society: They suggest that beginners use containers proportionate to the root ball. Check their resources at AHS for more on matching pot size to plant development. It is a piece of advice I wish I had followed earlier.
My Step-by-Step Setup Before You Even Start Hardening
You cannot just take a seedling out of a bag and expect it to thrive. The setup matters just as much as the timeline.
The Pot and Media
I use a small plastic pot with drainage holes. I fill it with a mix of 50% sphagnum moss and 50% perlite. This drains fast but holds enough moisture. I do not use regular potting soil. It has too many nutrients and holds too much water.
The Humidity Dome
If you have a ziplock bag, that works. I cut a small slit at the top for airflow. If you have a clear plastic cup, I use that flipped upside down over the pot. The key is that the dome traps humidity but is not airtight for long.
The Location
I keep the whole setup in a place with stable temperature. Around 70-75°F. No drafts from air conditioners or heaters. A stable environment makes the 2-week process much easier.
Water Quality
This is critical. Nepenthes are sensitive to minerals. I only use distilled water or rainwater. Tap water has salts and chlorine that burn the roots. I learned this after my third seedling developed brown leaf tips that would not go away. I switched to distilled water, and the problem disappeared within a week.
What to Expect: The 2-Week Observation Journal
Let me walk you through what I actually see during the two weeks. This helps you know if you are on the right track.
Week 1: The Leaves Look the Same (Mostly)
Days 1-3 are boring. The leaves look the same. You might see a little less condensation on the bag. That is normal.
Days 4-6, you might see the leaves orient themselves slightly toward the light. That is good. It means the plant is still photosynthesizing normally.
One thing I look for is the growth point. If it stays green and firm, we are good. If it turns brown, the plant is stressed. I usually slow down the schedule if I see that.
Week 2: New Growth Speaks
By day 9-10, you might see the growth point get slightly larger. Not always, but sometimes. The key is that the old leaves are not yellowing rapidly.
On day 12-14, after the bag is removed, I look for a new leaf unwinding. It will look slightly smaller than the old leaves. That is normal. The leaf will be stiffer and thicker than the leaves from the humid bag. That is a sign of successful hardening.
I always take a photo every morning. That helps me see changes that I would miss by eye alone.
Details That Matter: Light, Water, and Air Flow
After the 2-week period, I do not just forget about the plant. The transition to regular home conditions continues. But the first two weeks are the most intense.
Air Flow Is Your Friend
I run a small fan in the room on low speed. Not pointed directly at the plant. Just enough to keep air moving. This helps prevent fungal issues on the leaves. High humidity plus stagnant air is a recipe for mold.
Don't Overfeed (You Don't Need To)
Seedlings do not need fertilizer. In fact, extra fertilizer is harmful. The media I use has almost no nutrients. That is fine. The plant gets its nitrogen from insects it catches in the wild. At home, we do not feed seedlings. I occasionally drop a tiny dried bloodworm on a leaf, but that is optional. It is safer to skip feeding entirely for the first 6 months.
The Watering Schedule That Works
I do not have a fixed day count. I check the media surface with my finger. If the top half-inch feels dry, I water slowly with distilled water until it drains out the bottom. Then I let it drain completely.
I avoid letting the pot stand in a saucer of water. That invites root rot. I empty the saucer after 15 minutes if any water is left.
Common Questions from Beginners
Can I Skip the Hardening Process if My House Is Humid?
That depends. If your home is already at 60-70% humidity year-round, you might shorten the process to 7 days. But most homes in the US are at 30-50% humidity, especially during winter. I would still do the full 2-week program to be safe. Even in a humid bathroom, the drop from 90% to 60% is risky.
My Seedling Looks Wilted on Day 5. Should I Stop?
Yes. Back off. Close the bag fully and wait two days. If the leaves perk up, you know it was too much openness too fast. After two days, start again from day 1. It is not a race. A week lost is better than a plant dead.
When Can I Repot My Newly Hardened Seedling?
Do not repot for at least 3 months. The roots need time to establish. Moving it to a bigger pot during the hardening phase will set it back. I learned this after moving a seedling to a decorative pot on day 10. It went into shock and lost all its lower leaves. It survived, but it took 6 months to look good again.
My Final Routine for the First Month After Hardening
Once the 2-week period is done, I keep these habits:
- Water only when the top half-inch feels dry.
- Keep the plant in bright, indirect light.
- Mist the leaves lightly in the morning every other day.
- Check for new growth every week.
- Do not touch the roots. Just let it be.
A quick note about misting: Misting helps with humidity around the leaves but does not solve the main problem of low home humidity. A humidifier nearby is more effective. I used to think misting was the answer. It is not enough alone. I still mist because it helps keep dust off the leaves, but I rely on a pebble tray as my main humidity aid.
Is This Species Right for You?
Not all Nepenthes are equally hard to grow. If you are new, choose a hardy hybrid like Ventrata or a highland species that tolerates moderate humidity. Skip the finicky lowland species that require constant 80% humidity and warm nights. Check the RHS website for a list of easier houseplants if you are unsure. I started with a hardy hybrid and I am glad I did. The easier plant forgave my early mistakes.
What I Wish I Knew on Day One
I wish someone had told me that hardening is not a single event. It is a slow ramp. It is not about checking the plant every hour. It is about consistency. I check my seedlings at the same time every day. I use a notebook. I track what I see. It sounds nerdy, but it saved my plants.
I also wish I had known that losing the first few plants is normal. Almost every serious grower I have met has killed at least one Nepenthes seedling. The lesson is always the same: too much water, too sudden changes. So if you are on your first plant, do not feel bad. Just do not repeat the same mistake.
The Bottom Line
Hardening rooted Nepenthes seedlings for regular US home conditions takes two weeks. No shortcuts. Start with a tiny slit. Increase the open time every few days. Watch the leaves. Keep the media slightly damp but not wet. Use a small plastic pot. Give it bright, indirect light.
If you follow the schedule and stop when you see stress, your chance of success goes up dramatically. I have gone from killing four seedlings in a row to having a shelf full of happy pitchers. It really comes down to patience.





