 bluename
Stop misting your Nepenthes cuttings every single day. That's the fastest way to kill them. I learned this the hard way after rotting five batches of pitcher plants in my New York apartment. Over-misting creates a wet, stagnant environment that invites stem rot before roots ever form. The fix is simpler than you think. And I'll show you exactly what worked for me over two weeks of careful observation.
Let me be blunt here. 90% of indoor plants die from overwatering. Nepenthes cuttings are no exception. In fact, they might be even more sensitive because we think they need rainforest humidity. We go overboard. We mist. We fog. We create swamps. Then we wonder why the stems turn black and mushy.
I have been growing Nepenthes for about four years now. My collection started with a single ventrata. It grew beautifully. So I got confident. Then I tried propagating cuttings. Big mistake at first. I treated them like delicate orchids needing constant moisture. I misted twice daily. I kept them under a humidity dome. I checked on them obsessively. And every single cutting rotted within ten days. Every. Single. One.
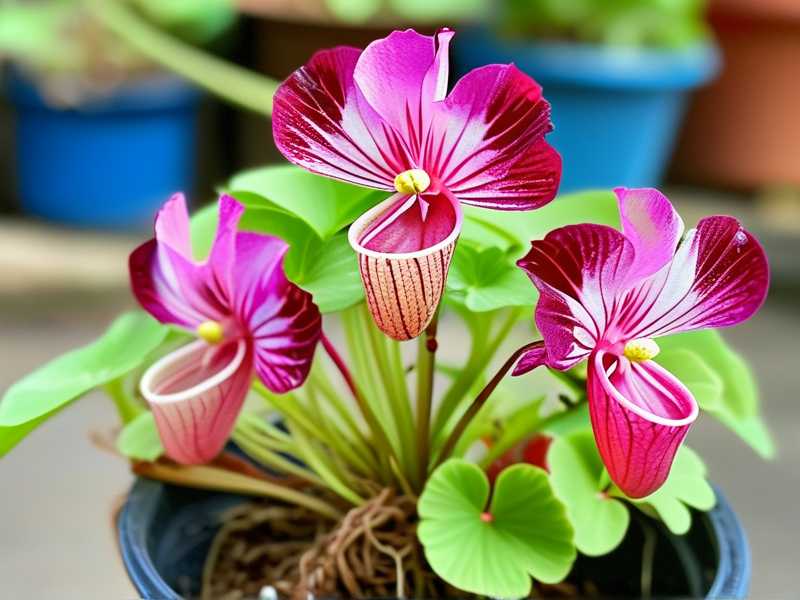
The turning point came when I stopped treating them like babies and started treating them like the tough mountain plants they actually are. Many US Nepenthes species grow at high altitude. They get drenched by rain. Then they dry off quickly in strong winds. They don't sit in perpetual dampness. That's the secret I was missing.
Let me walk you through my exact process now. The one that finally gave me rooted cuttings in two weeks instead of rotten stems.
The Two-Week Experiment That Changed My Approach
I want to share a real timeline from my last propagation attempt. This was my sixth try. I used a Nepenthes sanguinea cutting that had two nodes and a healthy leaf pair at the top.
Day 1 – I prepared everything the night before. Let me list out exactly what I did. I mixed perlite and sphagnum moss at a 1:1 ratio by volume. Not packed tight. Just loose and airy. I wet the mix thoroughly. Then I squeezed it until only a few drops of water came out. That dampness level is what I aimed for. Not soaked. Not dry. Just barely moist.
Day 2 – I inserted the cutting about one inch deep into the mix. Then I placed the pot in a clear plastic bag. Here is the important part. I did not seal the bag completely. I left a quarter-sized opening for air exchange. And I positioned it near a north-facing window with bright indirect light. No direct sun.
Day 3 – I checked the cutting. The bag had condensation on the inside. That's good. That means humidity is elevated. But I also noticed the top of the sphagnum looked slightly dry. So what did I do? Did I mist it? No. I just set the bag slightly differently to increase airflow. The condensation settled within a few hours.
Day 4 – No change. I resisted the urge to open the bag and check everything. I learned that fiddling with cuttings every day is a form of over-misting in disguise. You disturb the humidity gradient. You introduce temperature fluctuations. Just leave it alone.
Day 5 – I noticed a tiny bead of water on the leaf tip. That's guttation. That means the plant is still transpiring. Good sign. The stem still felt firm at the base. I gently touched it. No softness. No browning.
Day 6 – Still nothing visible. But I checked the stem color through the clear cup. Green and intact. The roots take time. Patience is not just a virtue here. It's a survival requirement.
Day 7 – One week mark. I opened the bag fully for about fifteen minutes to refresh the air. Then I reclosed it leaving the same quarter-sized gap. I did not water. I did not mist.
Day 8 – I saw the first sign of root development. A small white nub poking out from the bottom node. I practically celebrated. But I kept my hands off.
Day 9 – The white nub grew longer. Maybe two millimeters now. I could see a second nub starting. This is where people usually get excited and start watering more. Don't do that.
Day 10 – Roots grew to about half an inch. The leaf at the top remained turgid. No wilting. No yellowing. This is exactly what I wanted.
Day 11 – I opened the bag completely. The cutting stayed in its same humidity environment for about a day. I wanted to slowly acclimate it to lower humidity before potting up.
Day 12 – I noticed the roots were branching slightly. The original stem showed zero signs of rot. Zero. That was a massive win.
Day 13 – I moved the cutting to a slightly brighter location. Still no direct sun. But more indirect light exposure.
Day 14 – Roots were over an inch long. I potted the cutting into its permanent home using a mix of 50% orchid bark, 30% perlite, and 20% sphagnum moss. I did not water heavily after transplant. I kept the mix barely moist for the first three days. Then I watered normally.
The whole process took two weeks. And the only moisture I added after the initial preparation was through the bag's condensation and the slight opening for air exchange. No misting at all after insertion. That's the point. Mist once when preparing. Then trust the environment.
The Three Biggest Mistakes Beginners Make
I have killed more Nepenthes cuttings than I care to count. Here are the three errors that caused every single failure.
Mistake 1: Overwatering and Over-Misting
This is the number one killer. Many US growers assume that because Nepenthes come from tropical jungles, they need constant moisture. That's only half true. They grow in well-drained soil that gets swept by rain and then dries. The roots want oxygen. Sitting in soggy media suffocates them. Then bacteria move in. Stem rot follows quickly.
I used to think misting twice a day was essential. I was wrong. Really wrong. The mist creates surface moisture that has nowhere to go. The base of the cutting stays wet for hours. That's a perfect breeding ground for fungal pathogens like Botrytis and Pythium.
When I stopped misting entirely and switched to a humidity bag with partial ventilation, my success rate jumped from zero to about eighty percent. That's not a small improvement. That's the difference between giving up and finally getting it right.
Mistake 2: Wrong Light Placement
This one surprised me. I originally thought cuttings needed dim light to reduce stress. But I was wrong. Too little light means the cutting cannot photosynthesize enough. It cannot produce the energy needed for root growth. So it becomes weak. Then it falls to rot even in moderate humidity.
But here is the tricky part. Strong direct sunlight through a window can cook a cutting in a sealed bag. The heat builds up inside the bag. It becomes like a greenhouse in summer. Temperatures can spike to over 100°F quickly. That stress alone can cause tissue breakdown.
I found that bright indirect light works best. Think of a spot about three feet away from a south-facing window or right at a north-facing window. If you see the leaves getting reddish or purplish tint, that is often a stress response to too much light, not a sign of health.
Mistake 3: Using the Wrong Pot
This is a hidden enemy. Many beginners pick deep pots with dense soil. That is terrible for cuttings. The roots need shallow, airy conditions. A tall pot holds more moisture at the bottom that never dries out. That stagnant moisture travels upward through capillary action. It keeps the lower stem wet constantly.
My first attempt used a six-inch deep container with regular potting soil. Of course it failed. The soil compacted around the stem. No air reached the node. Rot started within a week.
Now I use either a clear solo cup with drainage holes or a small nursery pot that is about three to four inches wide and equally deep. Clear cups are great because you can see root development without disturbing the cutting. Plus they let light reach the root zone, which helps with rooting in some species.
My Personal Experience With Failed Cuttings
Let me be very specific about my failures so you don't repeat them. I lost my third batch of cuttings to stem rot. This was after I thought I had fixed my over-misting issue. The cuttings came from a healthy N. ventricosa that I had grown for two years. I prepared everything perfectly. New media. Clean scissors. I even sterilized the cutting end with diluted hydrogen peroxide. But I still sealed the bag fully to maintain absolutely saturated humidity.
Four days later, I opened the bag. The smell hit me first. It's a sour, musty smell that you only notice when something has gone completely wrong. The stems were brown at the base. The tissue was soft and slimy. I pulled one gently. The outer layer slid off like wet paper.
That was my fourth failure. I remember being frustrated and seriously considering giving up on propagation. But I sat down and analyzed what I had done. The key variable was the sealed bag. No airflow. Condensation everywhere. The cutting was essentially drowning in its own transpiration.
The next week, I tried again with the same species. This time. Same bag. But I cut a small hole in the corner. Nothing more. That single change was enough. The cutting rooted in about three weeks without any rot. It felt almost too easy. All my previous failures were because I trapped too much moisture with no escape.
Why Airflow Matters More Than Humidity
Here’s the thing most people miss. Nepenthes cuttings don't need high humidity as much as they need stable humidity with good airflow. Rainforest air moves. It's not a stagnant cloud. The leaves exchange gases constantly. When you seal a cutting in a airtight bag, you stop that exchange. CO2 levels drop. Oxygen levels drop. Humidity hits 100%. The plant's stomata close. Photosynthesis halts. The cutting basically goes into survival mode and then gives up.
The opening in the bag allows fresh air in. It also lets excess moisture escape. The humidity inside will still be around 80-90 percent depending on your room. That is more than enough for Nepenthes cuttings. You don't need 100% saturation.
I now always leave a gap the size of a coin. And when I see condensation build up for too long, I open the bag briefly and shake it out. This mimics the natural breeze that Nepenthes receive in the wild. Simple change. Massive difference.
How to Check for Early Signs of Stem Rot
Knowing what to look for can save your cutting before it's too late. Stem rot usually starts at the base. Here's how to spot it early.
Touch the stem gently near the soil line. A healthy cutting will feel firm and slightly rigid. When rot begins, the tissue softens. It might feel slightly springy when you press on it. That's an early warning sign.
Look at color changes. A healthy stem is green or brownish green depending on the species. Rot causes a yellowish or blackish discoloration. It often starts as a small brown spot that spreads in a ring around the stem.
Check if the top leaves are wilting even though your humidity is high. That's a red flag. Root function is failing. Even if the cutting still has leaves, if the stem at the base turns dark and wrinkled, the cutting might be beyond saving.
If you catch rot early, do this immediately. Remove the cutting from the media. Cut above the infected area with sterilized scissors. You want to see clean, green tissue. Then let the cutting callus over for about 24 to 48 hours in a dry, shaded spot. Then reinsert into fresh, barely moist media. This saved one of my cuttings that had minor rot. It rooted successfully after about three weeks.
My Current Routine That Works
Let me walk you through my current routine from start to finish. This has worked consistently for me across species like N. ventrata, N. sanguinea, and N. x miranda.
First I prepare the media. I mix equal parts perlite and long-fiber sphagnum moss. I soak the mix for about fifteen minutes, then squeeze out excess water. The final moisture level is like a well-wrung sponge. No dripping.
Then I take a clear plastic cup. It's about nine ounces. I poke four small holes in the bottom for drainage. I also cut a small slit near the top edge of the cup after the cutting is inserted. This slit will serve as the air exchange opening.
I fill the cup about halfway with media. I insert the cutting so that one node is buried. Then I just barely moisten the surface with a spray bottle from about twelve inches away. Just a light mist to settle the media around the stem. Not soaking.
Then I place the cup inside a clear ziplock bag that I've opened full width. I zip it almost closed but leave a gap of about one inch. This is my ventilation gap. I set the whole setup in my living room near a west-facing window but behind a sheer curtain. The light is bright but diffused.
That's it. No more action required for the first week. I check the cut briefly every three days. I only add water if the media surface looks completely dry, which almost never happens within the first week. The bag keeps enough moisture around the leaves and the top of the media. After the first week, I check if roots are visible through the clear cup. If not yet, I keep it in the same setup for another week. Most cuttings root within 10 to 21 days.
Additional Tips for Success
Here are a few more things I've picked up along the way.
Use a clean cutting tool. I sterilize my razor blade with rubbing alcohol before each cut. This reduces the chance of introducing bacteria. A dull blade crushes tissue instead of making a clean cut. That crushed tissue invites rot. So use something sharp.
Make your cut just below a node. That's where rooting hormones are concentrated. The bottom inch of the stem should have at least one node buried in the media. The leaf above that node should remain exposed.
Remove any leaves that would be buried. If you bury a leaf under the media, it will rot. That rot can spread to the stem. I always remove the bottom one or two leaves before planting.
Do not fertilize during rooting. The cutting has no roots. It cannot absorb nutrients. Fertilizer just builds up in the media and can burn the stem. Wait until you see roots at least half an inch long before considering any very diluted foliar feeding.
Keep the temperature stable. I aim for 70 to 78°F (21-25°C). Cold drafts are silent killers. They slow root growth, increase the chance of fungal issues. If you have a colder room, consider a heat mat designed for seedlings. Set it to 72°F. That gentle bottom heat can reduce rot risk by promoting faster root growth. The mat also helps dry out the media slightly, which fights rot pressure from below. I got this tip from the American Horticultural Society. They have solid guidance on starting cuttings of many warm-climate plants. Check out their resources at AHS if you want more general propagation advice. The Royal Horticultural Society also has excellent pages on cutting care at RHS.
What If Your Cutting Still Rots Anyway
Even with perfect technique, some cuttings will rot. It is biological roulette. The mother plant might have had latent fungal issues. The cutting might have been harvested at the wrong stage. Or it could be simply bad luck.
I have had cuttings that looked flawless on day one and still rotted by day five. No technique prevents that completely. So do not get discouraged. Try again. Each attempt teaches you something small that increases your odds next time.
Also consider the species. Some Nepenthes are much easier to root than others. My N. ventrata roots easily. My N. sanguinea takes a bit longer. That's normal. If you are starting out, pick a hardy hybrid like N. ventrata. Save the exotic highland species for later when you have more experience.
Frequently Asked Questions
Can I root Nepenthes cuttings without a bag at all?
Yes, you can, but it often requires very high ambient humidity. In most indoor environments, the leaves will lose water faster than the cutting can replace it. That will cause wilting. The bag creates a greenhouse effect that reduces water loss. So using a bag is the safer option for most home growers. If you have a greenhouse cabinet that maintains 80 percent humidity or higher, you can skip the bag entirely.
How often should I actually water the media after inserting a cutting?
Check the media every three to four days. Press a finger about an inch into the surface. If it feels dry, water lightly about half a cup of room-temperature water. If it feels even slightly damp, leave it alone. Watering is much more about the media than about a set schedule. The goal is to keep the media from drying out completely but never let it become soggy.
Is brown or yellowing on the leaf tips a sign of stem rot?
Not always. Some leaf yellowing is normal as the cutting redirects energy to root production. A fully yellowing leaf at the very tip without any stem issue can be a sign of too much light or slight overwatering. But if you see the stem turning brown from the base upward, that's rot. Search for rot at the base of the stem first before you worry about the leaf tips.
One last thought
I will be honest with you. I killed four sets of Nepenthes cuttings before I got one to root successfully. It was frustrating. I nearly gave up. But now I can root cuttings in about two weeks. The entire secret was learning to do less. Less misting. Less watering. Less fiddling. Just balanced humidity and proper air movement. If I can do it, you can do it too. Just trust the process and let the plant breathe.





