 bluename
How to Divide Mature Nepenthes Clumps for US Home Propagation
Let me be direct with you. If your Nepenthes has turned into a crowded mess of tangled pitchers and vines, you need to divide it now. I learned this the hard way after my third plant nearly suffocated itself. The answer is simple: wait for active growth in spring, pull the root ball apart gently, and pot each division in fresh sphagnum moss. That is the whole trick. The rest is details. And honestly, the details matter more than you think.
I have been growing tropical pitcher plants in my New York apartment for over six years now. I killed two Nepenthes before I figured out what works. The first one? I treated it like a regular houseplant. Big mistake. The second one? I divided it in winter. Also a huge mistake. By the time I got to my third plant, I realized that dividing mature clumps is an art form. But once you understand the basics, it becomes second nature.
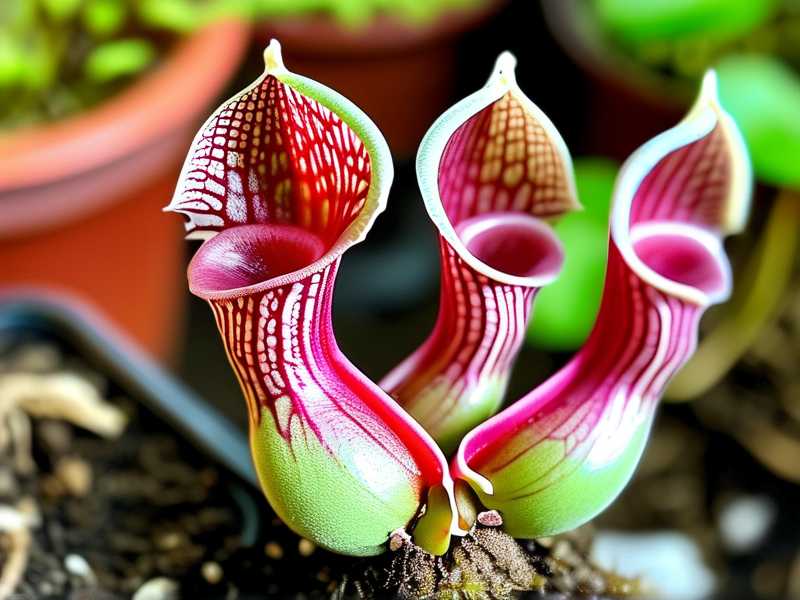
Why Divide Nepenthes Clumps at All?
Mature Nepenthes plants naturally form multiple rosettes from the base. Over time, these clumps get crowded. The stems get leggy. The pitchers get smaller. Growth slows down dramatically. I noticed my own plant stopped producing pitchers bigger than two inches. That was my wake-up call.
Dividing serves several purposes. First, it rejuvenates the plant. Each new division gets fresh soil and more space. Second, it gives you more plants for free. I currently have twelve Nepenthes growing around my apartment, and I bought only four. Third, it prevents root rot. Dense clumps have poor airflow at the soil level. That is a one-way ticket to fungal issues.
The Royal Horticultural Society (RHS) actually recommends dividing most carnivorous plants every two to three years. You can check their guidance at RHS. They emphasize doing this during the active growing season. The American Horticultural Society echoes similar advice at AHS. Both organizations stress that timing is everything.
The 3 Deadly Mistakes Beginners Always Make
I have seen countless forum posts from frustrated growers. They all make the same errors. I made all three myself. Let me save you the trouble.
Mistake One: Overwatering
I cannot say this loudly enough. Overwatering is the number one killer. In fact, 90% of indoor plants die from overwatering. Nepenthes are no exception. The roots need oxygen. Soggy soil suffocates them. When I first started, I watered my Nepenthes every other day. I thought tropical meant wet. I was wrong.
The soil should be moist but never waterlogged. I now use a simple finger test. Stick your finger an inch into the moss. If it feels damp, wait. If it feels dry, water. That is it. Stop overthinking it.
Mistake Two: Wrong Light Position
Nepenthes love bright, indirect light. They do not love full afternoon sun. Many people assume all carnivorous plants are sun worshippers. That is not true. I placed my first Nepenthes on a south-facing windowsill with zero shade. Within a week, the leaves burned. The edges turned brown and crispy. The pitchers dropped off entirely.
What works for me is an east-facing window with a sheer curtain. Morning sun is gentle. It promotes vigorous growth without scorching. If you only have south-facing windows, pull the plant back a few feet. You can always supplement with a grow light. I use a basic LED panel during winter months.
Mistake Three: Using the Wrong Pot
This one surprises people. Nepenthes do not want a big deep pot. Their roots are surprisingly shallow and delicate. Deep pots hold too much moisture at the bottom. That leads to root rot. Also, avoid terra cotta pots. They wick moisture away from the soil too quickly. Your moss will dry out unevenly.
I now use shallow plastic pots with excellent drainage holes. A 4-inch pot works perfectly for a single division. When I pot up, I add a layer of perlite at the bottom for extra drainage. This simple switch made a huge difference in my success rate.
My 2-Week Observation Process After Division
When I divided my mature Nepenthes clump, I kept detailed notes. I want to share the exact timeline with you. This will help you understand what to expect.
Day 1-3: The Shock Period
Immediately after division, the plant looks sad. Honestly, it looks like it wants to die. Do not panic. The root system was disturbed. The plant is redirecting energy to repair damaged roots. I keep my freshly divided plants in a humidity dome. A clear plastic bag over the pot works great. This traps moisture and reduces stress.
During these first three days, I do not water aggressively. I mist the foliage lightly and keep the soil barely moist. The roots need to oxygenate. Flooding them now will trigger root rot.
Day 4-7: The Adjustment Phase
By day four, the leaves start stabilizing. The droopiness lessens. I remove the humidity dome for a few hours each day. This acclimates the plant to normal humidity levels. I have noticed that gradual exposure is far better than removing the dome all at once.
I also start a very mild fertilizer routine. I use a diluted orchid fertilizer at one-quarter strength. I spray the leaves, not the soil. Nepenthes absorb nutrients through their leaves. Feeding the roots while they are damaged is counterproductive.
Day 8-10: New Growth Indicators
By the end of the first week, I look for signs of new growth. The central growing point should look perky. You might see tiny new leaf tips emerging. This is my signal that the division took. If you do not see this, wait another week. Growth rates vary based on temperature and light.
Day 11-14: The Turning Point
By day fourteen, I typically see visible new leaves. At this point, the roots have re-established enough to support regular watering. I transition to my normal care routine. The plant may not produce pitchers immediately. Patience. The next pitcher cycle usually takes four to six weeks.
My Personal Step-by-Step Division Guide
Now let me walk you through my exact process. I have refined this over multiple successful divisions. Follow these steps and you will have healthy plants.
Step One: Choose the Right Moment
I only divide plants that have at least three to four distinct rosettes. Smaller clumps do not divide well. The roots are too interwoven. I wait for spring or early summer. Active growth phase means faster recovery. I tried dividing in fall once. Bad idea. The plant went dormant and never recovered.
Step Two: Prep Your Materials
I gather everything before I touch the plant. You will need fresh sphagnum moss, perlite, shallow pots, scissors, and a clean work surface. I soak the sphagnum in distilled water for fifteen minutes. Then I squeeze out the excess. It should be moist but not dripping.
Step Three: Remove the Plant Carefully
Water the plant thoroughly an hour before removal. This softens the root ball. Then I slide the plant out of its pot. I turn it sideways and gently squeeze the pot sides. The root ball should slide out in one piece. If it resists, run a butter knife around the inside edge.
Step Four: Separate the Root Ball
This is the delicate part. I use my fingers to loosen the root mass. Start at the bottom and work upward. Gently tease apart individual rosettes. Each division should have at least two to three active roots. I do not cut unless absolutely necessary. Every cut is an entry point for infection.
If you must cut, use sterilized scissors. Dip them in rubbing alcohol first. Cut cleanly. Do not tear.
Step Five: Pot Up Each Division
Fill your shallow pot with the damp sphagnum moss. Create a small hole in the center. Place the division inside. Position the crown slightly above the soil line. Do not bury the crown. That is a fast track to rot. Gently pack the moss around the roots. Do not compress too tightly. The roots need airflow.
Step Six: Provide Immediate Aftercare
I place each potted division in a humidity dome. I keep them in bright, indirect light. The temperature stays between 70-80°F during the day. At night, it can drop to 60°F. This temperature drop is beneficial. It mimics their natural highland habitat.
For the first week, I do not water from the top. I mist the surface daily with distilled water. This keeps the moss hydrated without waterlogging the roots.
The Long-Term Care Routine
Once your divisions are established, maintain a consistent routine. I water with distilled water or rainwater. Tap water is toxic to Nepenthes. The chemicals and minerals in tap water will eventually kill them. I use water collected from my dehumidifier. That has been my secret weapon.
I fertilize monthly during the growing season with diluted orchid fertilizer. I spray the leaves. I skip fertilizing entirely in winter. Light levels drop too much. The plant slows down. It does not need extra nutrients.
Repotting is only necessary every two years. I have found that this aligns with their natural growth cycle. If you skip repotting, the moss breaks down and compacts. This reduces drainage and airflow. Your plant will start declining.
What Do the Experts Say?
I have always been curious about what professional botanists recommend. According to the RHS, Nepenthes should be repotted in spring using a free-draining mix consisting of sphagnum moss and perlite. They emphasize using plastic pots over clay pots. Clay pots allow excess evaporation, which dries out the roots too quickly.
The AHS points out that proper ventilation is critical after division. Stagnant humid air encourages fungal growth. I had this problem with my very first division. I kept the humidity dome sealed for ten days. When I opened it, there was white mold on the moss. I lost two divisions that time.
The lesson is simple. Vent the humidity dome daily. Just lift the edge for a few minutes. Let fresh air circulate. Then seal it back up.
Common Problems After Division
Even with perfect technique, things can go wrong. Here is what I have encountered.
Yellowing Leaves
If leaves turn yellow within the first week, the roots are struggling. This usually means the soil is too wet. Remove the plant from the humidity dome. Let the moss dry slightly. Check that your pot has proper drainage holes.
Blackening Stems
Black stems are a fungal infection. This happens when the crown is buried too deep. Remove the affected tissue immediately. Treat with a fungicide if you have it. I learned this the hard way. I lost two whole divisions to stem rot.
No Growth After Two Weeks
If there is no new growth after two weeks, examine the roots. You might have divided before the roots were mature enough. Also, check the light levels. If the plant is in too much shade, it will not grow. Move it to a brighter location gradually.
Frequently Asked Questions
Can I divide a Nepenthes that is not mature?
I do not recommend it. Young plants have weak root systems. Division will likely kill them. Wait until the clump is at least two to three years old.
Should I use rooting hormone?
I have tested this. Hormone does not significantly improve success rates with Nepenthes. They root readily on their own. I skip the hormone entirely. Save your money for better moss.
How often should I divide Nepenthes clumps?
Every two to three years is plenty. Some growers go longer. If the plant looks healthy and produces good pitchers, leave it alone. Do not fix what is not broken. I have a plant that I have not divided in four years. It is thriving.
What size pot should I use for a single division?
Stick with four-inch pots. That sounds small, but Nepenthes prefer snug roots. Too much soil means too much moisture retention. If you live in a humid climate, go even smaller. Three-inch pots work perfectly.
Is it normal for the plant to stop producing pitchers after division?
Yes, completely normal. The plant redirects energy toward root development. Pitcher production will resume once the roots recover. For me, that takes about six to eight weeks. Do not try to force pitcher growth with extra fertilizer. That causes more harm than good.
The Reward of Patience
Dividing Nepenthes clumps is not hard. It just requires restraint and attention. I have killed my fair share of plants through impatience. But now, with a steady hand and the right timing, I propagate successfully every time. Each division you make is a new opportunity. A new plant to watch. A new pitcher to admire.
I remember the first time I successfully divided a clump. I stared at the tiny new leaf for an entire hour. That small green point of life was my victory. No store-bought plant could ever give me that feeling.
So take your time. Gather your materials. Wait for spring. And then, carefully, lovingly, pull your plant apart. Give each piece a fresh start. You will be amazed at how quickly they reward you with new growth.





