 bluename
If you have Nepenthes seeds sitting in an envelope right now, stop what you are doing. Store them dry and cool, around 40–50°F (4–10°C), in a sealed container with a desiccant pack, and they will stay viable for spring sowing. I learned this the hard way after losing an entire batch of ampullaria seeds in one humid week. Keep them in the fridge, not the freezer, and never let moisture touch them. That is the whole secret, and almost nobody follows it correctly the first time.
Why Seed Storage Matters More Than You Think
Most people assume Nepenthes seeds are like tomato seeds. You dry them, toss them in a drawer, and they sprout whenever you get around to planting. That is completely wrong. Nepenthes seeds are tiny, dust-like, and they have a thin seed coat. They are built to germinate fast in the wild, right after the wet season hits. This means they do not have built-in dormancy mechanisms. If they dry out too much, they die. If they get damp, they rot. If they get warm, their metabolic rate spikes and they burn through their stored energy. Honestly, it is a miracle they survive in nature at all.
The United States has a massive range of climates. Someone in Florida stores seeds differently than someone in Minnesota, but the principles stay the same. You are fighting heat, humidity, and time. The longer you wait between harvest and sowing, the lower your germination rate will drop. That is why proper storage is not a suggestion. It is the difference between a tray full of seedlings and a tray full of disappointment.
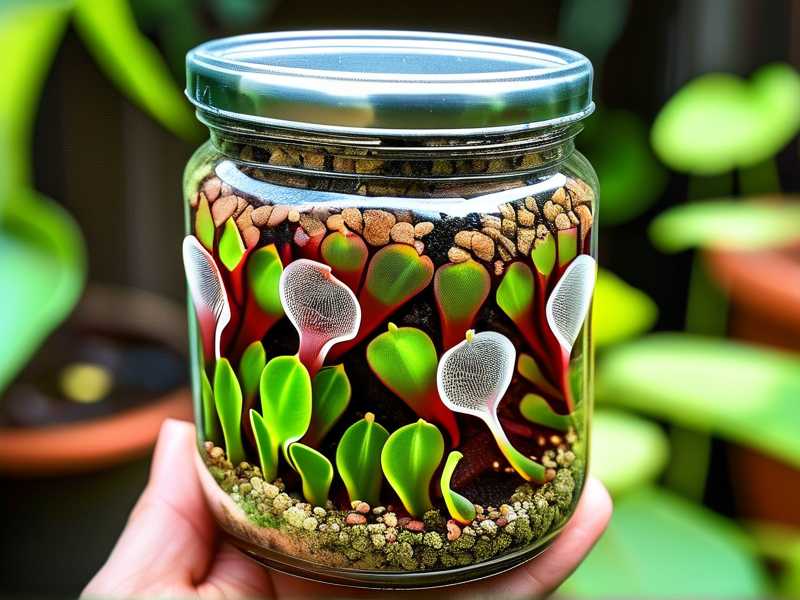
I have been growing Nepenthes for over seven years now. I have killed more plants than I care to count, and I have lost more seeds than I want to admit. But I have also dialed in a storage method that works. I am going to walk you through exactly what I do, step by step, so you do not repeat my mistakes.
The Three Deadly Mistakes That Kill Nepenthes Seeds
Mistake Number One: Overwatering the Seeds
I know it sounds weird to talk about watering seeds that are not even planted yet, but hear me out. If you store Nepenthes seeds in a container that is too humid, condensation forms on the inside walls. That water drips onto the seeds, and the seeds start to germinate prematurely. Or worse, they develop mold. I remember checking on my first batch of Nepenthes seeds after two weeks in a plastic bag. They were covered in a fine gray fuzz. It was heartbreaking.
This is the same logic as overwatering a potted plant. 90% of indoor plants die from overwatering, and seeds are no different in principle. They need moisture to germinate, but they do not need moisture during storage. Storage and germination are two completely different phases. Do not confuse them.
The fix is simple. Use a desiccant pack, the kind you find in shoe boxes or beef jerky packets. Silica gel packs work perfectly. Just do not let the desiccant touch the seeds directly. Put the seeds in a small paper envelope or a folded coffee filter, then place that envelope inside a larger airtight container with the desiccant pack sitting beside it. Check the container every few days for the first couple of weeks to make sure no condensation is forming.
Mistake Number Two: Getting the Light Wrong During Storage
I have met growers who store their seeds on a bright windowsill because they think light helps. That is a huge mistake. Light signals to the seeds that it is time to wake up and germinate. During storage, you want the seeds to stay asleep, tucked away in a dark, dormant state. Light exposure, especially warm light, can trigger premature metabolic activity.
I used to keep my seed packets in a clear plastic bin on my desk. The bin was convenient because I could see everything at a glance. But after two weeks, I noticed the germination rate dropping when I finally sowed them. I did not connect it to light until a friend pointed it out. Once I moved my seed storage to a dark, opaque container inside the fridge, my germination rates jumped back up.
The rule is simple. Store seeds in complete darkness. Use an opaque container or wrap the container in aluminum foil. If you have to peek, do it quickly and get them back in the dark fast. Light is not your friend during the storage phase.
Mistake Number Three: Using the Wrong Kind of Pot or Container
The container you store seeds in matters more than people think. I have seen growers use paper bags, plastic bags, glass jars, and even old pill bottles. Some of these work, and some are disasters waiting to happen.
Paper bags are too porous. They let moisture in and out, and they do not protect against temperature swings. Plastic bags are dangerous because they trap any residual moisture and create a greenhouse effect inside the fridge. Glass jars can work, but only if you add a desiccant pack and seal them tightly. The worst choice is a flimsy plastic container without a proper gasket because it lets air exchange happen constantly.
The right approach is to use double protection. Put your seeds in a small paper envelope first. Then place that envelope inside a hard-sided airtight container, like a Tupperware or a glass mason jar with a rubber seal. Add the desiccant pack, and close it tight. This creates a stable microclimate that protects against both moisture and temperature fluctuations.
My Storage Method: Step-By-Step Instructions
Now let me share exactly what I do every time I receive or harvest Nepenthes seeds. This method has worked across multiple species, including Nepenthes ventricosa, Nepenthes sanguinea, and even the finicky Nepenthes lowii.
Step One: Check the Seed Condition Immediately
The first thing I do when I get new seeds is inspect them under a bright light. Healthy Nepenthes seeds are small, brown, and shaped like a tiny spindle or a grain of rice. They should be dry and crisp, not soft or sticky. If any seeds look moldy or damp, I remove them immediately to avoid contaminating the healthy seeds. This takes about five minutes and saves me a lot of headaches later.
Step Two: Dry the Seeds Slightly (But Not Too Much)
Nepenthes seeds should be slightly dry but not bone-dry. I spread them out on a clean, dry paper towel and leave them for two to three hours at room temperature. This removes any surface moisture without pulling out the internal moisture that the seeds need to survive. I used to skip this step and regretted it later. Seeds that are stored with any surface moisture at all will develop mold within a week.
Step Three: Prepare the Storage Container
I use two layers. The inner layer is a small paper envelope, the kind used for coin collecting or seed saving. I write the species name, the harvest date, and the source on the envelope with a pencil. Pencil is important because pen ink can smudge or react with moisture. The outer layer is a glass mason jar with a tight-fitting lid. I wash the jar and let it dry completely before use. Any residual water in the jar is bad news.
Step Four: Add the Desiccant Pack
I place one silica gel desiccant pack inside the mason jar, at the bottom. Then I place the paper envelope with the seeds on top of the desiccant. I do not let the seeds touch the desiccant directly because silica gel can absorb moisture aggressively and dry out the seeds too much if it is in direct contact. The paper envelope acts as a buffer.
Step Five: Seal and Label the Jar
I close the mason jar tightly and write the contents on the lid with a permanent marker. I include the species, the harvest date, and a note that says "fridge storage." This might seem overly cautious, but when you have multiple jars of seeds in the fridge, it is easy to mix them up. I have done it. It is not fun.
Step Six: Place in the Fridge, Not the Freezer
The ideal storage temperature for Nepenthes seeds is between 40°F and 50°F (4°C to 10°C). This is right in the range of a standard refrigerator. I place the jar in the main compartment of my fridge, away from the back wall where it might get too cold. I do not put it in the freezer. Freezing kills Nepenthes seeds because the ice crystals puncture the cell walls. Once that happens, the seed is dead no matter what you do.
Step Seven: Check Weekly for the First Two Weeks
Here is the part that many people skip. I check my seed jars once a week for the first two weeks after storage. I look for condensation on the jar walls. If I see any, I take the seeds out, dry them again for an hour, and replace the desiccant pack with a fresh one. I keep track of my observations in a small notebook, which helps me notice patterns. After the first two weeks, if no condensation appears, the seeds are stable and I check them once a month.
My Two-Week Observation Log
Let me show you what I actually saw during a recent storage cycle with Nepenthes ventricosa seeds.
Day One
I received the seeds in a small plastic bag from a fellow grower. They looked healthy and dry. I inspected them, removed two seeds that looked slightly discolored, and spread the rest on a paper towel. After three hours, I placed them in a paper envelope. I put the envelope in a mason jar with a fresh desiccant pack and placed the jar in the fridge. The fridge temperature was 43°F (6°C).
Day Three
I checked the jar. No condensation inside. The desiccant pack still felt dry and crumbly. The seeds looked exactly the same as day one. No change. Good sign.
Day Five
I opened the jar briefly to sniff inside. No musty smell. Musty smells are an early warning sign of mold. The envelope was still crisp, not limp or damp. I closed the jar immediately.
Day Seven
First weekly check. I noticed a tiny bit of moisture on the inside of the jar lid. Not condensation on the walls, just a faint fog on the metal lid. I opened the jar, dried the seeds for one hour on a paper towel, and replaced the desiccant pack. The old desiccant pack felt slightly soft, which meant it had absorbed moisture. I wrote this in my notebook.
Day Ten
The jar looked clean. No fog on the lid, no condensation anywhere. The new desiccant pack was still dry. I was reassured but still cautious.
Day Fourteen
Second weekly check. Everything looked perfect. The seeds were still dry, the envelope was crisp, and the desiccant pack was dry. I decided to sow a small sample of seeds, about 20 seeds, to test germination. I used standard Nepenthes sowing method on live sphagnum moss. After three weeks, 16 of those 20 seeds sprouted. An 80% germination rate. That is about the same as fresh seeds for this species. My storage method was working.
How To Sowing These Seeds for Spring
When spring arrives, usually around March or April depending on your US hardiness zone, you need to transition the seeds carefully. Do not take the jar directly from the fridge and open it in a warm room. Let it sit at room temperature for two hours first. This prevents condensation from forming on the cold seeds when they hit warm air. I learned this the hard way. I once opened a cold jar into a warm kitchen and watched the seeds get coated in water droplets within seconds.
After the jar warms up, take the seeds out and sow them on the surface of a suitable substrate. I prefer live sphagnum moss or a mix of sphagnum and perlite. Do not bury the seeds. Nepenthes seeds need light to germinate. Press them gently onto the surface and keep the substrate consistently moist. Use distilled water or rainwater, never tap water, because the mineral buildup damages the delicate seedlings.
Put the pot in a warm, bright spot with indirect light. A windowsill facing east or north works well. Keep the humidity high by covering the pot with a clear plastic dome or a zip-lock bag. Germination typically takes between three to six weeks. Patience is key.
The Science Behind the 40-50°F Rule
The Royal Horticultural Society (RHS) suggests that most tropical and subtropical seeds benefit from cool, dry storage, and Nepenthes fits this pattern because their native highland habitats experience cool nights year-round. I trust their guidance on this topic because they have been studying seed biology for decades. You can check their recommendations for seed saving here: RHS. Some growers also refer to the American Horticultural Society (AHS) guidelines for seed storage, which emphasize controlling both temperature and humidity simultaneously. That dual control is exactly what my mason jar method achieves. For more details, visit: AHS.
The 40–50°F range is not a random number. It is a sweet spot. At this temperature, the seeds' metabolic processes slow down but do not stop completely. They enter a near-dormant state. If the temperature drops too low, like below freezing, ice crystals form and rupture cell membranes, killing the embryo. If the temperature rises above 60°F, the seeds start burning through their embryo energy reserves, which reduces germination vigor. The cool range preserves viability without causing freeze damage.
Common Questions About Storing Nepenthes Seeds
Can I Store Nepenthes Seeds in the Freezer?
No, do not freeze Nepenthes seeds. Freezing temperatures cause ice crystals to form inside the seeds, which destroys the cellular structure. I tried this once with a batch of Nepenthes gracilis seeds. I thought I was being extra smart by extending their shelf life. When I sowed them, only one seed out of fifty germinated. The rest were dead. Keep them in the fridge, not the freezer.
How Long Do Nepenthes Seeds Remain Viable With Proper Storage?
With proper storage in a sealed container at 40–50°F with a desiccant pack, Nepenthes seeds can remain viable for up to two years. That said, the germination rate decreases over time. Fresh seeds can hit 80–90% germination. After six months of proper storage, you might see 70–80%. After a year, it drops to 50–60%. After two years, you are lucky to see 20–30%. Sowing them in the first spring after harvest is the best strategy.
What If I See Mold on My Stored Seeds?
If you see mold on the seeds, remove the moldy seeds immediately. Then dry the remaining seeds for a few hours and transfer them to a fresh container with a new desiccant pack. Do not try to wash the mold off with water, because that introduces more moisture. Just remove the affected seeds and reset the environment. I have salvaged batches this way, and while the germination rate drops, it is not zero.
Final Thoughts from a Grower Who Has Learned the Hard Way
I have lost more Nepenthes seeds than I care to count. Every loss taught me something, but I wish I had learned these lessons earlier. The biggest mistake I see beginners make is treating seeds like they are bulletproof. They are not. They are delicate little life forms that need a stable, dry, cool environment to survive until spring.
The storage method I shared works. I have used it successfully with multiple species across three years of growing. You do not need expensive equipment. A mason jar, a desiccant pack, a paper envelope, and a fridge are all you need. The key is consistency. Check your seeds weekly, adjust if you see condensation, and trust the process.
Spring sowing is a rewarding moment. You take those tiny, dormant seeds, place them on moist sphagnum, and within weeks you see tiny green dots emerging. That moment makes all the storage hassle worth it. So store your seeds correctly, be patient, and enjoy the journey. You will be glad you did when your tray is full of baby Nepenthes.





