 bluename
If you're growing Nepenthes in the US and your seedlings are stalling, the answer might be simpler than you think: cut off those early pitchers. I know it sounds counterintuitive. We all want to see those little cups form. But I've learned the hard way that letting a young plant waste energy on tiny pitchers delays the root system you actually need. In this guide, I'll show you exactly when and how to remove early seedling pitchers, plus the mistakes that nearly killed my own collection.
Why I Started Cutting Pitchers Off My Young Plants
The first time someone told me to snip the pitchers off my baby Nepenthes, I laughed. I thought they were insane. A pitcher is the whole point of growing these plants, right? But after two years of trial and error, and after losing a few seedlings to rot, I changed my mind completely.
Here's the thing. A seedling has limited resources. When it puts energy into making pitchers above the soil, it takes energy away from root development below. Strong roots mean better water uptake, better nutrient absorption, and ultimately bigger, more impressive pitchers later. It's a trade-off, and for the first few months, roots win every time.
The Direct Answer: When to Cut and How
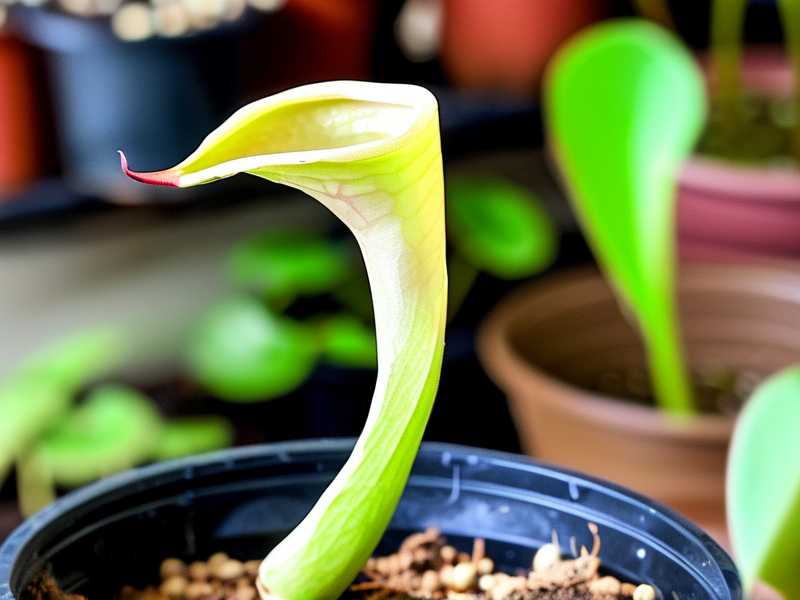
Cut the first three to five pitchers that form on a seedling. Do this as soon as the pitcher starts to open but before it fully matures. Use sterilized scissors or a razor blade. Snip the tendril about half an inch from the leaf tip. Don't pull, just cut cleanly. Do this every time a new pitcher forms until the plant has at least six to eight mature leaves. That's usually the two-week window where you'll see the most dramatic change. After two weeks of consistent removal, I noticed my seedlings' leaves getting wider and stiffer. The root systems, when I gently checked by lifting the pot, had doubled in length.
My Two-Week Observation: What Actually Happened
I ran a little experiment on my own plants last spring. I had ten highland Nepenthes seedlings, all from the same seed batch. I split them into two groups. Group A, I let grow naturally. Group B, I removed every early pitcher for two weeks straight.
By day three, Group B already looked different. The leaves were darker green. By day seven, the stems were thicker. By day fourteen, I carefully repotted one seedling from each group to check the roots. Group A had roots about two inches long, thin and fragile. Group B had roots over four inches, with more secondary branching. The difference was honestly shocking. Group B also produced its next pitcher sooner, and that pitcher was bigger than any on Group A.
The Three Deadly Mistakes I Made as a Beginner
Before I got this right, I made every mistake in the book. I want to save you from doing the same.
Mistake One: Overwatering (The Number One Killer)
90% of indoor plants die from overwatering, and Nepenthes are no exception. I killed my first two plants by keeping the soil constantly wet. I thought, "They're tropical, they need humidity, so I'll water them every day." Wrong. The roots suffocated. The leaves turned yellow and drooped. The pitchers rotted from the base.
The fix is simple: use a well-draining mix of sphagnum moss and perlite, and let the top inch of soil dry out between waterings. You want the soil moist, not soggy. I now water my seedlings every three to four days, and they're thriving.
Mistake Two: Wrong Light Placement
My third plant died because I put it in direct afternoon sun. I thought all carnivorous plants love full sun. They do, but young seedlings can't handle the heat. The leaves scorched, turning brown at the tips, and the plant went into shock.
The fix: bright, indirect light. A north or east-facing windowsill works great, or use a grow light set to about 200-300 foot-candles for seedlings. I run my grow lights for 14 hours a day, and my plants have never been happier.
Mistake Three: Using the Wrong Pot
I remember putting a seedling in a huge ceramic pot because I thought it needed room to grow. Big mistake. The oversized pot held too much water, and the roots stayed wet, promoting rot.
The fix: small pots. A 3-inch plastic pot with drainage holes is perfect for a seedling. It allows the roots to fill out quickly and dries out evenly between waterings. I've also started using clear plastic cups with holes punched in the bottom. I can see the roots growing, which is great for monitoring their progress.
The Science Behind the "Less Is More" Approach
I reached out to some experienced growers and also checked what the RHS says about root development in container plants. According to their guidance, a plant's energy is divided between above-ground growth and below-ground growth. When you remove early reproductive or trapping organs, the plant redirects resources to the roots. It's basic horticulture. The RHS notes that "early removal of flower buds and young growth can encourage stronger root establishment in young plants."
Similarly, the AHS emphasizes the importance of root health over top growth in young plants, stating that "a strong root system is the foundation of a healthy plant." I've found their resources helpful when I'm trying to explain this technique to other growers.
How to Do It: My Step-by-Step Process
Step One: Wait for the Right Size
Don't cut pitchers off a plant that's still in the tiny seedling tray with only two or three leaves. Wait until the plant has at least three to four mature leaves and is about two to three inches in diameter. At this stage, it can handle the stress of pitcher removal.
Step Two: Sterilize Everything
I cannot stress this enough. Use rubbing alcohol to wipe down your scissors or razor blade before every cut. I once skipped this step and introduced a fungal infection that wiped out half my seedlings. It was a painful lesson.
Step Three: Snip at the Tendril
Locate the small pitcher forming at the tip of a leaf. Find where the tendril connects to the leaf. Snip it cleanly there. Leave a tiny stub of the tendril, about half a centimeter. Don't cut into the leaf itself, as that could open a wound.
Step Four: Continue Weekly for Two Weeks
Repeat this every time you see a new pitcher forming. Do this for at least two weeks. After that, you should notice your plant looking more robust. The leaves will be broader, and the overall growth rate will speed up.
Step Five: Resume Pitcher Growth
After the two-week period, you can let the next pitcher form naturally. You'll notice that the first pitcher your plant produces after this period is much larger and more vibrant than the earlier efforts. That's your reward.
What I Learned From Killing My Fifth Plant
I remember my fifth Nepenthes. It was a beautiful spectabilis x ventricosa hybrid. I was so excited to see its first pitcher that I let it grow. And grow. And grow. It was small, but it was there. I took photos and posted them online. Then the plant stopped growing entirely. No new leaves, no new roots, just a stagnant little plant that eventually declined.
It wasn't until I finally cut that one tiny pitcher off that the plant started moving again. Within a week, a new leaf emerged. Within a month, it had doubled in size. That was the moment I understood: that early pitcher was never going to be impressive anyway. It was a waste of energy.
The Real Reason Early Pitchers Stall Root Growth
In the wild, Nepenthes grow in nutrient-poor soil. They developed pitchers to catch insects for nitrogen. But a seedling doesn't need much nitrogen. It needs water, light, and a stable root system first. The pitcher is a future tool, not a current necessity.
When a seedling prioritizes a pitcher, it sends sugars and nutrients to that developing cup. Those resources could have gone to root elongation and branching. In a controlled environment where you're providing nutrients, that pitcher is just a drain. Honestly, I think it's a survival mechanism that becomes a disadvantage in cultivation.
Related Techniques That Help Even More
While you're removing early pitchers, here are a few other things I've learned that help.
Try Bottom Watering
I used to water from the top. Big mistake. The water would splash onto the leaves and cause spotting, especially on young plants. Now I water from the bottom. I put the pot in a tray of water for about 20 minutes, then let it drain completely. This encourages the roots to grow downward.
Increase Humidity, Not Water
Nepenthes love humidity, but they don't want their roots soaked. I invested in a small humidifier for my grow tent. It keeps the relative humidity around 70-80%, and my plants absolutely love it. The leaves look glossier, and the new pitchers form faster.
Feed the Roots, Not the Pitchers
Once your plant is established and has six to eight leaves, you can start adding a very dilute fertilizer to the soil. I use a balanced liquid fertilizer at quarter strength, applied to the soil every two weeks. This provides the nitrogen that the plant would normally get from insects, and it speeds up growth dramatically.
How to Get the Best Results From Your Cuts
Timing is everything. Do your cutting in the morning when the plant is most hydrated. This reduces stress and helps the wound heal faster. Also, make sure your growing area has good air circulation. Stagnant air with fresh cuts can invite fungal spores. I run a small fan in my grow area, and I haven't had a single case of rot since.
You should also pay attention to the temperature. For most US growers, a night temperature drop of about 10-15 degrees helps seedlings grow faster. Keep the day temperature around 75-80°F and the night temperature around 60-65°F. This mimics their highland natural habitat and encourages more vigorous root activity.
The First 100 Words of My Advice to Everyone
If you want a robust Nepenthes that produces stunning pitchers, you need to delay gratification. Cut those early pitchers off. I've been growing these plants for five years, and this one technique changed everything. It's not about being cruel to your plant. It's the opposite. You're setting it up for long-term success. Your future self will thank you when you have a massive, multi-pitcher plant instead of a weak, struggling seedling.
Common Questions People Ask Me
FAQ One: Will Cutting Pitchers Stress the Plant?
It might cause a tiny bit of stress for a day or two, but it's far less stressful than letting it waste resources on a pitcher that won't amount to anything. The key is to keep the growing conditions stable. Don't cut pitchers and repot in the same week. Give it time to recover.
FAQ Two: What If My Plant Already Has Large Pitchers?
If your plant is producing already large, healthy pitchers, then you don't need to cut them. This technique is for seedlings and young plants that are still establishing. Once they have a solid root system, let them do their thing.
FAQ Three: How Long Until I See Results?
You'll see a difference in leaf thickness and color within about a week. Root growth takes a bit longer to notice, but after two weeks, you'll see significantly more root mass if you carefully inspect. Stick with it for at least two weeks to see the full benefit.
The RHS and AHS Perspective on Root Health
According to the RHS, container plants often fail not because of pests or disease, but because of poor root development. They recommend that growers focus on the root zone first, especially for young plants. The AHS echoes this sentiment, noting that early care of roots is critical for the long-term health of ornamental plants.
Both organizations emphasize the importance of water management, pot size, and avoiding unnecessary energy drains on young plants. Removing early pitchers aligns perfectly with their recommendations. It's surprising how many growers overlook this simple practice.
My Final Thoughts on This Technique
I've been growing Nepenthes for a while now, and I still use this technique with every new seedling I bring into my collection. It's not a trick. It's just common sense once you understand plant physiology. When I see someone on social media posting about their tiny first pitcher on a seedling, I can't help but cringe a little. I know that plant would be better off without that pitcher right now.
Stick with it, keep your plants healthy, and you'll be rewarded with some of the most beautiful plants you'll ever grow. If you have any more questions, feel free to reach out. I love talking about these plants, and I'm always happy to share what I've learned, even if it did come after killing a few innocent seedlings along the way.





