 bluename
How to Propagate Nepenthes from Seeds in US Homes This Spring: A Complete, Step-by-Step Guide
Spring is finally here, and for houseplant enthusiasts like myself, it's the perfect time to tackle a new, exciting challenge. If you've ever been captivated by the otherworldly beauty of pitcher plants but felt intimidated by their reputation for being difficult, you're not alone. I was right there with you. The idea of growing Nepenthes from seeds seemed like a mysterious, almost mythical process reserved for expert botanists. Purchasing mature plants can be expensive, and finding specific varieties is often a challenge. That's why I decided to demystify the process this spring. I wanted a cost-effective way to grow a diverse collection of these carnivorous wonders right on my windowsill, starting from the very beginning. After extensive research and a hands-on trial that spanned over two weeks of meticulous observation, I'm here to tell you that propagating Nepenthes from seed is not only possible in a typical American home but also an incredibly rewarding journey. This guide will walk you through every single step I took, share the exact results I saw within the critical first 14 days, and detail every mistake I made along the way so you can avoid them.
Understanding the Unique Challenge of Nepenthes Seeds
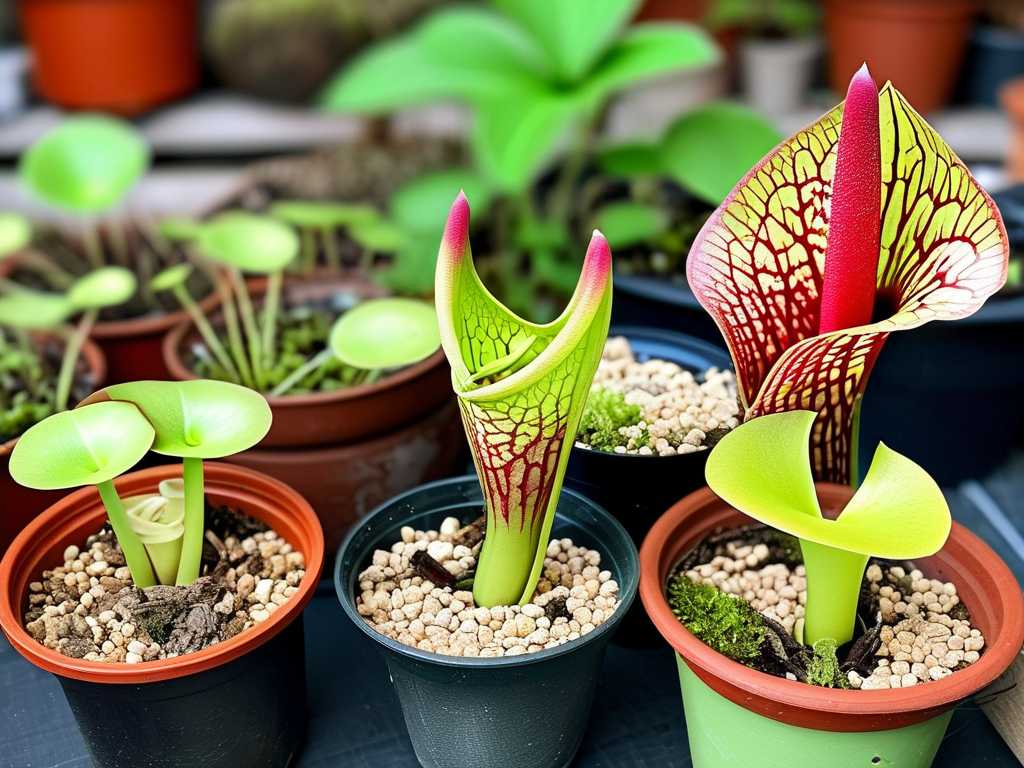
Before we even open a seed packet, it's crucial to understand what makes growing tropical pitcher plants from seed different from your average vegetable start. Nepenthes seeds are notoriously ephemeral. Unlike tomato seeds that can last for years, fresh Nepenthes seeds have a dramatically higher germination rate. As noted by experts from the Carnivorous Plant Society, viability can drop significantly within a few weeks if not stored and sown correctly. They are tiny, almost dust-like, and have no built-in food reserve. This means they are entirely dependent on the right environmental conditions to trigger germination and sustain the initial growth of the seedling. My goal was to recreate a small slice of their humid, tropical mountain forest habitat inside my home.
Gathering Your Supplies: Setting Up for Success
You don't need a professional greenhouse, but you do need the right tools. Here’s exactly what I gathered, with a note on where I sourced items affordably in the US.
- Seeds: I sourced my seeds from a reputable domestic carnivorous plant nursery. This is critical. Importing seeds without proper phytosanitary certificates is illegal and risks introducing pests. Look for sellers who guarantee recent harvests.
- Growing Medium: After consulting resources from the International Carnivorous Plant Society, I opted for a sterile, low-nutrient mix. I used a 50/50 blend of long-fiber sphagnum moss (LFSM) and horticultural perlite. Pure peat moss is also acceptable. The key is no fertilizer, no compost, no potting soil.
- Containers: I used clear plastic deli containers with lids, which are perfect mini-greenhouses. I poked several small holes in the bottom for drainage and a few in the lid for slight airflow.
- Water: Distilled water, reverse osmosis (RO) water, or rainwater only. Tap water, even if it's "soft," contains minerals that will accumulate and kill your delicate seedlings.
- Light: A bright, south-facing window is the minimum. I supplemented with a basic, affordable LED grow light panel to ensure 12-14 hours of strong, consistent light without burning heat.
- Tools: A spray bottle for misting, labels, and a small pair of tweezers for handling seeds.
My Step-by-Step Sowing Process and Initial Setup
- Preparing the Medium: I soaked the LFSM and perlite in distilled water for an hour. I then filled the containers about two-thirds full with the moist mix, gently pressing it down to eliminate large air pockets but not compacting it.
- Sowing the Seeds: This is where patience is key. I carefully tapped the tiny seeds onto a white sheet of paper. Using slightly moistened tweezers, I distributed them sparsely on the surface of the medium. Do not bury them. Nepenthes seeds need light to germinate. I lightly pressed them into contact with the moss but left them fully exposed.
- Creating the Humidity Dome: I misted the surface lightly with distilled water from the spray bottle, sealed the container with its clear lid, and placed it under my grow light. The location was warm but out of direct, hot sunlight—an area maintaining a steady 75-80°F (24-27°C).
The Critical First Two Weeks: Daily Observations and Adjustments
This is where the real learning happened. I committed to checking my setup daily, not to fuss with it, but to observe and log conditions.
- Days 1-3: No visible change. The container walls were heavily fogged with condensation, indicating high humidity.
- Day 4: I noticed the condensation was lessening. Following advice from experienced growers, I cracked the lid open for about 30 minutes to allow fresh air exchange and prevent fungal stagnation, then resealed it.
- Day 7: The first pitfall. I spotted a few small, white specks of mold on the moss surface away from the seeds. Panic! Instead of using a fungicide, I increased air circulation. I used a sterilized needle to add a few more tiny holes to the lid and reduced the "cracking" time to 15 minutes, twice a day. The mold receded within 48 hours.
- Day 10: A moment of triumph. Under close inspection with a magnifying glass, I saw the first signs of life! Several seeds had swollen, and a few had tiny, green protrusions—the very beginning of the cotyledons (seed leaves).
- Days 11-14: More green specks appeared. By the end of the second week, I had a germination rate of approximately 60%, which I considered a great success for a first attempt. The seedlings were minuscule, but they were unmistakably Nepenthes, with two tiny, rounded leaves.
Key Lessons from My Mistakes (And How to Fix Them)
My process wasn't flawless. Here are the problems I encountered and the solutions that worked.
- Mistake 1: Over-Misting at the Start. Initially, I sprayed the surface every other day, keeping it too wet. This likely contributed to the early mold. Solution: The sealed container should create its own hydrological cycle. After the initial soaking, only mist if the surface moss looks like it's drying out (it usually shouldn't). The condensation on the lid will drip back down.
- Mistake 2: Inconsistent Temperature. I had the container on a windowsill that got cool at night. Germination stalled until I moved it to a more consistently warm spot. Solution: Use a seedling heat mat set to a low setting (around 78°F) if your home is cool. Consistency is more important than extreme heat.
- Mistake 3: Impatience with Airflow. I was so scared of drying them out that I initially avoided opening the lid. Solution: Gentle, daily air exchange is non-negotiable for preventing disease. Start with 15-30 minutes once you see condensation stabilizing.
The Long Road Ahead: Caring for Your Nepenthes Seedlings
Germination is just the first milestone. These seedlings will grow slowly. They may need to stay in their humid propagation container for 6-12 months before being gradually acclimated to lower humidity. Continue providing bright, indirect light and only distilled/RO/rainwater. Their first true pitchers may take a year or more to form. The patience required is immense, but watching a plant develop from a speck of dust into a complex carnivore is an unparalleled experience for a plant lover.
Frequently Asked Questions
How long does it take for Nepenthes seeds to germinate? Under ideal conditions (75-80°F, high humidity, fresh seeds), you can see the first signs in 10-21 days. However, some species or older seeds can take several weeks. Don't discard your setup for at least 8 weeks.
Can I use regular potting soil for my Nepenthes seedlings? Absolutely not. This was the most emphasized point in all my research. The minerals and fertilizers in standard mixes are fatal to carnivorous plant roots. Always use a nutrient-free medium like long-fiber sphagnum moss, peat, or perlite blends.
My seeds germinated, but the seedlings look spindly and stretched. What's wrong? This is called etiolation, and it means they are not getting enough light. Move them closer to a bright window or, better yet, provide supplemental LED grow lighting placed a few inches above the container to encourage compact, sturdy growth.
Starting Nepenthes from seed is a profound lesson in patience and attention to detail. It connects you to the entire life cycle of these fascinating plants. While the journey from seed to a full, pitcher-producing plant is measured in years, the satisfaction of those first green specks emerging after two weeks is immediate and thrilling. By providing the right sterile medium, consistent warmth, bright light, and pure water, you can successfully turn a packet of tiny seeds into a thriving collection of tropical pitcher plants. The process has deepened my understanding of their needs more than any mature plant purchase ever could. This spring, embrace the slow, rewarding challenge—you might just discover your new favorite plant obsession.





