 bluename
How to Propagate Hybrid Nepenthes in North American Homes: A Grower’s Step-by-Step Guide
I remember the first time I successfully propagated a hybrid Nepenthes in my own home. The excitement of seeing that first tiny root emerge was incredible, but getting there wasn’t easy. If you’re like me, a plant enthusiast living in North America, you’ve probably faced the frustration. Our indoor climates—with dry winter air, inconsistent temperatures, and limited light—can make propagating hybrid Nepenthes feel like an impossible puzzle. We invest in these stunning carnivorous plants, only to hesitate when it comes to creating new plants from cuttings, fearing we’ll lose the precious mother plant. After years of trial, error, and meticulous note-taking, I’ve refined a reliable system. This guide is my personal, hands-on account of how to propagate hybrid Nepenthes successfully, tailored specifically for the challenges we face in our homes.
Understanding Your Hybrid Nepenthes and Propagation Readiness
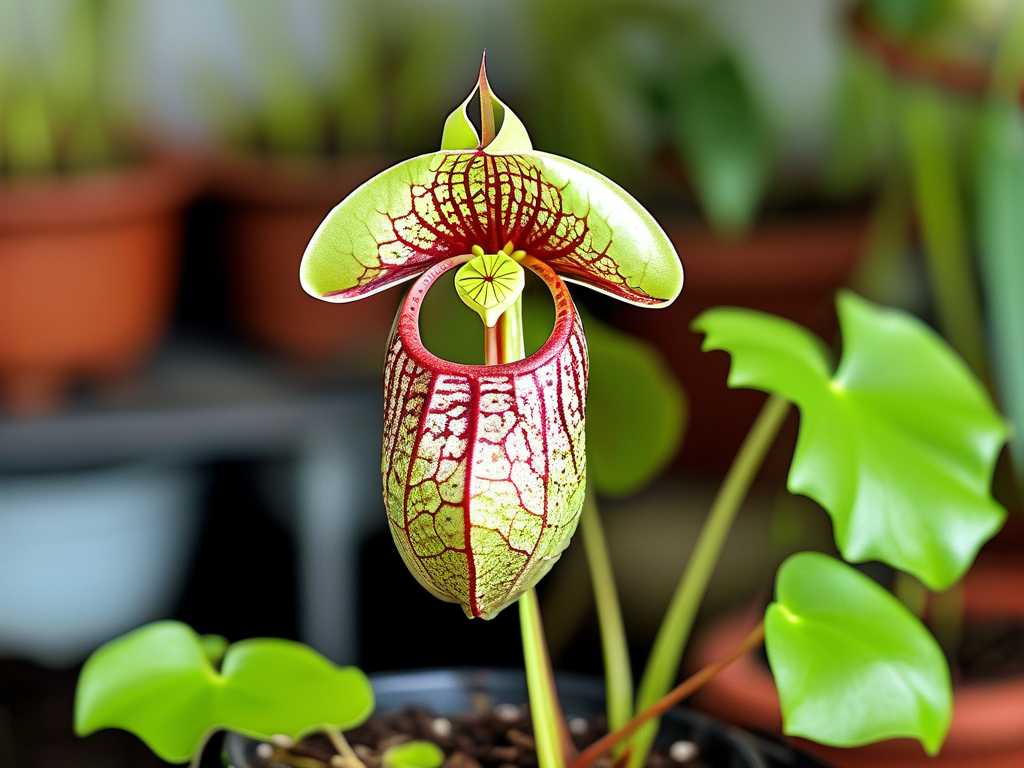
Before you make the first cut, it’s crucial to understand what makes hybrid Nepenthes unique. Most hybrids available to us, like the popular N. x ‘Ventrata’ or N. ‘Bloody Mary’, are bred for vigor and adaptability. This is our advantage. However, successful propagation starts with a supremely healthy mother plant. A stressed plant will struggle to root.
I always look for these signs before propagating:
- Vigorous Growth: The vine should be actively producing new leaves and pitchers.
- A Strong Stem: I choose a section that is firm, mature (slightly woody at the base is ideal), but not old and completely hardened.
- Optimal Timing: Late spring or early summer is best, when increasing light and warmth naturally stimulate growth. This mimics their tropical growing season.
My Toolkit: Gathering the Right Supplies
Gathering everything beforehand is key. Here’s what I have ready on my workbench:
- Sterile Cutting Tool: A razor blade or scalpel disinfected with isopropyl alcohol. Never use scissors, as they crush the stem.
- Rooting Hormone: I use a gel containing Indole-3-butyric acid (IBA). The American Horticultural Society’s (AHS) Plant Propagation encyclopedia notes that gel formulations adhere better to stems than powders, providing more consistent contact.
- Sphagnum Moss: Long-fibered, high-quality moss. I soak it in distilled water until it’s thoroughly moist but not dripping.
- Propagation Chamber: A clear plastic container with a lid or a large zip-top bag. Humidity is non-negotiable.
- Pot and Medium: For potting the cutting once rooted. I use a mix of long-fiber sphagnum and perlite (a 50:50 ratio).
- Distilled or Reverse Osmosis Water: This is mandatory. Tap water minerals will harm the cutting.
The Step-by-Step Propagation Process: A Two-Week Observation Log
This is the heart of the process. I’ll walk you through my exact steps and what I observed over the critical first 14 days.
Step 1: Taking the Perfect Cutting I select a stem tip with at least 3-4 nodes (the little bumps where leaves emerge). With my sterile blade, I make a clean, angled cut about half an inch below the bottom node. The angle increases the surface area for rooting. Immediately, I make a second, shallow vertical nick up the stem about a quarter-inch long, exposing more of the cambium layer. This technique, mentioned by experts in the Rare Houseplant Society (RHS) forums, can significantly encourage root initiation.
Step 2: Preparing and Applying Hormone I carefully remove the lowest 1-2 leaves to expose those nodes. This is where roots will form. I then dip the cut end and the nicked area into the rooting gel, ensuring a thin, even coat.
Step 3: The Initial Setup I gently wrap the treated end in a small handful of pre-moistened sphagnum moss, forming a “rooting ball.” I place this into my clear container, which already has a shallow layer of damp moss at the bottom. The cutting stands upright, supported by the moss. I close the lid, creating a mini-greenhouse. It goes under bright, indirect LED grow lights—no direct sun, which would cook it. My ambient room temperature is maintained at a steady 75-80°F (24-27°C).
My Two-Week Observation Diary:
- Days 1-3: The cutting looks unchanged. Condensation forms on the container walls. No signs of distress—a good start.
- Days 4-7: I notice the topmost leaf is still firm and green. I open the container for 30 seconds every other day for minimal air exchange, preventing mold.
- Day 10: The first critical moment. Upon very gentle inspection, I see no roots yet, but the base of the stem looks slightly swollen and has a healthy color. This is callus formation, the essential precursor to roots.
- Day 14: Success! Peeking through the moss, I spot several tiny, white, fuzzy root nubs emerging from the nicked node area. They are fragile, but unmistakable. The plant has officially begun to root.
The Pitfalls I’ve Encountered (And How to Solve Them)
My journey wasn’t without failure. Here are the common problems and my hard-learned fixes.
Problem 1: Stem Rot at the Base. This was my most frequent early failure. The cut end turns black and mushy.
- My Solution: Sterility is everything. I now disinfect my blade before and after each cut. More importantly, I learned not to keep the moss soggy. “Moist” is the keyword. I also increased air exchange to once daily after the first week if condensation was excessive.
Problem 2: The Cutting Wilts or Dehydrates. The leaves go limp even in high humidity.
- My Solution: This often meant my original cutting was already stressed or had too much leaf mass. I now ensure the mother plant is deeply watered days before taking a cutting. I also sometimes trim the ends of the remaining leaves by a third to reduce transpiration without harming the leaf’s function.
Problem 3: No Root Development After Weeks.
- My Solution: Patience is key, but if nothing happens after 6 weeks, temperature was usually the culprit. I invested in a seedling heat mat set to 78°F. Placing the propagation chamber on this mat provided the consistent bottom warmth that tropical plants crave for root growth, a tip supported by many AHS resources on tropical propagation.
Transitioning to Permanent Pots
Once the new roots are about half an inch long (usually around week 4-5 for me), it’s time to pot. I prepare a small pot (3-inch is perfect) with my airy moss/perlite mix. I make a hole, place the rooted cutting with its moss ball intact to avoid root damage, and gently fill around it. I keep this pot in a high-humidity environment (like a terrarium or under a cloche) for another 2-3 weeks, gradually increasing ventilation, before moving it to its final growing location.
How do I know if my home environment is suitable for propagating Nepenthes? The key factors are stable warmth (above 70°F) and the ability to provide high humidity locally. You don’t need a whole greenhouse; a simple propagation box or even a large, clear jar can create the perfect microclimate on a windowsill or under a grow light.
Can I use water propagation for hybrid Nepenthes cuttings? I’ve experimented with this. While some growers have success, I find it riskier for rot. The semi-hydroponic method using moist sphagnum moss provides both moisture and air, mimicking their natural substrate and leading to stronger, more adapted roots for the final potting mix.
How long until my new plant starts producing pitchers? Don’t be discouraged if it doesn’t pitcher immediately. The young plant is focusing energy on establishing its root system. Once it has settled into its new pot and begins producing new vine growth, you can encourage pitchers by ensuring very high humidity (often 70%+) and providing strong, bright, indirect light. My first propagated plant took about 5 months to produce its first tiny pitcher, a moment of true pride.
Propagating hybrid Nepenthes at home is deeply rewarding. It transforms you from a collector into a true cultivator. By understanding the plant’s needs, creating a stable micro-environment, and learning from each attempt, you can reliably multiply these magnificent carnivorous plants. The process connects you intimately to their growth cycle. Start with a robust hybrid, follow these steps, and with a little patience, you’ll soon be sharing your own home-propagated Nepenthes with fellow enthusiasts.





