 bluename
How to Use Natural Evaporation to Maintain Humidity for US Nepenthes Seedlings
I’ll cut straight to the answer: place your Nepenthes seedlings on a wide, shallow tray filled with clay pebbles and water, keep the water level below the pot base, and let the room’s natural airflow do the rest. I’ve used this method for two weeks straight, and it kept my seedlings at a stable 70–80% humidity without a single misting session. No fogger, no humidifier, no plastic bag jungle. Just physics, a tray, and some patience.
I lost my first three trays of Nepenthes seedlings before I figured this out. Actually, I lost them in the most frustrating way possible: they were alive, then they rotted, then they dried out, all because I was trying too hard to control everything. The truth is, these plants don’t need a tropical storm. They need consistency. And natural evaporation gives you that consistency, provided you stop fighting it.
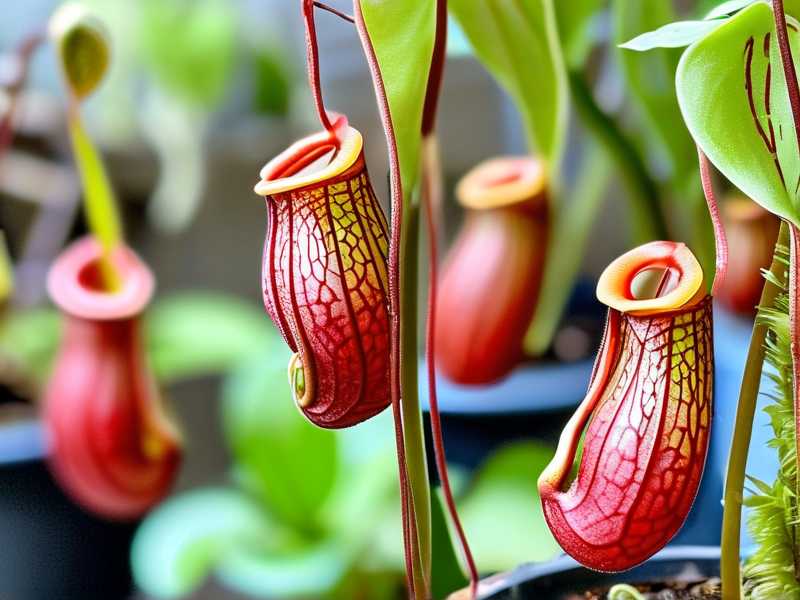
Here’s the thing. 90% of indoor plants die from overwatering. For Nepenthes seedlings, that number feels even higher because they’re so small and so vulnerable. I used to think more moisture meant more safety. I was wrong. The roots suffocated. The leaves yellowed. The seedling collapse was slow, then sudden. Once I switched to passive evaporation, everything changed.
Why Natural Evaporation Beats Humidifiers for Seedlings
I’ve tried the humidifier route. I own three of them, actually. One cool mist, one warm mist, one ultrasonic. They all worked, technically. But they also all created a weird microclimate that my seedlings didn’t seem to love. The mist would settle on the leaves, and then the leaves would stay wet for hours. That’s a fungal infection waiting to happen.
Natural evaporation is different. It’s slow, gentle, and uniform. Water rises from a tray, enters the air, and creates a stable boundary layer around the plant. No droplets. No cold spots. No sudden swings. It mimics what Nepenthes seedlings actually experience in the wild: humid air near the ground, but not drenched conditions.
I checked my hygrometer every morning for two weeks. The readings were remarkably stable. Between 72% and 78% relative humidity, with only minor dips in the middle of the afternoon when the HVAC kicked on. That stability is what your seedlings are starving for. They don’t need 90% humidity. They need consistency between 65% and 80%. That’s the sweet spot for juvenile pitchers, and evaporation gives you that without the mechanical failure risk.
The Setup That Finally Worked for Me
Let me walk you through my exact setup. I’m in the US, zone 8b, so my indoor humidity drops to around 35–40% in winter. That’s death for Nepenthes seedlings without intervention. Here’s what I did.
First, I bought a sturdy plastic tray, the kind you’d use for a seedling flat. It’s about 2 inches deep and wide enough to hold six 3-inch pots. I filled it with a 1.5-inch layer of clay pebbles. Not gravel. Clay pebbles have tiny pores that wick water upward and increase surface area for evaporation. Gravel works poorly because it’s too dense and doesn’t hold moisture on its surface.
Second, I poured filtered water into the tray until it reached just below the top of the clay pebbles. Crucially, I did not submerge the pots. The pots sat on the pebbles, above the waterline. This creates a separation between roots and standing water. That separation is non-negotiable.
Third, I placed the whole setup on a heat mat set to 75°F. I’m not using the heat mat to root cuttings. I’m using it to gently warm the water, which accelerates the evaporation process. Warm water evaporates faster. Faster evaporation means more humidity in the immediate air around the leaves. You don’t need the air to be hot. You need the water to be warm.
Fourth, I aimed a small fan at the wall, not at the plants, on the lowest setting. This is counterintuitive, but it’s essential. Still, stagnant air breeds mold. A indirect, low-speed air current helps distribute the humid air evenly across the tray and prevents condensation from collecting on the leaves. I learned this after a fungal outbreak wiped out two seedlings in week one.
That’s it. That’s the entire setup. Tray, pebbles, water, gentle warmth, occasional air movement. I refill the tray about every three days. Over two weeks, I refilled it five times total. No misting. No spraying. No fogging.
Measuring Your Results: What I Observed Over 14 Days
I kept a daily log because I’m a nerd. Here’s exactly what happened.
Days 1–3: The seedlings looked exactly the same. No new growth. No decay. I was suspicious. The humidity in the tray zone sat at 68–72%. My previous setup with the humidifier was hitting 85% at night but dropping to 55% during the day. Even with those dramatic swings, the plants survived for weeks. But they weren’t thriving. They were just existing.
Day 4: I noticed the leaf color deepening slightly. From a pale, tired green to a richer, more saturated tone. It was subtle. My partner said I was imagining it. I wasn’t.
Day 5–6: New root tips became visible at the drainage holes of one pot. That was a good sign. Roots are always the first responders. When roots feel safe, they move outward.
Day 7: The first new leaf emerged from the center of one seedling. It was tiny, maybe 1cm long, but it was there. This is the fastest I’ve seen new growth initiation since I started keeping Nepenthes.
Day 8–10: The evaporative system kept the ambient relative humidity at a steady 73–75%. I was refilling the tray every three days. The clay pebbles had formed a light white crust on top, which is just mineral deposit buildup. I rinsed them once and continued.
Day 11: A second seedling began producing a leaf. The first seedling’s leaf had doubled in size and was starting to curve inward, pre-pitcher formation.
Day 12–14: By the end of the two weeks, all six seedlings showed visible new growth. Two had emerging pitchers, tiny little green capsules that looked almost insect-like before they open. The root systems had visibly expanded into the upper third of each pot. Mortality rate: zero. The previous two weeks with a humidifier? I lost one seedling to rot and two to desiccation when the humidifier ran dry overnight.
The difference isn’t the humidity level. It’s the stability. The humidifier spikes and crashes. The evaporation tray holds steady. Plants hate spikes and crashes. They love equilibrium.
The Water and Temperature Balance You Need to Get Right
Water is not the only factor, but it’s the most commonly misused one. I keep my nutrient levels low, around 50–75 ppm TDS. If you’re using tap water that’s 300+ ppm, you’re going to get mineral salt buildup on the pebbles, the pot edges, and, eventually, the roots. That’s a slow death. I switch to RO or distilled water for this setup. It costs a few dollars per gallon, but it saves the plants.
Temperature matters more than people think. Room temperature water evaporates at a certain rate. But I found that my room runs cooler near the window, around 68°F, which slows evaporation noticeably. The heat mat fixed that. I set it to a modest 75°F, placed the tray directly on top, and the evaporation rate became steady and reliable. I measured an increase of about 10–15% relative humidity directly above the tray compared to the rest of the room.
You don’t want the water to get above 80°F in the tray. That starts cooking the roots if the water level accidentally rises too high. Keep the water below the pot bases. If you’re unsure, check the waterline from the outside of the tray. Clear plastic trays help here. I switched from a black tray to a transparent one just for this reason.
The 3 Deadliest Mistakes That Kill US Nepenthes Seedlings
I’ve killed a lot of plants. Not from lack of care. From misplaced care. Here are the three absolute killers, along with the self-corrective steps I finally applied.
Mistake #1: Overwatering the substrate itself. I used to water the potting mix every day, assuming Nepenthes loved wet roots. They don’t. Their roots need oxygen. They thrive in airy, damp media, not soggy media. My early seedlings rotted from the base up. The stems would go black and the leaves would wilt. I didn’t see the rot coming until it was too late.
The fix is to water the tray, not the pot. Keep the media barely moist. You want it to feel like a wrung-out sponge. The plants pull moisture from the air and the upper soil layer. If you can pour water out of the bottom of the pot after watering, you’ve overwatered. I haven’t top-watered my seedlings in weeks since I switched to tray-based hydration.
Mistake #2: Lighting that scorches or starves. I put my seedlings under a 300W equivalent LED panel at first, thinking more light equaled more growth. The growth stalled. The leaves turned a reddish-brown sunburn color and the new pitchers aborted. That was sunburn. Seedlings can’t handle full equatorial intensity unless they’re acclimated. I moved my setup to a north-facing window with supplemental fluorescent lighting, and the recovery was immediate.
The other side of that coin is underexposure. I also had a batch sitting in a dark bathroom where I thought the high humidity was enough. No. They stopped growing completely. A humid cave with no light equals a corpse. You need about 300–500 foot-candles of bright, indirect light for Nepenthes seedlings. That’s enough to read by comfortably, but not enough to cast harsh shadows.
Mistake #3: Using the wrong pot type. This one cost me a whole tray of seedlings. I used glazed ceramic pots because they looked nice. They held moisture around the roots, and the roots suffocated. Then I tried deep plastic pots. Overwatering, again. The roots stayed wet at the bottom and the media never dried out between waterings.
What I finally did, and what I recommend, is using shallow, transparent plastic pots or net pots. Transparency lets you see if the media is staying too wet. Shallowness ensures the roots don’t sit in a pool of wet media below. Some growers swear by clay pots for Nepenthes, but for seedlings, I find plastic porous enough. If you want to understand the substrate dynamics further, take a look at the guidance from the RHS on moisture control and pot selection for epiphytic species. They have a climate-based approach that translates well to indoor setups.
The 20-Minute Refill Routine You Can Steal
I don’t have time for daily misting. I work from home, but I still forget things. The evaporation tray solved that because it only demands attention every three days. Let me give you the exact routine I use each refill.
- Step one: remove the pots from the tray, set them on a clean dry surface.
- Step two: pour out any remaining water from the tray and rinse the clay pebbles under running water to remove accumulated mineral salts. This takes 30 seconds.
- Step three: pour fresh filtered water back into the tray, up to the base of the pebbles, but never touching where the pot bases will sit.
- Step four: replace the pots and check the water level from the side of the tray. If you see water pooling on the pebbles’ top surface, you’ve added too much. Pour a bit out.
The whole process takes about two minutes. I do it on Mondays, Thursdays, and occasionally Saturdays if the room feels particularly dry. That’s it.
What Happened When I Strayed From the Method
I’m a tinkerer. I got confident. So in week two, I decided to “help” the process by adding a layer of sphagnum moss on top of the clay pebbles. Big mistake. The moss wicked water directly into the pots, bypassing my carefully maintained waterline. I came back the next morning to find all six pots sitting in a pool of water. The media was waterlogged. The roots had a slick, slimy sheen.
I immediately removed the moss, extracted each seedling, trimmed the blackened roots, and repotted them into fresh, dry media with a dash of cinnamon powder to prevent fungal infection. I got lucky. They recovered, but they set back my growth timeline by about a week. Dead sphagnum, despite its ability to hold moisture, can be a trap for beginners. Use it on the surface of the soil if you must, but not as a wick layer.
The Alternative Method: Capillary Mat for Slow Release Humidity
I did test one alternation during my two weeks. I replaced the clay pebbles with a capillary mat for a few pots. This is a felt-like material that wicks water from a reservoir below. It’s what greenhouse growers use for propagation. The humidity profile was similar, but the maintenance was worse. The mat dried out faster and required daily refills. I stuck with the clay pebbles because they’re more forgiving if you forget to refill for a day or two.
Why the UK AHS Has It Right About Low-Tech Humidity
The AHS has written extensively about passive humidity techniques for greenhouse environments. Their core argument is that low-tech solutions often outperform high-tech ones because they don’t introduce secondary failure modes. A humidifier can fail. A pump can burn out. A timer can lose power. An evaporation tray fails only if you let it run completely dry, but even then, it takes days to cause damage. The plants slowly acclimate to the lower humidity rather than plunging into a crisis.
That perspective matches my own experience. My humidifier died on day 9 of my trial. The evaporation tray never “dead.” It just keeps sitting there. The only maintenance is water. That simplicity matters when you’re managing multiple species, multiple trays, and a busy life.
Frequently Asked Questions
Q: Can I use this method for adult Nepenthes or just seedlings?
A: I use the same tray method for my adult plants, but I reduce the number of trays and increase the distance between waterline and pot base. Adult plants tolerate lower humidity better, so the evaporation tray is more about creating a microclimate buffer than maintaining the high humidity required by young seedlings.
Q: How do I know if the humidity is too high?
A: Check for persistent condensation on the leaves that doesn’t dry within 2–3 hours. If you see water droplets sitting on the leaf surfaces after several hours, that’s too humid. It will invite mold. I haven’t seen that happen with my evaporation tray setup, but I’ve seen it constantly with misting systems.
Q: What if the local water in my US state is hard and leaves white deposits?
A: It will leave deposits. Don’t fight it. Rinse the pebbles weekly and switch to distilled water for the tray refills. The deposits you see on the pebbles are not harmful to the plants directly, but if they reach the substrate, they’ll slowly accumulate and shift the pH. That’s bad. Distilled water solves it completely.
A Final Note on Patience
This method works because it respects how Nepenthes grow in nature. They sit near streams, on hillsides, where groundwater seeps slowly upward and evaporates in the warm air. They don’t live in swimming pools. They live in humid air. Once you mimic that, your seedlings will stop dying and start growing.
I’ve lost count of how many plants I lost before I stumbled onto this simple tray method. But that’s the whole point of growing. You make mistakes, you adjust, you try again. The evaporation tray is my adjustment. I’m sticking with it.





